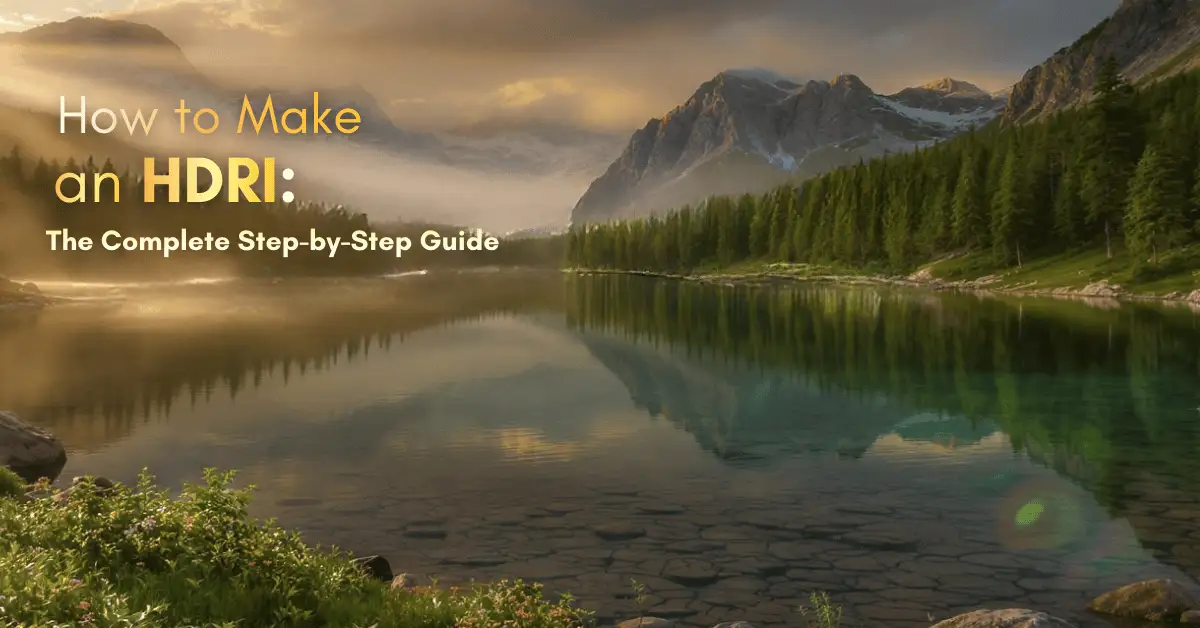
How to Make an HDRI: The Complete Step-by-Step Guide to Creating Stunning HDRI Maps and Environments
Imagine walking into a 3D scene where the lighting feels alive—soft sunlight filtering through leaves, sharp reflections on polished metal, and realistic shadows that make your render pop off the screen. The magic lies in a good HDRI. If you’re starting or you’re an experienced 3D artist, knowing how to make an HDRI means you call the shots. No more searching the ‘net for something generic to download.
In this ultimate guide, you’ll find every way to create HDRI – from shooting real-world environments with a camera to creating them completely in Blender or Photoshop. You will find information on how to create HDRI maps that generate the best lighting and reflections in Blender. You will also find tips for quickly editing HDRI images in Photoshop using a workflow that has been proven successful by many professionals. You will also discover how to use HDRI in Blender like the pros before you finish creating HDRI images (by creating an image of the same quality as commercial libraries).
What Is an HDRI? Getting Basic with Lighting for Creating HDRI
HDRI stands for High Dynamic Range Image. Unlike a “regular” photo (low dynamic range or LDR), HDRI captures a vast range of brightness levels in a single file – usually 32-bit floating point data.
For example, using your phone’s camera in the sky may get too bright for the top of your photo, while the ground may be too dark. When using Raws, you will combine multiple exposures, which will give you all information from each aperture, or the information from the blown out parts of your photo.
Using this as an environment map in a 3D program, it will provide the right colour, brightness and reflections to your environment (whether real or imagined).
HDRI files are usually stored as equirectangular values—think a 2:1 aspect ratio panorama that wraps your 3D world like a globe. They can be found in .exr (which is the gold standard for 32-bit precision), .hdr, .tif and sometimes in other formats. The dynamic range can be beyond 20 stops of exposure range – way beyond what JPEGs and PNGs offer.
Why is this relevant to us, 3D artists? HDRI environment lighting, particularly in environments, is by far the quickest way to achieve photorealism. One HDRI map replaces dozens of lights, gives instant reflections, and gets the right mood across the room.
Product visualizers preview materials accurately. Architects render interiors true to real sky conditions. Game artists bake them down for light in engines like Unreal or Unity.
The revolution started around 2005 with the addition of Merge to HDR Pro in Photoshop. A few short years later, HDRI images are powering everything from Hollywood VFX shots to indie Blender animations.
Once you learn how to create HDRI for yourself, your entire perception of lighting will be changed.
Why Create Your Own HDRI Instead of Using Free Downloads?
Free HDRI libraries are a great place to start, but they aren’t perfect. The location might not be at the time of day or the weather, or different enough stylistically to fit what you need. The reflections may even include other us-worthy objects, like buildings, cars, etc. And if you’re doing client work, using unique HDRI maps is a great way to make your renders stand out.
Making your own gives you:
• Perfect customization – Capture whatever environment your scene needs (a specific backyard at golden hour, an industrial warehouse at dusk, etc.).
• More control over quality – Shoot bracketed exposures for your specific camera, process for zero clipping, and optimize resolution for your render engine.
• Cost efficiency: Apart from the price of the gear you own, every new HDRI you need is free.
• Creative freedom – Use real photos intermixed with procedural elements, or produce HDRI images in utterly fictitious environments in Blender.
• Legal peace of mind – You can never break the licensing terms of a commercial library with your own captures.
Artists who can create HDRI get faster workflows and consistently better results from project to project. Let’s look at the tools you’ll need to get started.
Essential Tools You’ll Need for Creating HDRI
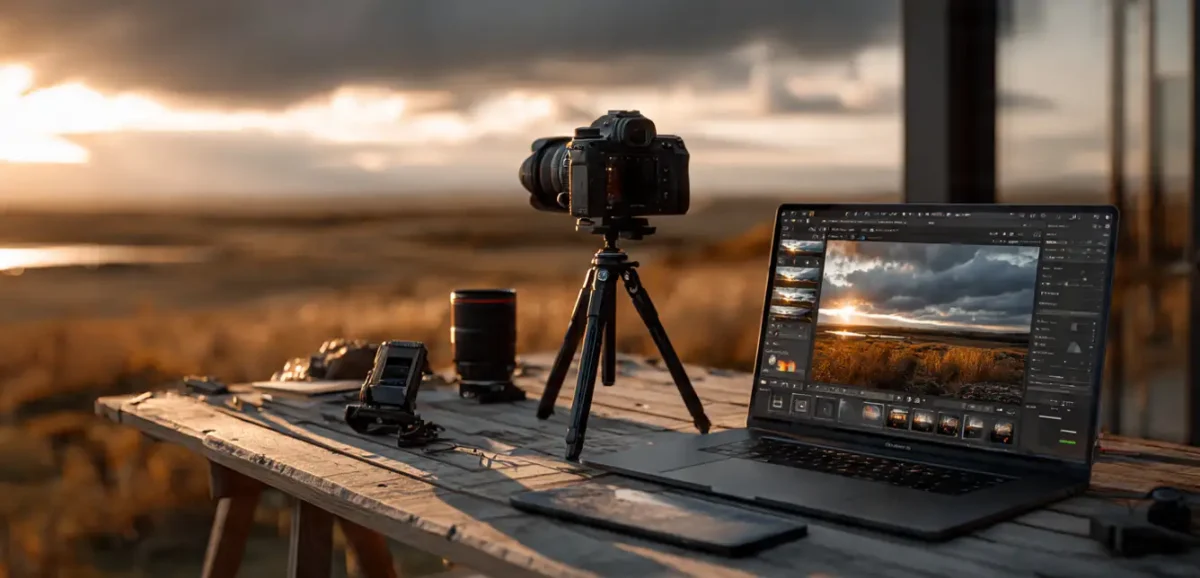
You really don’t need an expensive studio to start.
The lowest cost option is using any DSLR or mirrorless camera that allows for raw capture with bracketing capabilities, including any Canon, Nikon, or Sony camera, or even more advanced smartphones that have appropriate applications for this purpose.
The next level is to use Canon or Nikon models with Magic Lantern firmware (which may be available from the manufacturers) to allow for a full automated method of capturing (bracket) 7 exposures at +/- 2 EV.
If you are creating panoramas that require well-defined edges of the object you are photographing, then a full-frame camera will give you the highest quality images when shooting at high ISO values.
If you will instead be using wide-angle lenses, then you don’t need a full-frame body; crop sensors can provide amazing image quality using wide-angle lenses.
When shooting outdoors with sunlight directly hitting the camera sensor, use a version of an ND filter, such as Collected Style ND400, ND1000, or multiple filters stacked together, so that no pixels will “blow out” your highlights. Additionally, the following items are also required to create spherical panoramas:
• For proper alignment of your camera to the nodal point of your tripod with a panhead (Nodal Ninja), you will want to use a tripod with a panhead. The reason for this is that it will allow you to keep your camera in the same position when you rotate it, which prevents you from getting parallax error in your image.
• You’ll also want to have some method of causing the camera to take pictures without moving the camera while pressing the shutter button (using either a remote trigger or intervalometer).
• Accurate software programs for the processing of the raw photographs to convert them to “linear image format”, such as RawTherapee, Darktable or Adobe Lightroom Classic.
• For stitching and merging captured images, PTGui Pro is the best industry-standard software program in use by professionals; however, there are other free versions, such as Hugin, that should work fine for non-professional applications or the stitching tool in Photoshop.
• Editing: Photoshop, Affinity Photo, or GIMP with EXR plugins.
• Viewer: Blender or dedicated HDRI viewers for quick tests.
Barebones Setup (<$300): Used DSLR + fish eye + tripod + free software.
Pro Setup ($800+): Mirrorless body, motorized pano head, variable ND filters, PTGui.
For purely digital HDRI image creation, there’s no need for the camera, just Blender & Photoshop. Either way, make sure you’re exporting 32bit and using equirectangular projection so they’re actually compatible with HDRI environment.
Method 1: How to Create HDRI from Real Photos – The Most Photorealistic Approach
A classic technique that will give you the most realistic results because it records true light. Expect to spend 1-2 hours per HDRI once you’re practiced.
Step 1: Choose Location and Prepare Scout via Google Street View for areas that have interesting light but few (or no) moving objects in them. Arrive once you’ve observed the desired conditions—golden hour for warm tones, or overcast for diffused light. Level the tripod as close to perfectly as you can using a bubble level. Set the nodal point of your panoramic head (search for the entrance pupil database for lens/camera combo) to eliminate parallax errors.
Step 2: Camera Settings and Shooting In order to maintain correct alignment between the camera and the Nodal Point, you will want to have the use of a tripod that accommodates a Pan Head, i.e., like a Nodal Ninja. Making certain the Camera will remain at the same precise position, as it rotates, to help eliminate parallax error.
All settings in the camera to be set to Manual (fully)
• ISO: at the lowest native ISO (typically ISO 100 or 200)
• Aperture: (ideal sharpness) will be f8 – f11 at the same exposure
• White Balance: Daylight or custom (5400K)
• Focus: manual/hyperfocal distance
• File Type: RAW (At least 14-bits+)
To properly cover the entire image area for a 10-15 mm lens on a Crop Sensor camera, 9 horizontal shots every 40 degrees of rotation for vertical tilts of +45 degrees / 0 degrees / -45 degrees, i.e. using each angle, multiply 9 x 3 (9 horizontal and 3 verticals) = 27 angles x 5-7 bracketed exposures = 135-189 total images.
Required for each nadir (ground) shot is lowering the camera approximately 30-50 cm and rotating the camera slightly. It is also recommended that any time the sun is in the shot, use ND filters and take the shot quickly (within 5 minutes) to avoid having the sun “move”.
Step 3: RAW Processing Import into Rawtherapee or Lightroom. Apply a neutral profile – no creative adjustments yet: correct chromatic aberration and lens distortion. Choose a white balance setting on one well-exposed image and sync to all. Export as 16-bit TIFF (linear if possible).
Step 4: Merging Exposures PTGui’s HDR merging means that we can create HDRI in a short amount of time. You can use either PTGui’s Merge to HDR Pro feature or Photoshop’s Merge to HDR function. For improved accuracy, you should link your bracketed images together within PTGui and set the merging to “true HDR.” Inspect the merged previews. Bright areas should reveal no noise, just detail. If all’s good, output one HDR file for each angle.
Step 5: Stitching into the HDRI Map Load all the merged images into PTGui—mask, tripod, flares and anything that moved (paint red to hide). Align automatically, then optimize the control points until the average error is below 3 pixels. Add vertical control lines.
Set output to “Leveling,” equirectangular, 100% optimum size, and 32bit EXR with PIZ compression. For the sun: shoot separate ND-filtered brackets, make a patch in PTGui, and composite in Photoshop with exposure adjustment layers (+8 to +10 stops) and careful masking.
Step 6: Nadir Cleanup and Final Polish The bottom (nadir) often shows the tripod. Use Photoshop’s Content-Aware Fill tool to replace it, clone stamp painting or the Flexify 2 plugin if required to blend things seamlessly. You may want to prevent a hole from appearing and add a subtle hint or trace of the ground, but make sure you don’t break any 32-bit data; otherwise, fold brings that back at a later stage.
To get maximum quality for your final HDRI environment map, you can export either a 16K or a full 32K resolution image for use in professional workflows and test whether the lighting feels right in Blender. Shoot more brackets than you think you need. If you do an indoor HDRI, shoot more brackets too (longer exposures) and get a remote.
This method gives the best HDRI images because real light data can’t be faked well.
Method 2: Creating HDRI in Blender – Procedural and Custom Environments for HDRI in Blender

Blender allows you to create HDRI completely free and easily. Great for fictional locations or if you can’t shoot things on location.
Step-by-Step Blender Workflow (For use with Blender 4+): Open a new scene and delete default objects. Add your environment (a ground + sky sphere (or use World nodes) + lights (sun lamp + area lights for windows) + props for reflections (buildings, trees or abstract shapes)).
For realistic skies, use a procedural sky texture or import a low-res base HDRI temporarily.
How to Add HDRI to Blender: Set Camera: Add a camera at the centre of your scene, where the “viewer” would stand. Render Settings (Cycles recommended):
• Render Engine: Cycles
• Device: GPU if available
• Output: OpenEXR, (32-bit float), Colour Depth: Float (Full)
• Resolution: 8192×4096 (or higher) with 2:1 aspect ratio.
• Samples 128-512 for clean results (may denoise in compositor post-render).
After rendering a panorama (F12) or an animation (just a single frame) from your camera’s 360-degree view with Blender, save this file as an EXR file and voila! Your HDRI map can now be used for other applications.
Advanced Tips for HDRI in Blender: Use baking for speed: Using a high-poly model to create an equirectangular image texture for lighting, rather than using HDRI lights, can speed up a workflow with lots of detail. Add emissive materials for things like neon signs or fire, anything that appears as a glowing reflection. Make it procedural: Drive colours/intensity using drivers or Geometry Nodes for infinite variations of the same HDRI.
HDRI for Blender environment maps intended for games: 4K – 8K render, and then compress slightly. Best for stylized/impossible scenes.
How to Use HDRI in Blender: In your World properties, add an Environment Texture node. Load in your .exr file.
Connect to your Background node > Strength 1.0.
Activate ‘Camera Ray’ visibility if you need it.
To rotate it and make it perfect, use a Mapping node.
Your scene now lights itself realistically. Put a simple sphere with a metallic material in it to preview reflections immediately.
Method 3: HDRI Photoshop Workflow – Quick Creation and Editing with HDRI in Photoshop
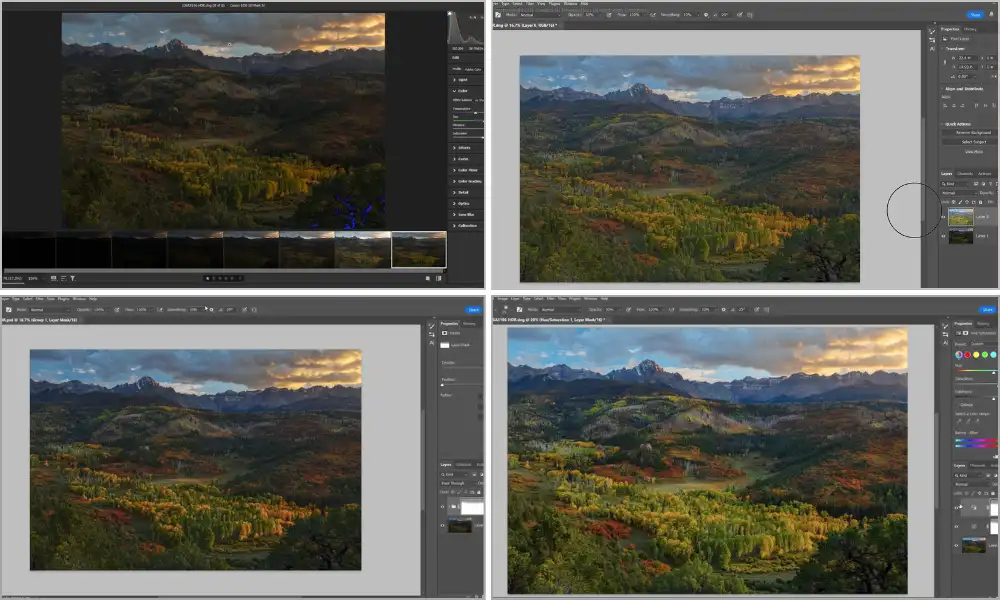
Creating an HDR from bracketed photos: File > Automate > Merge to HDR Pro. Select the bracketed images (if handheld, check Align). Choose a 32-bit result and set the tone curve preview (but leave it neutral) and click OK. For a panorama Use Photomerge first on the tonemapped versions, then convert back to 32-bit.
Editing HDRI Images in Photoshop: Open your .exr file (32bit is natively supported in Photoshop). Use layers: Adjustment Layers such as Exposure / Levels / Curves for most of your adjustments – all non-destructive. Clone out unwanted artifacts / heal unwanted blemishes in the 32bit mode.
For HDRI Photoshop colour correction, add your Hue/Saturation and check it with the Info panel to make sure your values fall in range. If you need to resize, stick with Preserve Details 2.0 if you’re increasing it to higher resolutions. Finally Export as…Save As > OpenEXR.
Photoshop’s Merge to HDR Pro is perfect for a quick HDRI from even just a few shots when you want to skip the full 360 stitching.
The Beautiful Union Of Photography And 3D – Many artists shoot brackets, merge them in HDRI Photoshop and finish the work in Blender.
Faster Alternatives for Creating HDRI – Chrome Ball, Single Image, Mobile HDRI
Sometimes speed is more important than quality!
Chrome Ball: Put a highly reflective sphere in your scene and shoot bracketed exposures from one position. Merge these into HDR and use specialized software to unwrap into equirectangular or use Photoshop’s 3D tools. Great for HDRI simply for lighting purposes (lower resolution on the edges).
From a Single Image: One could project a flat photo on a sphere in Blender and add procedural lighting to render the scene as panoramic HDRI. Use Vanishing Point in Photoshop and 3D extrusions to wrap things around you. The results tend to have a stylized look to them, but what you get is very quick.
360-degree Cameras: Ricoh Theta (or similar) bracketing apps will create rough HDRI in minutes. Stitch out with free tools, and enhance in Photoshop or similar!
Mobile Apps: Newer phones have some form of computational photography, and by combining these with open camera apps (for bracketing) and free pano stitchers, we can make basic HDRI on the go!
They sacrifice some quality for this and are great for quick concept work or if you’re up against some tight deadlines.
How to Use HDRI in Blender – Bringing Your Creation to Life
You’ve created the HDRI map, so now make it shine…! Open your scene. Come into World Properties, go into Color, go to Environment Texture, then load your .exr HDRI map. Add a Mapping node (Texture Coordinate followed by Mapping) to rotate if necessary. Connect it to the Background shader > the Strength slider, and away you go!
For reflections: Make sure your objects are set up properly (metallic/roughness, etc.)
Pro Tips for HDRI in Blender:
• Make many HDRI layers and use them with mix shaders to get interesting blending.
• Add a Sun lamp synced to your HDRI to get clearer shadows if needed.
• Animation: Keyframe your mapping rotation to get ‘time-lapse’ type effects.
Advanced Techniques for HDRI Maps and HDRI Environment
Sun patching: Separate the sun into its own layer for easy, adjustable use of intensity.
Noise Reduction / Upscale: Use AI and/or Blender’s compositor to remove noise and graininess.
Optimize: Use 8K for most of your renders and use 16K+ for assets that have reflections that are close to your camera. Procedural Mix: Use two HDRIs inside of Blender’s nodes to create hybrid environments.
Game-Ready: Texture HDRI to a lower resolution (use baked light) and create.
HDRI Creation Troubleshooting and Best Practices
Common Fixes: • Clipped Highlights: Use stronger ND-filter(s) next time or use more underexposed brackets.
• Seams in Stitching: Fix the inaccuracy of masking and control points; realign the nodal point.
• Nadir Problems: Extra ground shots + Content-Aware tools fix the majority.
• Color Shifts: Crucially, a consistent white balance throughout all shots is important.
• Blender Crashes on Large EXR: Drop your resolution temporarily or switch to tiled rendering.
• Noisy Shadows: Shoot more overexposed brackets. The RAW processing has to be spot on.
Best Practices for HDRI Quality Every Time: Shoot in RAW. Test your HDRI as soon as you shoot it in Blender. Keep a “reminder” notebook—Level tripod, make enough overlap, sun handled separately. NOTE your settings so you can reproduce them at a later date. Often, imperfect HDRI maps tend to look more real than perfect HDRI maps!
Free Resources to Start Creating HDRI Today
Blender manual (panoramic camera section) Free stitching software trials Public domain sky textures for procedural beginnings Online HDRI preview tools
Conclusion: Start Making HDRI Today!
You’ve just learnt how to make an HDRI with a bunch of real photos, some Blender knowledge, a dash of HDRI Photoshop wizardry, and a couple of quick hacks. So whether you need HDRI for Blender, a bit of HDRI in Photoshop editing, or even full HDRI environment maps, you’ve got everything you need to achieve professional results without limits!
Your first custom HDRI will change your renders forever. Put in the effort, dive in, and see your 3D worlds transform!
Frequently Asked Questions About How to Make an HDRI
How long does it take to create one HDRI?
Around half an hour for simple Blender versions, 2-3 hours for photo-based.
Do I need expensive software?
No – Blender and free software (Hugin, RawTherapee) do everything you need.
Can I use HDRI in other software?
Yes—Unity, Unreal Engine, Maya, and other 3D software support .exr files.
What’s the best resolution for HDRI maps?
8K-16K is probably ideal for most typical projects.
How do I fix banding in my HDRI?
Use 32-bit throughout and proper linear workflow in processing software.
Start small, choose a method to practice, and put them together for a unique style. The paths towards realistic 3D lighting are in your hands now!