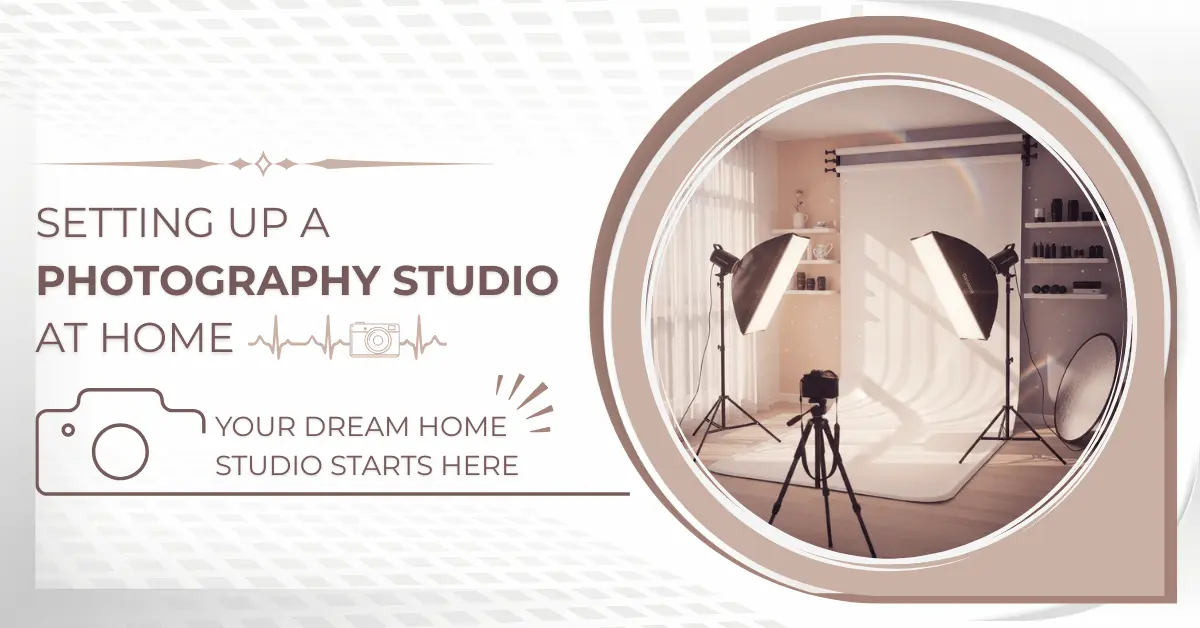
Setting Up a Photography Studio at Home: Complete Kit List
Welcome, photographers! f you’ve always wanted a dedicated space to capture beautiful images, product shots, or experiment creatively without leaving home to take beautiful images, product shots, or experiment creatively without leaving home. Setting up a photography studio is one of the most satisfying projects. This article covers everything from turning a spare room into a nice home photography studio to establishing a professional photography studio.
Table of Contents
Why Setting Up a Photography Studio? The Perks and Possibilities
Before we begin, here’s why setting up a photography studio is worthwhile. Imagine customizing your lighting, backdrops, and environment—no need to depend on daylight or unpredictable weather. A home photography studio lets you experiment, learn, and earn income from your photography.
It teaches studio photography setup essentials without pressure for beginners. Pros like the convenience and cost savings over renting premises. With e-commerce and social media growing, a good photoshoot studio setup can help you develop unique content. You can do dramatic portraits, slick product photos, or enjoyable family sessions at home.
Using a little apartment nook, a friend launched one of my favorite stories. She began with a white sheet and one light; now she regularly books headshot sessions. It proves you don’t need a big room or expensive equipment to start.
Planning Your Photography Studio Setup: Where to Begin
Setting up a professional photography studio begins with a solid plan. Spend some time making plans so you can keep away from wasted money and frustration.
Define Style and Goals
Which type of photography will you focus on? Portrait studio setup for people? Product photos? Newborns or pets? The answers will guide your decisions. Controlled lighting is important for moody, dramatic portraits. Natural light may be best for bright, breezy family shots.
Take into account your style. You prefer bright, high-key or dark, low-key images? This affects wall colors and backdrops. Make a vision-based list of essentials.
Space Assessment: Basements to Bedrooms
A photo studio at home may fit virtually anyplace, even if you don’t have a dedicated room. You can use spare bedrooms, basements, garages, or living-room corners. The excellent area has:
- Basic setups require 10×10 feet (full-body pictures require more).
- Minimum 8-foot ceilings to minimize tight lighting.
- Good air flow, mainly for warm lights.
- Ensure electricity stores are accessible, and use extension cords properly.
Plan optimized layouts to make the most of constrained space. The camera, lighting fixtures, and subject placement in your room ought to be measured and sketched out.
Budgeting Basics: How Much Does It Really Cost?
Setting up a photography studio is affordable. Starting around $200–500, a pro setup can cost $1,000+.
- Without a camera, lighting, and backdrops cost $300+.
- Stands and modifiers cost $200+.
- Luxury: $100+ tethering tools, props.
Pro tip: Start small and upgrade. Search eBay or Facebook Marketplace for used goods.
Choosing a Home Photography Studio Space
The space is the heart of any photography studio setup. Describe how to pick and prepare it.
Assessing Room Options
Garages are larger yet may need heating. Bedrooms are comfortable and accessible.
Walls, Floors, and Ceilings Prep
White or gray walls are great for reflecting light or for a backdrop. Vinyl and laminate floors are versatile, long-lasting and low maintenance. Too low ceilings? Mount lights on walls to save space. Cheap window blackout curtains reduce light.
Comfort and Safety Considerations
Consider ergonomics. During long shoots, lights and padded floors. The aim? Avoid frequent mistakes and build something lasting.
Essential Equipment for Setting Up a Photography Studio
Cameras and Lenses: Every Shot’s Foundation
Your camera captures the image, but lenses often define its quality., but lenses typically steal the show in a controlled studio. Focus on a trustworthy model with strong manual controls and good image quality to get outstanding results.
Recommended starter cameras include:
Why these? Without menus, they handle studio illumination admirably.
For pros (or upgraders):
The Sony A7 IV or A7R V has a wide dynamic range and works well in low light. The Canon EOS R6 Mark II is good for portrait autofocus, and the Nikon Z6 III or Z7 II has good overall performance.
In general, these cameras offer high-resolution sensors ideal for studio work.They also have advanced features like eye-detect AF that make it easier to direct the subject.
Lenses: The Real Source of Image Quality.
A camera’s depth of focus, perspective, and portrait bokeh are all controlled by the lens.
- For headshots and environmental portraits with a full-frame camera, you require a 50mm top lens (f/1.8 or f/1.4), also called the “nifty fifty.” A 35mm f/1.8 lens looks good on bodies with crop sensors. Wide open, sharp, small, and reasonably-priced ($200 to $400).
- An 85mm or 135mm f/1.8 lens for tighter portraits with less distortion and nice compression.
- Macro or work item? With a Canon RF 100mm Macro or a Sony 90mm Macro, you can take an incredibly close-up photo.
- This 24–70mm f/2.8 is a flexible zoom, but in bright lighting, primes are better because they shoot faster and are sharper.
Good tip for photo studios: Before buying, take advantage of LensRentals or BorrowLenses. Test out several of the options in your environment to find out which is easiest to use. Many individuals appreciate the 85mm after a single use.
Tripods and Stands: Non-Negotiable Stability
With shorter shutter speeds and regulated lighting, camera shake degrades sharp studio shots faster than anything else.
Tripods for cameras
Select strong ones with quick-release plates (Arca-Swiss compatible is preferable) and decent height adjustability. For pictures, ball heads move quickly, but pan-tilt heads are more accurate.
- Manfrotto Befree Advanced or Vanguard Alta Pro for beginners—they are sturdy, easy to carry, and cost around $200.
- As a professional upgrades, you should get a Gitzo Systematic or Really Right Stuff carbon fiber tripod, which will last for decades and be stable.
Why it matters: During long sessions, you can lock your camera and move your subject around without having to hold your heavy gear.
Light Stands/Grip
Knob loosening? Adjustable, air cushioned stands prevent lights from collapsing.
C-stand brands you can trust include Manfrotto, Neewer, and Avenger. These brands are ideal for professional steadiness.
In order to protect softboxes and umbrellas from being damaged by wind or being banged, sandbags should be attached to the legs.
Pro tip: Boom arms enable you creatively position above or hair lights without stands.
Tethering, Computers, and Workflow Essentials
Tethering allows for the instantaneous display of photographs on a wide screen, which is an excellent feature for professional client meetings or precision product production.
Laptop/Computer
- Minimum: 16GB RAM, fast SSD, excellent screen (color-accurate if possible). Microsoft Windows or MacBook Pro with Intel/AMD processors work well.
- Pro choice: Dell UltraSharp or BenQ SW series calibrated monitors for accurate colors right away.
Setting Up Tethering
- For most, Adobe Lightroom is easy, although Capture One has more advanced tethering tools.
- Tether Tools orange cables are thick, conspicuous, and reliable (no tripping).
- Newer cameras offer Wi-Fi tethering, although wired is fastest and most stable.
- Bonus: Add a 27–32-inch external display for live customer approval.
Perfecting Studio Photography Lighting
Lighting makes or breaks studio work. It distinguishes flat photos from striking professional portraits.
Select Your Lighting Style

Soft, flattering natural light from large windows enters through large windows diffusing using white sheets or sheer curtains. This is beautiful and totally free. Position your subject at a 45 degree angle from the windows to make Rembrandt style shadows. Cons: Not always available, limited hours.
Continuous LEDs: Always on, so you know what you’re getting. Excellent for novices, video hybrid work, and light placement.
- Choose Godox SL60W or FV150 (hybrid strobe/continuous for adaptability). Cool, reasonably-priced, and Bowens-mountable, so it is easy to tweak.
- Color-correct, app-managed Aputure Amaran or Light Storm series are must-haves.
Flashes/Strobes: Freeze motion, excessive output, rapid recycle. Ideal for dramatic photographs or freezing movement.
- Budget preferred: Godox AD200Pro or AD300Pro, portable, effective (200–300Ws), TTL-capable.
- Conventional Monolights: Godox SK400II kits or AD600Pro for a larger process.
- Godox V1 and TT685 are excellent off-camera trigger speedlights.
Popular hybrid setups include a continuous key light for previewing and strobes for punch.
Lighting Modifiers: Enhancing Light with Modifiers
Light modifiers shape, soften, and control light for beautiful product photos and flattering portraits.
- Softboxes produce gorgeous eye catchlights, flattering soft, even light. Octabox ones resemble natural round highlights. Starting: 24–36″ square or octa. Godox, Neewer, Westcott. Pro: 5-foot octa or strip boxes for full-body wrap-around illumination.
- Umbrellas: Cheaper and easy to set up—shoot-through for soft diffusion, reflecting for wider dispersion. Interiors should be white for neutral light and silver for contrast.
- Reflectors: 5-in-1 foldable, silver, gold, white, black, translucent, cheap fill shadows. Gold warms the skin, silver cools and lights.
- Grids (to contain spill) barn doors (for highlight effects), beauty dishes (for vintage fashion), and flags (black boards to cover stray light) are also important.
A Beginner Lighting Setup: one main light (key) and a reflector as a fill. When comfy, add a hair/backlight. Move lights in self-portraits to observe shadows alter. Learning is fastest this way.
Use this gear base for years. Start simple (camera, one light, modifier, backdrop) and add as your style improves. Best part? Each item teaches something new. Which gear do you want to try first? Let me know your setups—I enjoy seeing them!
10 Lighting Tricks for Amazing Results
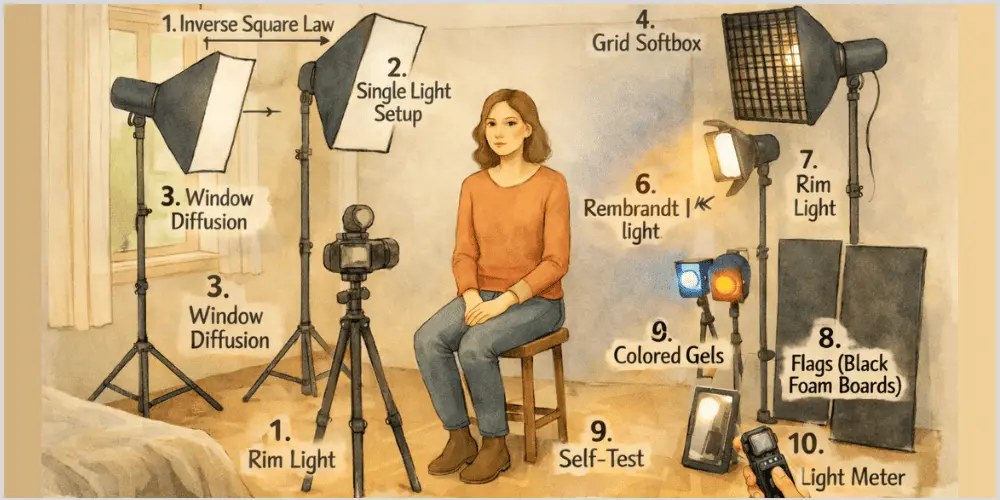
Lighting defines the mood, depth, and emotion of your images. Mastering a few studio photography setup concepts (even at home) that will turn an average image into a gallery quality portrait. Use these 10 photo studio tips and tricks for instant productivity improvement.
- Understand Light Falloff (Inverse Square Law): Physics indicates that light intensity reduces dramatically as distance increases—doubling the gap from your light to the subject halves its energy.
Want intense drama? Bring your key light 2–4 feet away for sharp falloff—bright face, dark edges. Need smoother changes? Get it farther back. This approach adds depth to small homes without equipment. While metering, move your light in and out—the difference is surprising! - Learn One Light Before Adding More: Many beginners rush into multi-light setups and get flat, confusing effects. Use one main light to learn highlights, shadows, and direction. Add fill (reflector or low-power) or rim/back lights once comfortable. This creates intuition quickly—many pros prefer one-light portraits for their clean, strong style.
- Diffuse Natural Window Light: Windows are free studio lights, however direct sun casts intense shadows. Hang sheer white curtains, diffusion fabric, or a cheap shower curtain liner to diffuse light. Facing the window at 45 degrees is how you get Rembrandt-style shadows. Bonus: It increases the shooting window past golden hour.
- Grid Softboxes to Control Light Spill in Tight Spaces: Light shows everywhere in small rooms, washing out backgrounds. Add fabric grids (egg-crate attachments) to softboxes to limit the beam like a spotlight even as keeping softness. Effective for wall and floor spills. Compact home photography studio setups gain from low cost Neewer or Godox grids that clip on easily.
- Create Colour Effects with Gels: Put blue gels (thin plastic sheets) over your lighting for a fab night time, orange for a warm sundown, or inexperienced for sci-fi drama. Be subtle—gel background light and keep key neutral. Rodo or Lee gels for $20 immediately change plain white backdrops.
- Classic Rembrandt Lighting: Perfect the 45-Degree Key Light Position: Rembrandt lighting has a triangle of light at the shaded cheek. Key light should be 45 degrees to one side of your subject and simply above eye level so the nose shadow blends into the cheek shadow, making the inverted triangle. Try tilting the subject toward the light. Use a softbox or umbrella—too soft and the triangle disappears, too firm and it’s overdone. This set suits most faces and adds refinement.
- Use a Hair Light or Rim Light to Separate Subjects: Dark hair and dark backgrounds can blur persons into shadows. A modest speedlight or monolight behind and above the figure should illuminate the hair/shoulders. Avoid flare using low power (1/4–1/2 key) and feathering. Portraits stand out with this dazzling edge. Use grids or barn doors to restrict beams in compact places.
- Block Unwanted Light Using Flags: Black foam boards or cloth flags “subtract” light from striking the background, floor, or lens. Between lights and undesired locations. Use DIY stand-mounted black poster board as inexpensive flags. Required for clean, controlled appearances in photo studio in home setups with unpredictable wall reflections.
- Always test setups with selfies: Use a mirror, timer, or tether to shoot yourself instead of a model. This shows uneven lighting, harsh shadows, and terrible catchlights before the shot. Instantly adjust angles, intensities, and modifiers. This is the fastest method to discover what works in your space.
- Always meter for steady exposure: Point a hand-held light meter (Sekonic L-478 is common) on the light supply from your subject’s position in incident mode. This guarantees skin tones and consistency across photos. Histograms do things digitally, but metering removes the uncertainty, especially with gels or mixed lighting.
Quick summary of pros and cons
- Continuous lights: instant result (good for beginners and video), but hot and weak (compared to strobes)
- Strobes/flash: freeze motion perfectly and pack a punch (pro), but need triggers/receivers and don’t preview.
- Hybrid? Switch to strobes for last pictures after setup with continuous.
Set the Scene with Backdrops and Props
Backgrounds not only set the ambiance but also communicate your tale. In a home photography studio, versatility and ease are key.
Backgrounds: Paper, Fabric, or Walls?
- Seamless paper rolls provide a clean, professional look. Savage and Colorama offer unlimited colors and wrinkle-free surfaces. Remove dirty areas to start over. Ideal for high-key white or product work—smooth and seamless from floor to ceiling if curved (“cyc” effect). Cons: Consumable and creases if poorly stored.
- Muslin, Polyester, or Canvas—Portable, textured, and forgiving. Muslin drapes softly, while canvas lends richness for artistic portraits. Remove creases with iron or steam. Ideal for travel or quick replacements. Glare-free patterns are in modern fabrics.
- Vinyl is wipeable, durable, and often preprinted with scenes or textures. Good for messy food, kids and pet shoots, or outdoors style indoors. Matte coatings reduce wrinkles but intense light glare.
- Plain walls: A simple, cost-effective option– Create backdrops with matte white, gray, or black. No seams, easy storage. If desired, add texture with faint painting.
Avoid horizon lines by making the backdrop reach the floor and bend softly for full-body photos. Start with high-key pure white, dramatic low-key true black, and flexible neutral mid-gray.
Mounting and Storing Tips
For paper rolls, use Impact or Manfrotto backdrop stands with crossbars for quick changeover. Small room ceiling-mounted devices conserve floor space. For cheap DIY, use PVC pipes and clamps.
Save rolls by hanging or tubing them to avoid wrinkles. Tidy or loosely roll fabrics. Cover everything to avoid dust.
Additional Style
Props add character without distracting. Start with simple essentials such as:
- Basic wooden seats, stools, or benches for diversity.
- Faux fur or textured carpets for flooring.
- Fake flowers, plants, and garlands provide natural charm.
- Layer vintage mirrors, books, or materials creatively.
Props should support the subject, not compete. Organize by theme (boho, minimalist, elegant) and keep in bins for easy access.
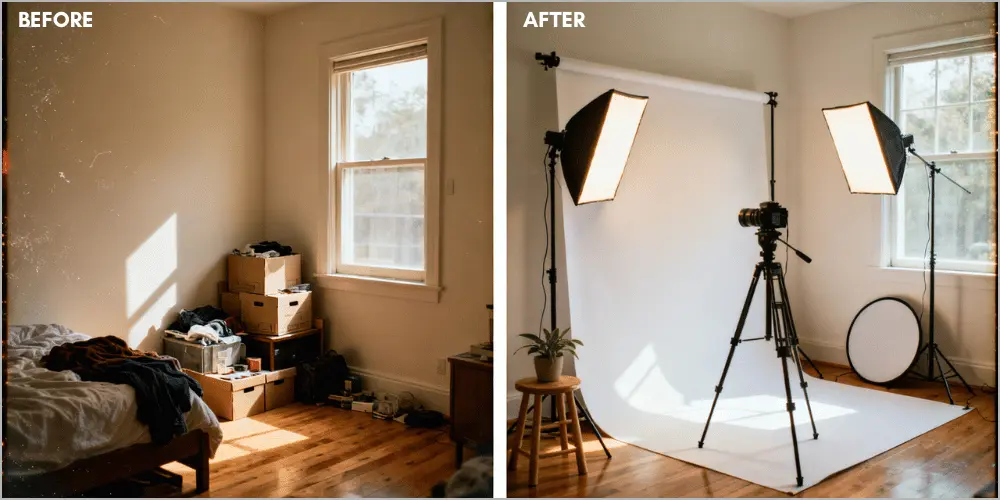
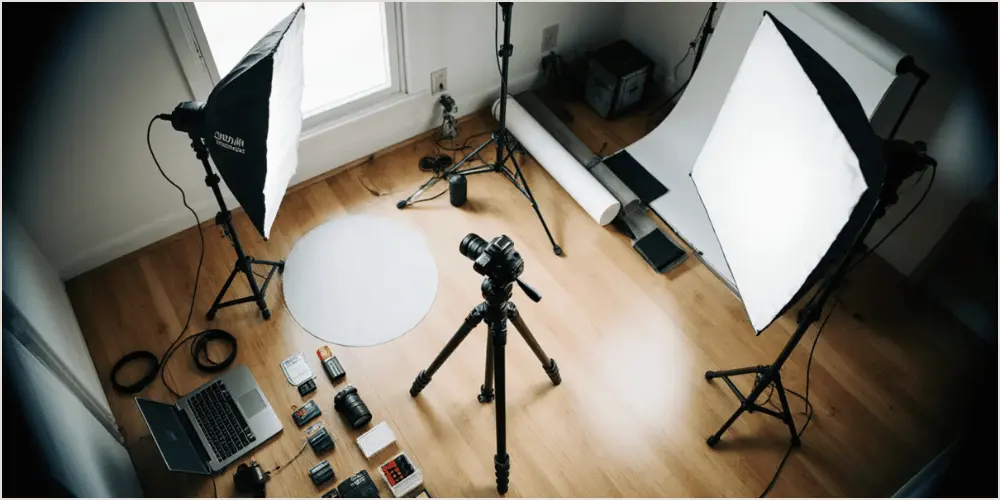
Step-by-Step Guide to Setting Up Your At-Home Photography Studio
You have the stuff, put it together. I worked with a small-to-medium size room, but this scales surprisingly well.
Step 1: Clean and Prep the Space
Take everything out of the room. Clean floors, cord-tape, outlet coveralls. Place the tripod centered toward the backdrop. To frame comfortably, leave 8–12 feet between camera and subject.
Step 2: Install Backdrops
Put up stands and hang your background (paper unrolled, fabric draped smoothly). For a smooth floor transition, curve the bottom. Check for creases and glare under lighting.
Step 3: Place Lights
Set your key light at 45 degrees to the subject (Rembrandt sweet spot). If shadows are deep, fill (reflector opposite). Position hair or rim lights high and behind the subject. Use a mannequin head or stand-in to test heights and distances for drama.
Step 4: Setup Camera and Tethering
Put your camera on the tripod. Connect laptop over Wi-Fi or tether. Set base settings. ISO 100–200, f/8–f/11 for sharpness and depth of field. 1/160–1/200 shutter to kill ambient light. Lighting white balance. Custom if mixed.
Step 5: Adjust and Test
Add grids, umbrellas, softboxes. Add reflectors/flags. Do test frames (self portrait or empty scene) and review on the big screen and adjust: soften hard spots, fix spill, adjust ratios.
Step 6: Shoot/Adjust
Introduce your topic. Do direct poses, check eye catchlights and live shots. Adjust lighting subtly. Even small lighting adjustments make a big difference.
Common Mistakes to Avoid
- Too much lighting creates flat, lifeless photos.
- Ignoring Falloff in Small Spaces—Use inverse square or draw lights back if everything looks even.
- Wide angles (sub 35mm) distort faces in tight rooms; use 50mm+ or crop sensors.
- Block ambient light by closing curtains or using higher shutter speeds.
- Skipping Tests—Do dry runs to discover concerns early.
After practice, this takes 10–30 minutes. The beauty of a home photography studio is its flexibility. Anytime inspiration hits, adjust it. Play, experiment, and see your style change! What lighting trick are you eager to try? Let me know below.
Photo Studio Tips for Small Spaces: Working Anywhere
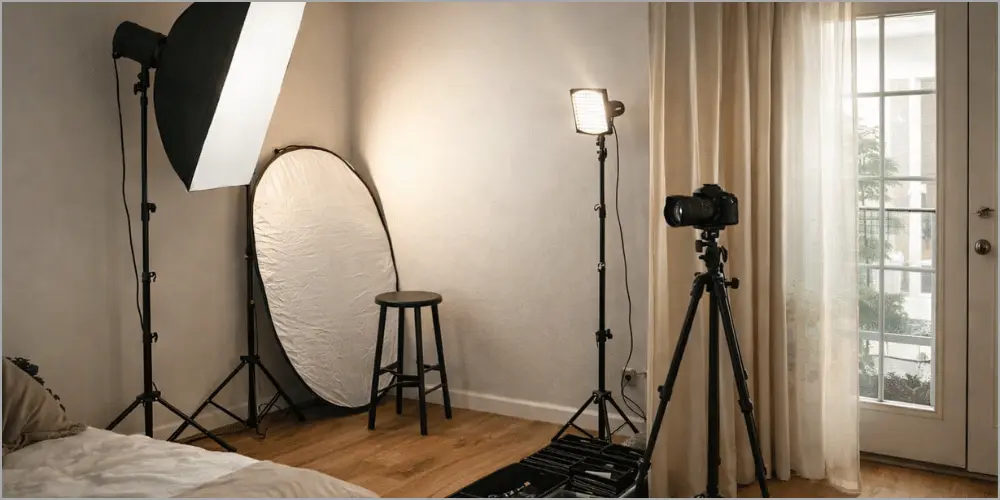
Limited space? Lots of great photographers shoot in apartments, spare rooms, basements and closets. At home photography studio setups are lovely because they don’t require much room; just good planning, creative methods and a bit of light and framing. These photo studio tips will help you to reap the full benefit of your space, avoid the typical missteps, and obtain great photos without having a cramped feel.
Space-Saving Tactics That Work
Limited room breeds creativity, which results in simple, efficient set-ups that are easy to unpack and re-use.
- Maximize vertical space: Instead of heavy stands, mount lights on wall plates or baby pins (cheap wall adapters). Ceiling-mounted curtain rods (IKEA Raecka poles are a favorite—under $10 and robust) or tension rods can hold backdrops. This frees up floor space for you and your subject.
- Be modular and foldable: Collapsible softboxes, carbon-fibre stands and folding V-flats are worth the money. Storable under mattresses, in closets and under walls. Gear carts are a must-have for photographers because they roll up after use.
- Create divider zones: Moveable walls include sliding room dividers, tension curtains, and black fabric panels. They block light spill, produce clean backdrops, and separate shooting and living areas. This hides the arrangement in apartments while family or roommates are around.
- Paint and prep well: Grey or white matte walls reflect light equally without color casts. Cover colorful or reflective walls with black cloth or flags during shooting. Vinyl rolls or cheap interlocking foam mats for floors and an easy-to-roll area.
A reader installed wall-mounted backdrop hooks and battery lights and turned a cramped hallway corner into a favorite spot, no floor mess!
Confined Space Lighting Hacks: Control Without Chaos
Heat spots, color casts, and flat images result from light bouncing in narrow places. Restraint and clever redirection are crucial.
- Maximum 1–2 lamps: Many lights mean more stands and spill, which overwhelms small rooms. A reflector with softbox or umbrella light work wonderfully for portraits. Place lights closer for dramatic falloff that adds depth without distance using the inverse square law.
- Use wall and ceiling bounce: White ceilings and walls become free fill lighting. For gentle, even lighting, bounce your key light off them. Many pros employ bounced light in low-ceiling basements for soft, appealing pictures.
- Natural-light hybrids: A door or tiny window can create lovely sidelight. Clip sheer drapes or white bedsheets to stands to diffuse. Combining with one artificial light ensures uniformity in apartments with few outlets.
- Control spills brutally: Softbox grids thin beams. Foam board or fabric black flags restrict light from striking walls and floors. To reduce bounce in super-small setups, position lights high and feather them (angle only the edge hits the subject).
- Battery-powered LEDs like Godox or Neewer panels eliminate floor wires, making them ideal for flats.
7 Clever Small Space Solutions
Photographers employ these daily photo studio tips and tricks in small spaces:
- Use a corner for L-shaped layouts: Place subject in corner, key light 45 degrees away, reflector or wall bounce. This produces natural three-dimensional lighting without equipment.
- Battery-powered lights are cordless: Free positioning without tripping. Compact Godox AD200 or smaller LEDs recharge quickly and last complete sessions.
- Choose tiny, telescopic stands: Air-cushioned small stands or those under 4 feet deflated fit tight places. Avoid tall booms unless wall-mounted.
- Store items in under-bed containers or rolling drawers: Label everything—backdrops in tubes, modifiers flat, props in plastic bins. Quick access equals more photography, less setup time.
- Shoot vertically for tall subjects: Rotate your camera for full-body or group images in restricted places. Wider lenses (35mm equivalent) help without distortion if you move back properly.
- DIY reflectors from foam board: 5-in-1 reflectors are amazing, however cheap white/black/silver foam core (from craft stores) works as V-flats or flags. Hinge two for adjustable bounce.
- Multi-use props that double as storage: Ottomans with lids hide stuff, stools function as posing aids and side tables. Keep it minimal—3–5 multipurpose pieces max.
Additional Idea: Closet Studio Setup. One savvy photographer cleared out a walk-in closet, painted it neutral, installed a curtain rod for backdrops, and used one window for light. Fold the door open for sessions—ingenious and zero footprint in the main house.
Advanced Photo Studio Tips: Taking It to the Next Level
Once your essentials click, restricted areas.
Specialized Setups for Genres
- Portraits: Three-point lighting (key 45°, fill reflector, rim/hair light high and gridded). Use bouncing ceiling light for subtle fill in small rooms.
- Products/Tabletop: Continuous LEDs on small stands or a light tent/box for even illumination. Use foam core reflectors to fill shadows—no need for huge modifiers.
- Newborns/Babies: Soft, warm setups with window light plus one diffused continuous light. Thick blankets or bean bags for safe posing; keep the setting cozy and toasty.
Incorporating Tech: Tethering and Software
Tethering is especially useful in compact spaces—see big previews instantaneously to nail focus and composition without moving much. Lightroom for live view, Capture One for precision. Presets speed edit; AI tools like Luminar or Topaz quickly reduce noise and retouch images.
Creative Experiments
Gels create mood without more space—tape colored sheets over lights for dramatic backgrounds. Small fans produce hair movement in portraits. Try double exposures in-camera for artistic flair. Low ceilings? Embrace them—bounce lights upward for ethereal, gentle overhead lighting.
Budget-Friendly Photo Studio Tips & Tricks
You don’t need thousands to start strong.
DIY Gear Ideas
- Reflector: Cardboard/paper board with foil on it, shiny side for strong fill.
- Alternative softboxes can be made using a shower curtain or white sheet over a PVC frame.
- Backdrop stand: tension rods or pvc pipes and crossbars. Very sturdy, and only about $20.
- Flags/grids: Black foam core, or painted cardboard
Where to Cut & Where to Spend
Backdrops (simple sheets, painted walls, or thrift-store stuff) and props (second hand or DIY) are where you save.
Lights are where you spend, they’re the heart of photography studio setup and last years. Good modifiers (like a sturdy umbrella) pay off quick.
Where to Find Deals
Black Friday/Cyber Monday for lights, stands
Facebook Marketplace, eBay, photographic groups for secondhand gear, test before buying
Join local photography groups for gear swaps and secondhand deals.
Turning Your Home Photography Studio into a Business
If you want to turn the hobby into something that pays you, expand gradually.
Getting Clients
Build a simple portfolio site (Squarespace or Zenfolio). Offer mini-sessions: headshots, product photography, family photos. Post before-and-after examples on social media. Word of mouth grows the fastest, satisfied clients generate referrals.
Start low, like $50–$100 per session, to get reviews. Bundle prints/digital files. Share behind-the-scenes photos on social media to show your tight setup as authentic
Legal Basics
Get gear insurance (via your homeowner’s or separate policy). Use simple contracts (templates online) specifying deposits, cancellations, usage rights. Register as LLC if increasing. Track expenses—deduct home office space accordingly.
Common Challenges and How to Overcome Them
Every setup hits bumps—here’s how to fix them.
- Excess light spill? Flags, grids, black fabric on walls.
- Wrinkled backdrops? Steam or iron on low; hang paper rolls appropriately.
- Low ceilings (7–8 ft)? Wall-mount lights, bounce off ceiling, use smaller modifiers, shoot seated/subject lower.
- No windows? Rely on continuous LEDs—Godox SL series for bright, customizable output.
- Best for beginners? One light + reflector—learn control before complexity.
FAQ fast hits: Ambient light slipping in? Fast shutter/high power strobes.
Maintaining and Upgrading Your Photography Studio
Dust is the enemy—weekly wipe-downs, lens cleaning, gear coverings. Store things organized to notice issues early. Upgrade gradually: Better lens for sharpness, then lights for power, then software for workflow.
Conclusion
There you have it—the whole guide to set up a photography studio, packed with practical photo studio tips. From squeezing great results into tiny residences to advanced creative twists, the actual trick is starting small, trying often, and loving the process. Your space, no matter how small, can become a creative workspace. Grab your camera, clear a corner, and start shooting. What’s your first project in your new setup? Share your first project idea in the comments—I’d love to hear what you create.