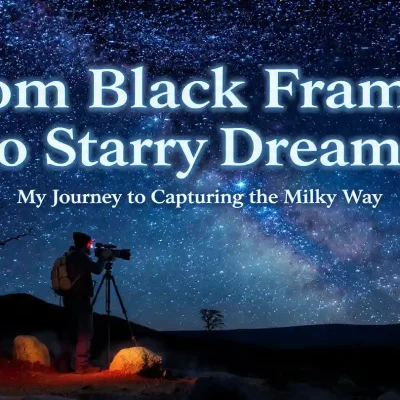
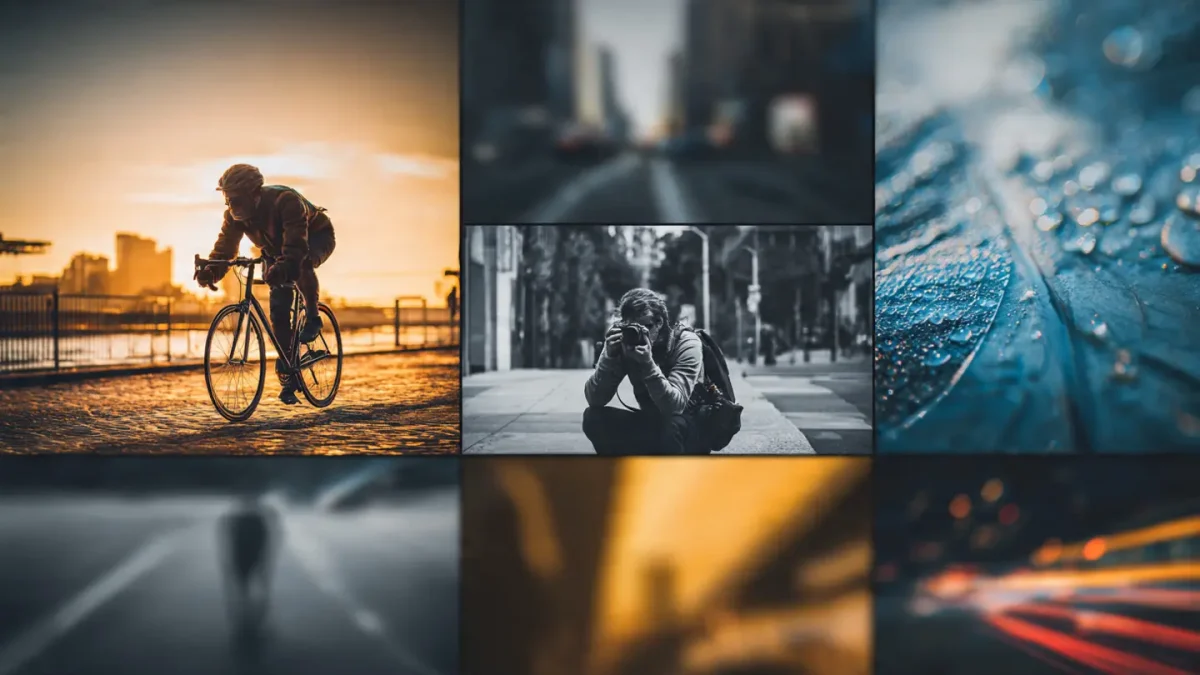
50 Simple Photography Techniques That Will Instantly Make Your Pictures Look Better – From Beginner Basics to Pro-Level Mastery
Whenever you take pictures, you do not need a high-priced camera. Instead, you will require an intentional and well-formed understanding of how to use the craft.
To create stunning images, you need to understand how professionals utilize all of the available resources. From learning how to manage light as a professional studio photographer would do, to creating your own unique style (and making use of it), you will find that photographers rely heavily on their resources to produce amazing work. Let’s begin the journey of becoming a fantastic photographer with these essential photography techniques!
Table of Contents
Simple Photography Techniques to Build Confidence Fast (1-15)
The essential ideas of visible language are mentioned below. Understanding these concepts will considerably enhance the way you understand and assemble objects in a way that will improve your photography, irrespective of which digital camera you’re using.
1. Rule of Thirds
An Early Artistic Composition Rule, also known as the Rule of Thirds, is when you take a 3×3 grid and divide the rectangular image into nine equal-sized rectangles. Having the subject or focal factor of the photograph off-center, along one of the horizontal and vertical lines, or in one of the 4 corners of the square frame, creates a more visually balanced and exciting photo than simply taking pictures at the assignment or focal issue right down the center. The visible imbalance ends inside the viewer’s eye, being capable of circulating freely around the frame, which moreover creates a more expert, dynamic, and thrilling photograph. One manner to carry out the guideline of thirds is to turn on the grid overlay in your virtual camera and deliberately place significant items on an intersection of the grid or across a horizontal line.
2. Leading Lines
The use of clearly occurring lines (i.e., roads, paths, fencing, rivers, or an overlapping line of a building) within a photograph can be an effective way to create a visual pathway for your challenge. Leading lines create depth and guide the viewer’s eye to your subject. Properly positioning yourself to have the road start from one corner of the image and lead into the subject area will help draw the viewer’s eye even further into the image.
3. Framing Within the Frame
Utilizing features of your environment – such as doorways, arches, and trees – will create a natural second frame around your primary subject and provide an appealing sense of depth and a valuable contextual background. The viewer feels as if they are “peering” into the scene when surrounded by a frame (making it easier to perceive the subject as being more significant). A frame casts soft shadows on its problem and attracts attention far away from its heritage through its mild satisfactory. An expert tip: Use a wide aperture (low f-stop variety) to create some blurriness within the foreground body. Blurring the foreground helps keep the main subject as the major focus without drawing excessive interest to the foreground itself.
4. Negative Space
This technique utilizes empty or sparse areas of a photo to create an emphasis on the principal subject matter. In the highly visual world we live in today, simplicity has a strong impact. That is why negative space is essential, as it provides area for your image to have “room” around it, allowing your principal subject matter to be noticeable. Simultaneously, it can express calmness, stillness, simple, and solitude along with several other emotions. Rather than shifting your object closer to you, oppose that and push the object away from the centre to create as much surrounding space as possible using either a solid wall or an unobstructed sky.
5. Fill the Frame
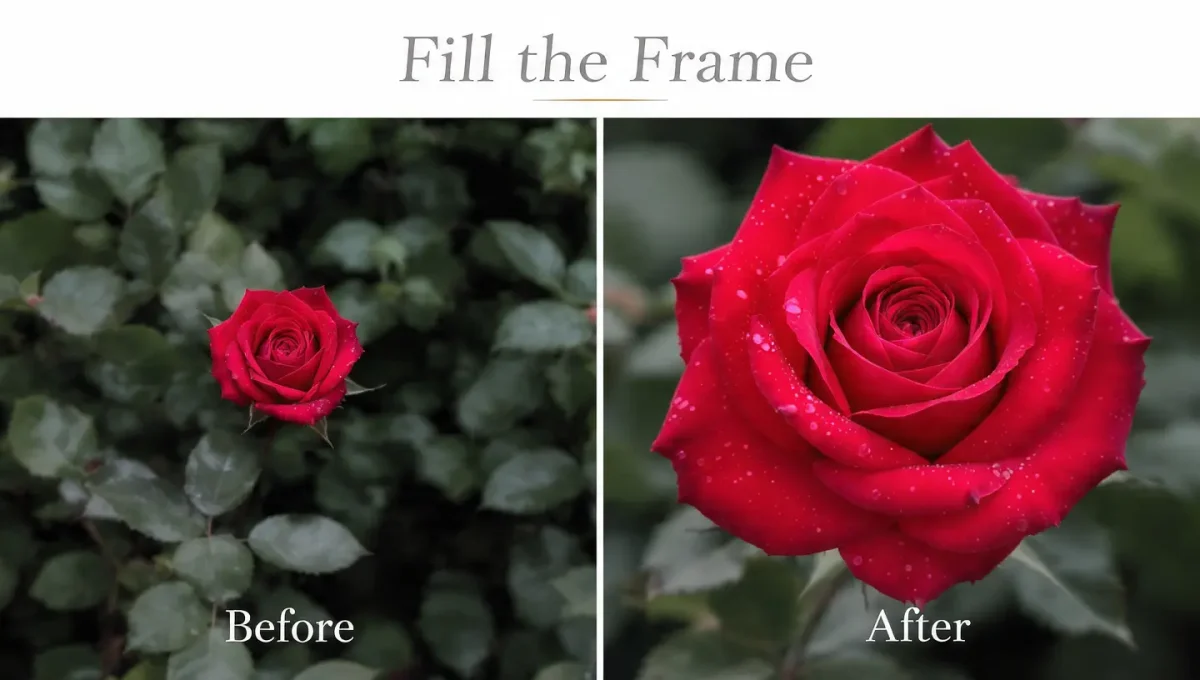
This is the total opposite of using negative space when photographing your subject. To apply this technique correctly, you must get closer to your subject until it’s filled up virtually completely (or completely) within your frame (without background. When you have eliminated almost every element outside of the frame of your subject, it creates an immediate connection to the subject. This creates a more powerful and intimate image with strong detail and emotion. You do not have to use your zoom lens to achieve this effect; your feet are far more effective. As you get closer to your subject, you will find that there is practically no background left to the image, and only the subject remains to tell the story.
6. Symmetry & Centered Shots
Even though the Rule of Thirds is often used as a helpful guideline, you may also make a strong creative choice to place your subject in the centre of your image. This will have a strong effect on images that contain large-scale objects, such as buildings (for example, high skyscrapers), long hallways, and perfectly reflecting surfaces (e.g., water). Positioning these subjects in the middle of the image will give the viewer a feeling of balance within that image and create a mutually beneficial degree of unity and/or stability and/or design intent. When you find a scene that has balance and symmetry, use this structure to your advantage and confidently place your subjects in the centre for a formal and powerful final composition.
7. Diagonal Lines
Strong diagonal lines will create movement, tension, and energy that you can “feel” through the music. You can use staircases, railings, or trees that have a lean to them as your diagonals, or you can tilt your camera slightly (this is called “dutch angle”) to create diagonals yourself. Diagonal lines give a scene “life” and energy when the scene could have been considered “boring” to view. Conversely, horizontal lines give you a feeling of calmness, stability, and strength. Even minimally tilting your camera will make the scene feel alive due to breaking up the “uniformity” of the shot.
8. Fibonacci spiral and the golden ratio
Compared to the Rule of Thirds, the Golden Ratio is a more natural, advanced way to order your photographs. The spirals created by the Golden Ratio create visual connections throughout the image and are derived from highly logical designs of mathematics, seen in so many places today. The majority of compositions structured using the Golden Ratio are generally more cohesive, or pleasing to the overall viewer’s eye, and help transport them through the photograph fluidly. To apply the Golden Ratio, think of a spiral stretching from a corner of your composition to the middle of your composition (the point that meets the centre of your two-dimensional composition). Next, you place your subject matter in the ‘sweet spot’ (which is found by measurement of where the spiral meets the centre of the composition), or the overall focal area for a bigger and more organic overall photograph.
9. With Depth and Layers
By adding clearly defined foreground, mid-ground, and background aspects to your 2D image, you develop a strong depth of field perception. Using multi-layered media to develop your picture will change a flat photo into one that draws in viewers and imparts a sensation of being in the photograph, creating an overall effect of enhancing three-dimensionality. The element in focus will pull people into the image and draw their eye through to the rest of the image. An example to achieve this would be to find an object to place before your subject that obstructs any clean line of sight to them (e.g., a rock, a flower, a blurred branch). Giving the image a front layer is vital to achieve the first layer of depth.
10. Mixing things up
Using contrast between two or more different types of elements in a photograph (such as large and small objects; a new object or an old object; and/or happy objects or sad objects) creates visual tension for the viewer of the photograph. Visual tension allows the viewer of the photograph to explore the relationships between the various elements in the photograph. As a result of this exploration, the viewer will find that the photograph has been changed from a documentary photograph to an interpretive photograph with emotional and/or intellectual depth. Thus, you should always look for opportunities to create contrast to create intellectual or emotional depth to your photographs and to contribute to the artistic value of your photographs.
11. Shoot things through
To create texture, ambient lighting, and an element of surprise, try shooting through an obstruction that is positioned directly in front of your subject (e.g., glass, foliage, or fabric). As the viewer looks at the photograph through the obstruction, they will perceive the subject as if they are looking through “curtains,” creating a dreamy and voyeuristic atmosphere. Position close to the object being obstructed to make sure your subject remains sharply defined, while still being the focal point of your photograph. Use a large aperture to allow for creative distortion of what is obstructive material in your photograph while obtaining the best possible detail out of your subject matter.
12. Light at Golden Hour
Both the first hour after sunrise and the last hour before sunset produce beautiful, soft, warm light. Many people believe this is the ideal time to take photographs of almost any subject. Because the sun is lower in the sky, it wraps around your subject, producing long and soft-edged shadows with texture and dimension, along with a lovely gold color. So when planning a photo shoot, schedule your photo sessions around these times and position your subjects so that they receive this lovely light from below or to the side for maximum drama and glowing effect.
13. Blue Hour Magic
At the time of dusk or dawn, the calmness of twilight can be viewed from either location with a deep, dark blue-colored sky. The cooler brightness of the ambient light produces a unique and interesting atmosphere, and when combined with the warmer, artificial lighting found within cityscapes, creates a beautiful image that’s both relaxing and invigorating. Because of the limited amount of light available at this hour, a photographer will require a tripod and a way to increase their exposure to produce a bright blue color in the sky so that the city lights can twinkle and shine through in the photograph.
14. Change how you see things
Consider changing your point of view frequently, rather than taking all of your photographs at eye level. When you make an effort to lower your camera down to waist level, people look stronger, more imposing and more courageous than they would from a higher angle. Conversely, shooting from above can provide a sense of power or awe to individuals or could potentially make them feel vulnerable. Be creative with your camera placement; get down on your knees to create a unique perspective that is vastly different from what most others experience!
15. Rule of Odds
According to The Rule of Odds, an odd-numbered combination like 3, 5, or 7 generally produces a more pleasing and natural expression than an even-numbered combination like 2,4, or 6. The likelihood of creating a “pairing symmetry” within the two odd-numbered objects creates a friendly visual balance; however, having an unpaired object within the grouping provides a sense of dynamism and visual interest to the group. The next time you are composing a scene/frame or grouping objects, grouping them in 3s or 5s will increase your chance of creating a visually pleasing and naturally balanced experience.
Gaining Control (Techniques 16-30)
Once you develop an understanding of seeing, you will be ready to move away from automatic camera setting options to effectively use the camera without relying on it to control time and light (by adjusting your settings). By taking the time to do this, you are now able to create all of the artistic possibilities using the camera with these intermediate photography techniques.
16. Lack of Depth of Field (Bokeh)
When shooting portraits with a camera with a large aperture (i.e., low f-stop number), creating a blurred-out background will produce a beautiful bokeh effect that separates your subject from its background and makes it appear to jump out of the photo. A good bokeh background is one of the defining features of a professional-looking portrait. To obtain good bokeh, set your camera to aperture priority (think of it as the letter “A” or “Av”) and use the lowest f-number possible, and then position your subject as far away from the background as possible.
17. Deep Depth of Field
For you to capture classic, wide views that have all elements in sharp focus (like flowers at your feet right up to distant mountains across the horizon), you have to utilize a fast f-stop (f-stop being the numerical representation of an aperture) to achieve maximum depth of field. Thus, the larger the area that is in focus, the more detail you will see in each part of the scene. Therefore, you should set your f-stop at f/11 or greater (the higher the number, the narrower the aperture), use Aperture Priority (a mode in digital cameras allowing you to set aperture manually) and use a tripod for stability due to low light conditions/long exposure times created by your choice of aperture.
18. Motion Blur (Panning)
By utilizing a slower shutter speed of around 1/30 of a second and moving your camera in a slow manner to follow the subject across the image, you will end up with a well-focused image of the subject in an otherwise totally blurred background. This technique will create a sense of motion and speed that can’t be created with a stationary image. When using “Shutter Priority” or “TV” mode, panning at the waist in a similar manner to your subject will help create smooth motion blur. Additionally, you should continue panning after the shutter has closed so that you get an even more smoothly blurred image.
19. Freeze Motion
Fast shutter speeds, at or over 1/1000s, capture incredibly clear, frozen moments in time. They can be used to capture events our eyes don’t always see, such as splashing water, an athlete soaring through the air, or the complex, fluttering wings of a hummingbird while in motion. By using Shutter Priority mode and adjusting the camera’s shutter setting higher setting, you will be able to capture quick-moving subjects better. For rapid movements that you wish to photograph, increase the shutter speed you set your camera to.
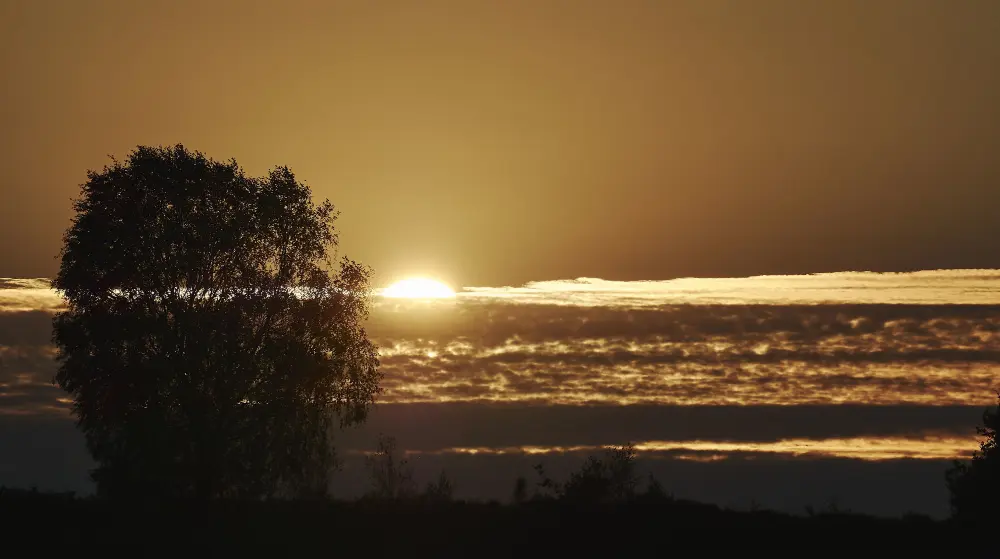
20. Silhouettes
Deliberately underexposing your subject will create a silhouette effect. To do this, point your camera at a brightly lit area (such as during a sunset) and adjust the exposure so that it is the same as that part of the day, thus making your subject a black, strong silhouette and having the story told around it. To set the exposure, point your camera at the brightest part of the sky and lock in the exposure; once you have done so, move the subject into the frame and take the picture.
21. How to Read a Histogram
Histograms refer to a chart that graphically demonstrates the tonal range of your image. The best method for checking exposure is through examining your histogram. The far left of the histogram chart will show complete blackness, and the far right will display complete whiteness. Remember that the display screen on your camera can be misleading because it will display an image of what the lens sees. Still, A histogram shows how much light your camera captured. Review your histogram after each key shot so you know whether or not your sensor has been clipped (both too much and too little) at either end of the graphical representation. If the clipping occurs at either end, you would lose your information in highlights or shadows forever.
22. Exposure Bracketing (AEB)
If you’ve ever taken a picture in challenging or contrasting lighting conditions, you’ll know just how difficult it can be for your camera to produce good images of both the bright (usually the sky) and dark areas (the foreground) of whatever you’re photographing. The Auto Exposure Bracketing tool allows you to take three (or more) photographs automatically at different exposure settings, essentially giving you “digital insurance.” You can use AEB in your camera’s menu to enable it and ensure that you have a broad range of highlights and shadows captured before you process the images together later on.
23. Focusing by hand with focus peaking
When your camera’s auto-focus is struggling to produce a sharp image due to either lighting, low contrast, or the object you are trying to capture is not clearly visible, the solution will be to turn off the auto-focus and switch over to the manual focus. With pertaining to manual focus, one of the newest features of many modern cameras is called focus peaking. This type of technology will allow you to see which areas of the shot have the sharpest portion of the image when you are using the manual focus by giving a bright color (red, yellow) to the area that is the sharpest. To improve the accuracy and confidence when you are manually focusing, Focus Peaking provides a great solution. It is especially useful when trying to shoot quality photographs in macro photography or images!
24. When in Burst Mode
If you want to capture a perfect still image of a split-second event, then you have to increase your success rate. To accomplish this, you should set your camera’s drive mode to Continuous High or burst mode. This way, you will be able to take many photographs in rapid succession by just holding the shutter release button down. To capture unpredictable action like a real smile, a game-winning goal, or an airborne bird, burst mode is the best way to be sure to get that ideal shot.
25. Change the white balance
If you’ve ever noticed your camera’s auto white balance (AWB) not giving you the correct color balance, especially under unnatural or mixed lighting conditions, then the camera could be deceived and produce an undesired photo with a bluish tint. Setting a custom white balance allows you to provide your camera with an exact representation of what “white” should appear like in a specific situation. To ensure that your images have accurate colors at all times, photograph a gray card under the same lighting conditions as the subject you are photographing and set that photo as your custom white balance in the menu on your camera.
26. Focus on the Back Button
Transfer the Autofocus function from being activated through the Shutter Button to a button located on the rear of the Camera. This method of focusing on the target allows you to separate the process of taking a picture from the act of focusing on the subject. You can thus use your Thumb to activate Focus once, then take multiple pictures of that Subject, using your Shutter Button each time, without having to reactivate Autofocus every time. Custom Set up Back Button Focus in your Custom Setup Menu for more accurate and precise control over your focus, which helps you when taking pictures of moving subjects.
27. Intentional Camera Movement (ICM)
Moving your camera for a long time with a slow shutter speed (about 1/2 second) will give you beautiful abstract works of art. Many people use this technique to create a feeling of movement or energy rather than a representation of specific or detailed objects. Because you move your camera for such a long time, the scene will become a beautiful wash of colors and light similar to Impressionist art. If you are shooting in Shutter Priority mode, try moving your camera vertically or panning up and down smoothly through the trees when shooting in a forest, and you will create streaked trees. Also, if you are shooting in the city at night, try jiggling your camera while shooting to create a blur of light in all directions.
28. Use ND filters for long exposure
When taking photos of water that appears glass-like and clouds that appear ghostly during the daytime, you’ll need to use an ND filter. You might think of it as putting shades over your lens. Because ND filters are dark, they greatly suppress light from entering your lens, allowing you to use slow (long) exposure times to create the dreamy and surreal photography images you will find on the internet. First, put your camera into manual mode and use a tripod to create the desired composition. Focus on your subject before adding the ND filter to your lens, and then download a long exposure calculator to determine your long exposure time based on how many stops (S) of light you have suppressed.
29. Portraits of the Environment
In order to provide context for your subjects’ personalities and ways of working, take images of your subjects in their individual environments (e.g., workspace or studio). The environments serve as part of the story because they give an insight into the individual’s personality, interests, and hobbies, in addition to providing an excellent backdrop for your subject’s headshot. To achieve the best photographic story, use a wider lens (35mm or 50mm) to allow your subject to relate more naturally to their environment.
30. Changing to black and white
By removing the color of a photograph, you are making a strong creative move; you are truly revealing the basic elements of a photo (shape, texture, light, and emotion), and often this can create a more timeless, dramatic and powerful feeling in an image. It is not ideal to shoot in black and white with your camera; I would always recommend shooting in colour (RAW format) in order to capture as much information as possible, and to change the photograph to black and white afterwards for total creative control over the final image.
The Pro’s Toolkit (Advanced Photography Techniques (31–50)
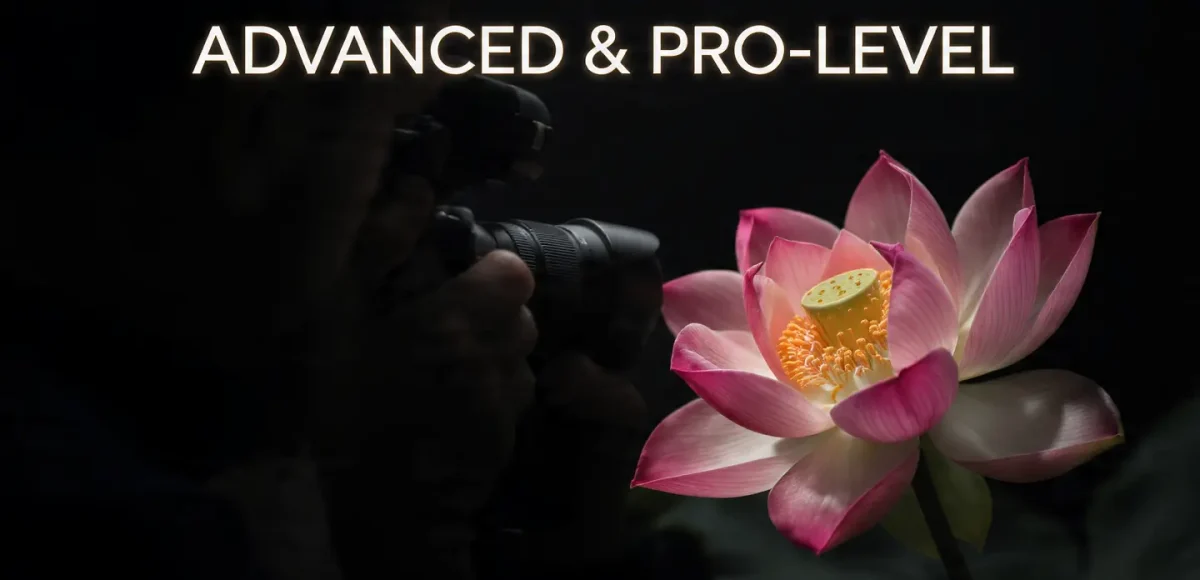
Becoming an expert photographer is not enough for you to produce truly great works. To create signature works of photographic art using the methods previously taught, you need to be highly skilled in mathematics, to have the right equipment and tools, and to develop a unique sense of creativity with these advanced photography techniques.
31. Stacking the focus
For images where part is in a sharp location or when there is extensive distance between the closest object and the furthest object can be captured by using Focus Stacking. Macro Photography and Landscape Photography create the need for Focus Stacking more than most styles of photography. The process is done by taking multiple photos with the camera positioned on a tripod and manually focusing on a certain place within each image, creating different focus points. Data from these images will then need to be merged using software such as Adobe Photoshop or Helicon Soft Focus.
32. Flash with High-Speed Sync (HSS)
Using HSS allows you to exceed your camera’s sync speed and break physics. This means you can take outdoor portraits with great lighting while blocking the harsh sunlight, using a wide lens and making your background creamy and blurry! In order to use HSS, you will need an off-camera flash and trigger system that is compatible with your camera. All you have to do is activate the HSS feature in the camera’s menu!
33. Rear-Curtain Sync Flash
The flash will go off at the end of a long exposure, just before the shutter closes, instead of at the beginning. When you take a picture of something in motion, it creates a trail of motion behind the object that looks much more natural. At the end of their movement, the subject is frozen sharply. If you’re shooting movement and action at night, for example, you can choose “Rear” or “2nd Curtain Sync” from your camera’s flash settings for artistic and imaginative movement-based photographs.
34. Changes and Off-Camera Flash
One of the most effective ways to improve the look of your lighting is to remove the flash from the hot shoe on your camera and put it in another location. Putting a flash in another location, it creates a softer, three-dimensional light that has depth and shape instead of flat, harsh light. After the light is removed from the camera, you can use various modifiers like umbrellas or soft boxes to form the light into a more pleasant effect and achieve an excellent portrait of anyone using only one flash, a transmitter for remote firing the flash, and a standalone light stand. Position the light at a 45-degree angle relative to the subject.
35. Lighting from three points
A Hollywood-origin lighting setup that allows total lighting control, and is based on the lighting in a professional studio portrait! The setup uses three separate lights, i.e., Key Light (the main or brightest light), Fill Light (the secondary or softer light to fill in shadows created by the Key Light on the opposite side of the subject), and Back Light (sometimes referred to as rim light; placed behind the subject; to define the subject). Learning how to use these three individual light sources and balancing their power will allow one such as an average person interested in photography to create research and high-key lighting, and to create dramatic/dark portraits using low-key lighting.
36. Painting with light
In complete darkness, use long exposure photography along with a direct-light source that is handheld (e.g., a flash), create “painted” images by directing the light onto your subject and some part of your scene; your artistic license is extensive in this type of photograph, as you are virtually using the direct-light source as a paintbrush to bring out different parts of your subject, creating texture or feelings that would otherwise be impossible to achieve. Set your camera to bulb mode, and have someone hold the light; you will then enter the dark scene and begin painting with the light onto various parts of it.
37. Put on the Right (ETTR)
To capture photographs in RAW format, you must intentionally overexpose your images as fully as you can without suffering from highlight clipping. By reducing the exposure using post-processing software, you gain access to all of the clean data available from your camera’s sensor, less digital noise, and more detail preserved in the shadow areas. You may use a live histogram to determine how much more exposure you need for the histogram to have almost reached the far right of the graph, but not past that point.
38. Distance of Hyperfocal
The purpose of photographing landscapes is to ensure your image is as sharp as possible, from the foreground to the background. The hyperfocal distance is the distance you should focus your lens in order to achieve maximum depth of field based on your chosen aperture and focal length, which will produce an image where everything is in focus throughout the scene. You can use an online hyperfocal distance calculator or download a smartphone app (such as PhotoPills) that allows you to find the hyperfocal distance of your chosen combination of lens, aperture, and camera type.
39. Zoom Burst
Using your lens to manually zoom while taking a photo with a slow shutter speed creates a spectacular and explosive radial blur effect. This is a creative way to draw the viewer’s attention into the center of the frame in a way that can make a photo feel energetic, disorienting or, in some cases, psychedelic. It is a particularly good way to create a different look with lights in a photo taken at night. To create the desired effect, set your shutter speed to a slow speed (ex. 1 second) and then use your zoom ring to add movement from one end to the opposite end while taking the picture.
40. Stitching a Panorama
Make multiple images that overlap and stitch them digitally to create an extra-wide (or ultra-high-resolution) image. This helps with photographing scenes that cannot be taken with a single camera because of their size, and creates large files that produce high-quality prints. To achieve the best results, shoot vertically in manual mode and have 30 to 40 percent of your photographs show open area between the images. After these images have all been taken, use a software program such as Adobe Lightroom or Photoshop to automatically stitch the photographs into a complete image.
41. Photography with Infrared
Utilizing a specially modified camera or blocking all visible light with an infrared filter to create photographs of an unseen world through an infrared spectrum of light. In this case, the famous technique will convert bright, green foliage into a brilliant, white, snowy-looking image or convert the blue of the sky and the blue of the water into a dark, dramatic grey/black (e.g., an ice-cream sandwich looks white, and the sky/sea looks black). The result is a summer scene that appears to come from another planet – an incredibly beautiful planet! For best results, use a properly converted camera; however, you can use a screw-on IR filter, a strong tripod, and a long exposure time for results.
42. Isolation of Spot Color
You can achieve this amazing and eye-catching effect with a picture once you have taken it, by turning your picture black and white, with the exception of a single color. It is dramatic and helps to pull your focus toward the one that you have left in color and will create interest for that colored object, thus making it the main subject of your picture. To achieve this effect in an editor like Lightroom, you will want to open the HSL/Color panel and reduce saturation for every other color channel except for one.
43. Hyperlapse and Time-Lapse
The contents of a time-lapse recording are created by taking numerous (usually hundreds or thousands) still photographs and then stitching them together to create the appearance of time elapsed. When these images are played back together at regular intervals of time, they demonstrate how slowly and continuously things like clouds, stars and urban life move over periods of time that can be anywhere from a few minutes to several years. In addition to the features of a time-lapse, a hyperlapse adds an added level of depth and movement to video recordings, as the camera is moved throughout the length of the recording, creating the illusion that the subject being recorded is “floating” or “flying” through space. By using the intervalometer feature on your camera to record images at a set interval or using your camera in combination with a sturdy tripod, you can also start capturing the beauty and wonder of the world around you as it continually changes over the course of time.
44. Point of View Forced
You can create an interesting and fun optical illusion by placing people/objects differently in relation to the camera, resulting in them appearing to interact with each other in ways that wouldn’t really be possible. The impressions created in photos can cause people to perceive/scenes/objects, etc. incorrectly, as photos are only 2D (two-dimensional). By using a small aperture, such as f-stop 16, you can keep all of the subjects in focus. Then, you can create a distance of one subject close to the camera while simultaneously having another subject some distance from the camera. This will give the illusion of a person holding the sun above their head, for example.
45. How the Brenizer Works
The process of stitching is difficult because it requires an enormous amount of skill and expertise to achieve. It also has a distinct aesthetic appearance that cannot be achieved with one photograph- instead of being photographed from one angle, the photograph will consist of multiple angles captured at the same time (the angles of view), resulting in a viewing angle much wider than a standard photographic image and therefore appearing as having been taken with a telephoto lens. It would be best to use a telephoto portrait lens (an 85mm f/1.8 lens) with a large aperture when capturing multiple images of your subject across multiple rows, followed by aligning and merging those different photo files together using computer imaging software to create one final merged photograph of your subject.
46. Masking the luminance
These advanced and precise editing techniques allows you to adjust specific areas of your picture’s luminance (brightness) accurately. By using masks, you can change only the mid tones, brightest highlights, or darkest blacks in a photo and not affect any other parts of the image. Adobe Photoshop has built-in tools that create complex masks that enable you to have good control over your contrast, color, and sharpening.
47. The Rim Lighting
Creating a rim light on your subject can produce a beautiful effect that outlines your subject and separates it from the background. In portraits, a rim light creates a glossy finish around your subject, effectively lightening up their sides, thus allowing them to look as if they were popping away from the rest of the picture. The use of a rim light assists in creating a professional-looking picture — something most people want. When photographing someone during the golden hour, place them such that the sun is directly behind them, then bounce light back at them using a mirror. This will ensure that there is enough natural light, creating a rim light on your subject.
48. Lighting with High-Key and Low-Key
High and low Key Lighting create completely different atmospheres. High Key is bright and airy, while Low Key is dark and dramatic with heavy use of shadows and few highlight areas, which can create atmosphere or drama. If you want to achieve a low-key look, only use one light source and a dark background to create the look. To achieve A High Key look, use a significant number of lights to eliminate all shadows from the scene and create a bright and airy atmosphere.
49. Photo Manipulation
Photo manipulation is a process used to combine different elements of multiple photographs together to create one image that often appears odd and tells a story that could not physically exist. It is also where photography goes past just capturing images with a camera and into the realm of creating digital art and drawings with virtually limitless possibilities. You will require competency in using your software; however, you must also ensure that you are matching up the lighting, color values, perspective, and graininess of each element you add to your collage so that it ultimately appears and feels as if it were created using actual photographic materials.
50. How to Create Your Own Style
How to Create Your Own Style Your style develops over time through consistent shooting and intentional choices. Your artistic style is derived from all of the decisions you have made regarding your work over the past few years. You should continue to shoot consistently for several years, take time to consider the work you admire and appreciate as well as the reasons it speaks to you, and then narrow your focus for a period of time. Ultimately, this dedication and passion will assist in creating your own, personal, authentic and individual artistic style.