Introduction to Lighting and Photography Techniques
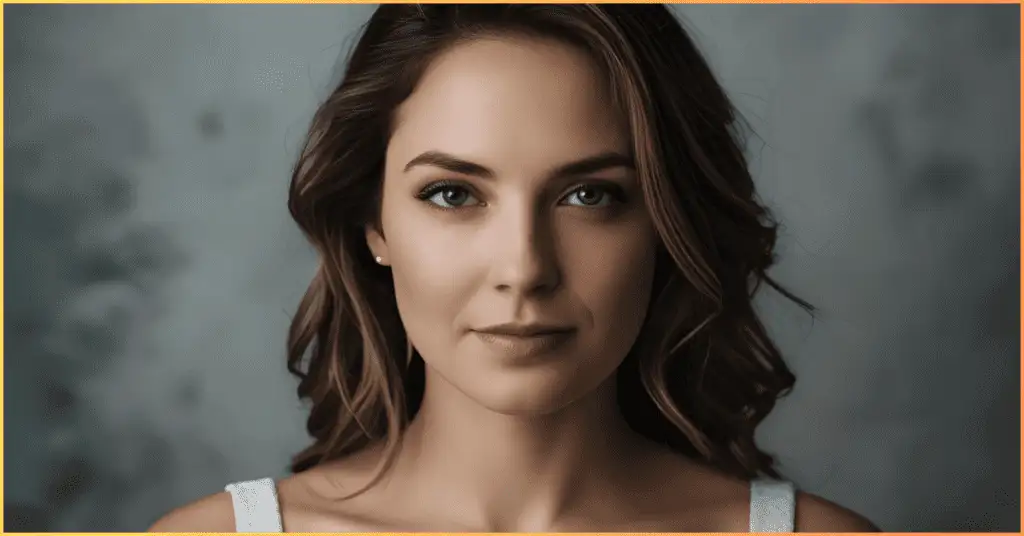
Photography is one of the most outstanding arts that a human has ever created. It is the art that helps in capturing moments, emotions, and stories in a single frame. Accomplishing this art is the light, which can be of different types and colours.
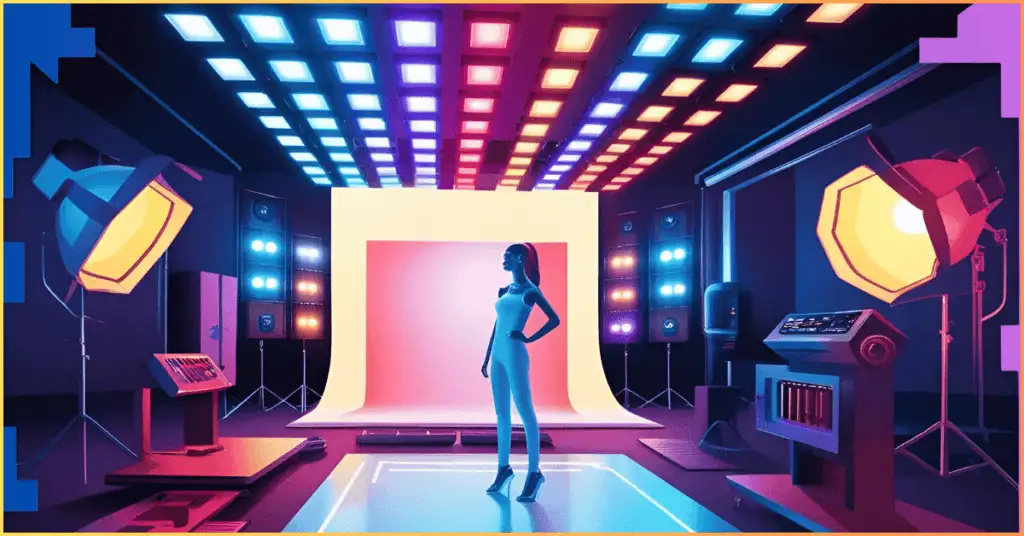
Photography is one field that demands imagination and dedication. Forget not the saying, “A good picture is worth a thousand words.” In this guide, we are exploring how to apply different lighting and photography techniques, along with the means of their implementation, to improve your and my photography skills.
Table of Contents
Understanding the Importance of Lighting in Photography
The lesson of light and photography is mentioned in the first magazine, light obsessions. No light, no image. The original rays’ energy has been synonymous with the final rays’ energy. Here are some significant areas to be considered:
1. Light Intensity
Light intensity is The brightness of light received at a given point. Extreme bright light with a high level of contrast; as a result, you will get sharp images. The softness and absence of strong shadows are the key signatures of low-intensity light. Regulation of light intensity is necessary to realize your photographs’ desired exposure and feeling.
2. Light Direction
How light moves around the object we are looking at, thus creating shadows and highlights, also changes the depth and the ability to perceive forms.
Usually, the light that has been launched from the front will, at the same time, cast fewer shadows, while the side light will make the things gain greater depth and texture. Backlight can do several things like reflections or adding a dramatic light animation to the silhouette.
3. Light Color
The usage of colour light represents the atmosphere and the emotions. Yellow light at dawn is an excellent example of that, and it gives the place a very special atmosphere, and it may be different if we have a blue time in the morning. Different artificial light sources and their particularity also come in various colour temperatures that they can give to the scene.
4. Light Quality
The light quality is the degree of the shadowing or the hardness of the light. It either creates a diffuse effect when the light is reflected multiple times, e.g., during an overcast sky or is a matter of the light being greater just in front of the subject and keeping all the area in the photo well-lit.
The sharpness of the image is the main result of the high contrast ratio produced by hard light, for example, outdoor direct sunlight or a flash without any light modifier. The alternative of light quality relies on the photo’s purpose and the photography topic.
Types of Lighting in Photography
1. Natural Light
Light that is from the sun, or natural light, is the kind of light that is the most widespread, and it comes in numerous forms. One principal cause creating the variety of natural light images is the motion of the sun’s movement in such times and the clarification as the sun ray’s cover of the earth changes.
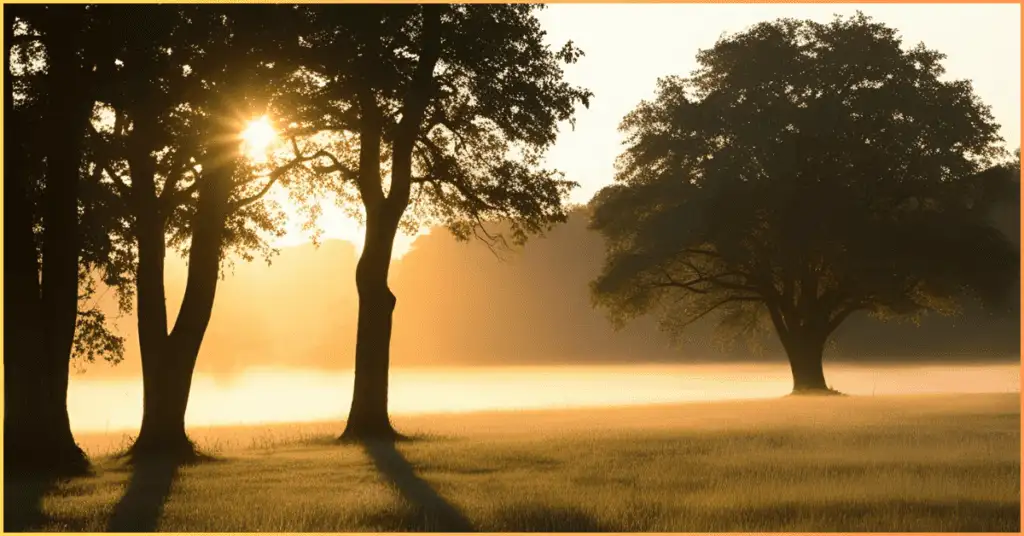
- Golden Hour: This is the time when the sun is rising or the time when the sun is setting, which provides warm, soft, and flattering light. This period is the most favorable time for the photography one has arranged for outdoors. Capture this time of day to let glowing and warm nature inspire you on the way to work.
- Blue Hour: It is 20 to 30 minutes, which is not late enough for the darkness to be pitch black, and at the same time, the sky is very blue around nightfall. It is similar to cityscapes and night portraits; the mood gets misty.
- Midday Light: Midday light comes when the sun is at its highest of the day, and typically, it is straightforward and intense, creating a stark difference between the things that are lit and the shadows. Even though it has its limitations, middle-of-the-day light is still an ideal way to achieve some extreme and very high-powered effect in your shooting.
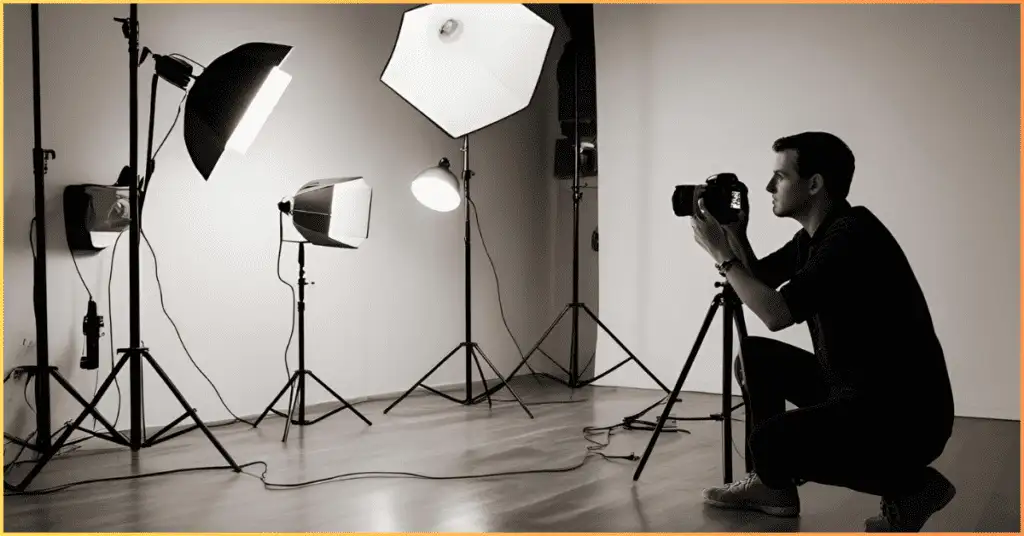
2. Artificial Light
Artificial light is one of the characteristics that can be used by the user so that they can control the devices and, therefore, the light in a given environment. The standard lighting setups and lighting systems that photographers use to capture a specific scene and allow them to be flexible include:
- Continuous Lighting: LED lights, tungsten lamps, and fluorescent lights are widely used in photo studios to minimize the costs of utilities since they supply constant illumination of the shooting space. As a result, the photographer can visualize the final image before capturing it.
- Strobe Lighting: Strobes generate a bright light when flash setting during a shoot. Strobes are a type of light source that can be installed and used, both indoors and outdoors, when taking a shot.
- Ring Light: The intelligent light function near the camera balances the light in all directions of the picture and gives the facial effect that the eye-catching people desire in photos. This feature ensures an equal amount of illumination for the face.
- Soft box and Umbrellas: Both of these include the lighting that scatters. The glow of these can provide a softer look while working with rough artificial light that destroys the final quality of the picture. These fantastic and versatile items are fundamental to light and shadows in photography, whether or not it is daytime.
Essential Lighting and Photography Techniques
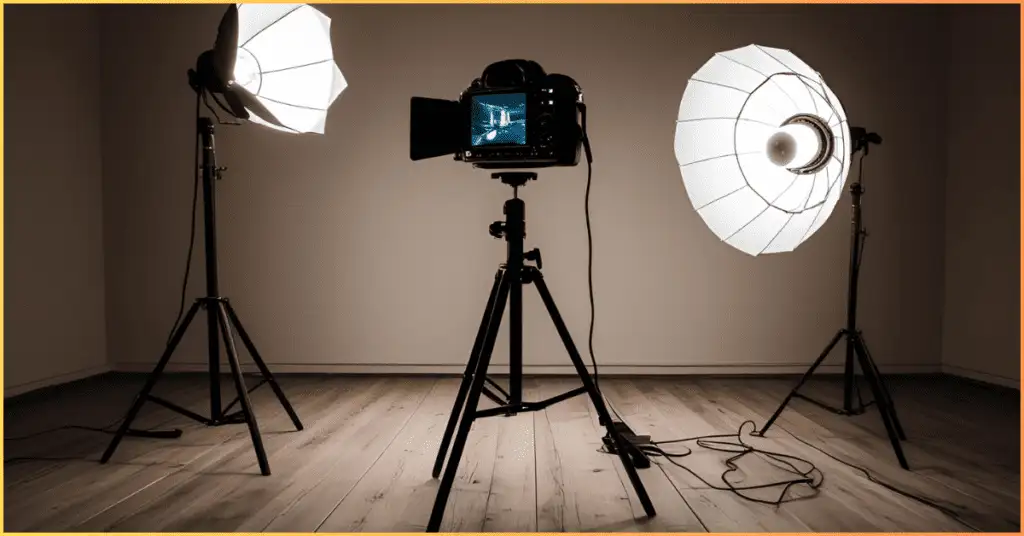
1. The Three-Point Lighting Technique
Three-point lighting skill is one of the skills that are often used in photography, and videography is a result of it. Qualities of Three-Point Lighting are:
- Key Light: This primary light source pointed at the subject is also a strong light source illuminating the subject.
- Fill Light: Correct uneven light on the scenery and decrease the shadows generated by the leading light.
- Backlight (Rim Light): A backlight or rim light is a great way to separate a subject from a background. Thus, a lighter edge can be seen around the subject.
This set of lights is a standard method applied in studio photography and filmmaking to obtain a balanced and professional-looking setting.
2. Rembrandt Lighting
All the great pieces of art and literature use the idea of symbolism to express more things than the actual plot suggests. The defining feature of metaphorical art is that it emphasizes all the indirect meanings. Art is one of the most varied and complex human creations, and the most significant thing is that it continues to evolve.
The main task of a painter is to use light to produce a realistic image of every subject the painter needs to create. In adding to the circular planes amid light where it obstructs the lines of attributes, the lighting schemes are further used as props to the big plot.
3. Butterfly Lighting
The name of this technique adequately describes the unique shape of the shadow formed under the model’s nose. This shadow looks precisely like a butterfly, giving the image an exceptionally aesthetic look. This light setup also benefits the beauty of the shoot.
4. Split Lighting
Ensure that one side of the face is in light while the other side is in the shadow. It is better to place the key light on one side to get as much contrast as possible on the other side. The way you split the face by one side of the face between the whole light and the dark will show a significant difference compared to the subject’s completely illuminated face.
5. High-Key and Low-Key Lighting
- High-Key Lighting: Brightness and minimal darkness areas often used by commercial photographers and fashion photography are acceptable. It produces a peaceful and positive vibe.
- Low-Key Lighting: This lighting technique is excellent for people who love something out of the norm. The method uses shadows and selective highlights with dark, rich, and often black backgrounds to achieve stylized and dramatic effects. It’s typically used in noir and portrait photography.
Best Lighting Setups for Different Types of Photography
1. Portrait Photography
A soft box or an umbrella can get beautiful, indirect light for a flattering effect. Catchlights in the eyes of the subject can give you a lively face. Rim lighting will also help you pull the face forward from the background to remove the backdrop.
2. Product Photography
Using several light sources will allow you to get rid of any harsh shadows. One may use a light tent to get even light to capture a product. The use of reflectors can help if you want to fill in shadows.
3. Landscape Photography
Get the most out of the golden and blue hours by utilizing the most favorable light during these times. Gradual ND filters get the correct exposure when the sky and the land compete. Shooting your image against the light to create silhouettes is encouraged.
4. Real Estate Photography
Mixing natural light with artificial light will give a balanced scene. Bracketing is a commonly used technology that can help the photographer to avoid sharp shadows. Flash diffusers can be the ideal solution for diffuse and soft light.
5. Night Photography
In night photography light exposures can be set to prolonged durations to capture more light. Painting with light will be exciting, and you can produce creative effects in the photos. Secure a tripod onto your camera to maintain steadiness against the shake endured by the camera in low-light situations.
Common Lighting Mistakes and How to Avoid Them
- Overexposed Highlights: Reset total exposure and use diffusers to soften intense light.
- Underexposed Shadows: Provide artificial light or use reflectors to enrich the unpacked areas of the scene.
- Harsh Shadows: Bring the power of electronic flash units to balance the shadow areas by using soft boxes or by indirectly illuminating the subject with bounce light.
- Incorrect White Balance: If you want to obtain accurate colours, the best way is to change the in-camera settings or make the adjustments post-processing.
- Ignoring Ambient Light: While using artificial light, don’t neglect the impact of natural light on the scene. This will help you to avoid mismatched lighting.
Post-Processing Tips for Enhancing Lighting Effects
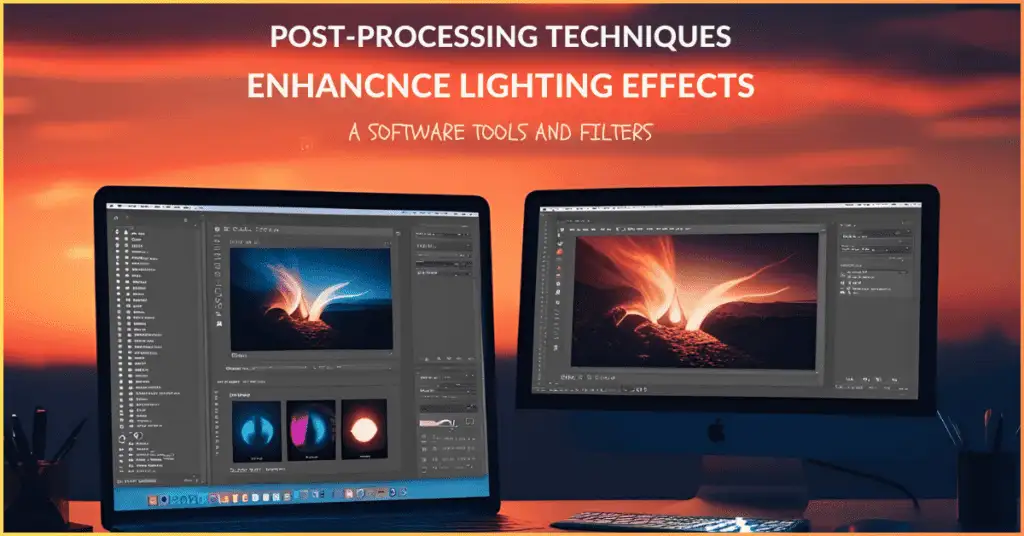
Even with excellent lighting conditions, photo editing software could improve image quality. The following are the methods on how to do this:
- Adjusting the Contrast and Brightness: Utilize photo editing software such as Adobe Lightroom to change the colour and contrast of your image according to what you favor.
- Dodging and Burning: Photography: The methods of dodging and burning are applied in lighting and darkening, respectively, the selected picture areas to enhance the image.
- White Balance Correction: With the help of the white balance adjustment, the colours will remain as they are in the world.
- Use Presets: Give your photos a consistent touch by using presets.
- Work with Shadows and Highlights: Use the tone curve tool to increase the brightness of dark areas and shadows and get a more excellent range of greys and mid-tones.
Advanced Lighting Techniques for Creative Photography
1. Light Painting
Light painting uses a handheld light source to “paint” in the dark while the camera’s shutter is open. This can give a dreamy and imaginative feel to your nighttime shot.
2. Bokeh Effects
The blurred background “Bokeh” is the visual quality of the out-of-focus parts of an image. Compose a photo with a wide aperture and use small light sources further, bringing out a nice bokeh effect.
3. Silhouettes
Silhouettes are made by placing the object in front of a strong light source and exposing it to the background. You get this technique as it concentrates on the shape of the figure, which often leads to a dramatic and minimalistic image.
4. High-Speed Sync (HSS)
The great thing about high-speed synchronization when using Flash is that it allows you to use shutter speeds faster than the camera’s standard sync speed. For example, this feature is an advantage when it comes to outdoor flash portraits, where you need to strike a balance with the sun.
Lighting Equipment and Tools
A part of the master technique in lighting is that the technicians have the right tools. Here are some must-have tools for photographers:
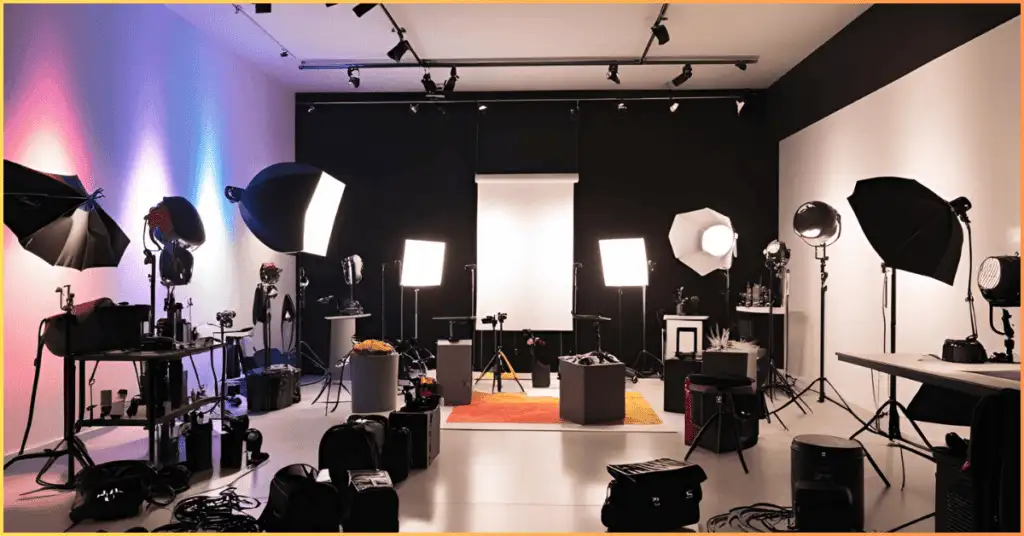
- An External Flash Has always been a tool used to provide extra light in poorly lit conditions and is considered a very flexible device.
- Reflectors: Use this tool to bounce light onto the subject’s face. Thereby, shadows and highlights can be created or enriched.
- Diffusers: These materials act as a way to soften the light, which makes the subject look even more impressive.
- Light Meters: These devices are the best because they determine the intensity of the light and exposure to help the photographer take a perfect shot.
- Colour Gels: This is one of the most innovative and helpful components of a lighting setup, as the light operator can change the light colour according to the personal taste or the colour of the item being photographed.
The Role of Shadows in Photography
Since shadows are to light as the sun is to the sky in photography, they play a significant role. Shadows add colour, texture, and drama, which, in turn, makes an image unique. Here is the recognition of darkness and its potential usability in photographs:
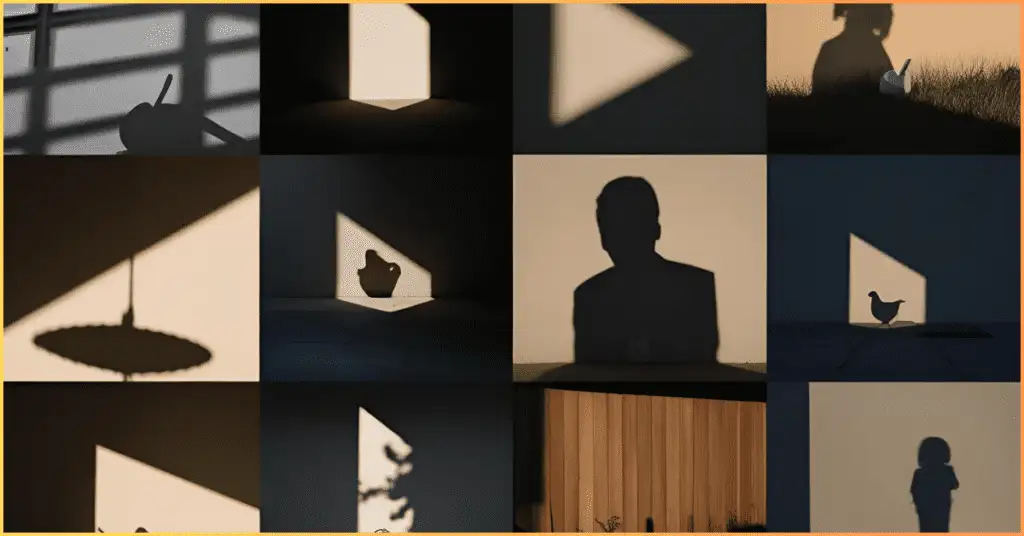
- Add Dimension: Construct an angle that naturally casts a shadow that will emphasize the 3D effect of the subject.
- Make It Bold: Do the opposite and silhouette it like it was a mystery or stripe shape due to underexposure, which makes the contrast so high.
- Switch The Balancing Light: Change the angle of the light source by observing the texture of the surfaces in the room; think about the materials such as clothes, wood, or skin.
- Bring Balance to Your Shot: Place the shadow where it can softly emphasize the subject or, by this action, attract the viewers’ attention to the main object.
The Psychology of Lighting in Photography
The position of the light is not only a technical detail but a trigger for emotions in a person. Here is how specific luminance comps can produce different reactions:
- Warm Light: This uplifts people’s spirits, making them feel nice and toasty. Warm light is primarily used in developing portraits and lifestyle photos.
- Cool Light: A person could be calm, serene, or down and bluesy around cool light. Most of the time, cool light is utilized in landscapes and architectural photography.
- High-Key Lighting: This is vibrant and conveys s a feeling of being in a good mood. It is used in fashion and advertising photography to show products in a good light.
- Low-Key Lighting: This relies on the story it likes to tell and the drama it wants to produce. Low-key light is a style of photography that is most often used for storytelling, cinematic and dramatic photography.
Lighting for Different Environments
1. Indoor Photography
Good indoor photography combines both natural and artificial light. Use window light as your primary source and canvas with assistive reflecting and soft box lighting to fill in gaps. Away from nature, many setups can be done, including using lighting from various directions in the 3-point studio lamp setup.
2. Outdoor Photography
The outdoor genre works with natural light only. [You] need to schedule the outdoor photo sessions, especially in the two moments mentioned, to get such great photos. Reflectors should be used for bouncing to the subject and diffusion to soften the sunlight.
3. Studio Photography
Ideally, a photography studio is where one should have absolute control over lighting. Sampling variations such as the Rembrandt, butterfly, and split lighting settings will help you get the desired outcomes. Spatially use modifiers like soft boxes, umbrellas, and grids to define the light.
The Future of Lighting in Photography
Photography development is gradually aligning with advanced technology, bringing about changes in the way photographers utilize light. The following trends should be on your radar screen:
- Bright Lighting: Light-emitting diode (LED) lighting fixtures with adjustable colour temperature and brightness are rising in popularity. The lights can be managed by a smartphone app, creating a more flexible and convenient control environment.
- Portable Lighting: Innovative technologies in light development, like small and eco-friendly light solutions, allow photographers to have their photo sessions from any location, maintaining the same quality as studio-based shoots.
- AI-Powered Lighting: Constructive artificial intelligence is being tested in the lighting industry where AI writes the settings once, then it can check, complement, and adjust them automatically when it detects a different scene, ensuring the photographer has an unerring hit on the spot every time.
Conclusion
Although using both natural and artificial light will create your images, it is also vital to understand how light and its conditions affect the image and how to apply the concepts related to light to your advantage. This technique will always be the best use of flash, whether a tiny pinpoint of light shines on a small portion of the face or light from a window.
The concept is about opportunities you must take advantage of, not just when shooting with natural light but with artificial [one]. The principles are of utmost importance as you can control the light’s saturation, direction, and colour when capturing an image.
By doing experiments using different lighting setups and avoiding common mistakes, one can create a stunning photography to make it stand out. Follow these techniques, let your talent grow, and ultimately, be at the top of the pyramid using perfect light. Happy shooting!