Perspective Correction: From Skewed to Stunning Photo
People who love shooting! Have you ever snapped a photograph of a towering building handiest to discover it leaning awkwardly in your picture, like it is about to topple over? Or you’ve captured an interior area where the walls appear to converge in unnatural ways. If that sounds acquainted, you’re dealing with perspective distortion – a not unusual headache for photographers of all levels. But don’t worry! In this in-depth guide, we’re going to dive right into the world of perspective correction, Learning how correct perspective can take your snapshots from precise to gallery-worthy, no matter how skilled you are with high-end software or your cellphone camera.
Perspective correction isn’t always only a cool enhancing trick; it is a fundamental skill that ensures your photographs show the scene precisely how you see it. If you want to see how immediately lines can make a room experience larger and friendlier, take a look at actual property photographs or architecture snapshots. When you’re done reading this post, you’ll know how to solve these problems with Photoshop, other paid software, and even useful apps. Now is the time to start actually straightening things out!
Table of Contents
Understanding Perspective Distortion: The Root of the Problem
Before we jump into fixes, permit’s break down what perspective correction genuinely is. In pictures, perspective refers to how three-dimensional objects seem in a two-dimensional photo. When you point your camera upward at a tall structure, for instance, the traces that ought to be parallel – just like the facets of a building – start converging towards a vanishing point. This is a natural optical impact, but it frequently results in distorted pix that do not quite capture the fact.
Perspective distortion occurs due to the manner lenses and angles interaction. Wide-angle lenses exaggerate this effect, making foreground elements appear larger and backgrounds seem farther away. It’s why selfies, along with your cellphone’s front camera, can make your nose look comically massive! Some common situations are:
- Architectural photography: Buildings lean in or out, which breaks up the balance.
- Inside shots: The tilted walls make the rooms feel squished.
- Product Photography: Things on a table might look off, which makes the photo less professional.
- Landscape with Foreground Elements: Fences or trees that should be straight and end up leaning.
Why try to fix images that are out of focus? Well, warping that isn’t fixed can make your photos look bad. In areas like real estate, where pictures are used to judge properties, straight lines help build trust and show off features correctly. When it comes to artists and designers, it’s about keeping the arrangement whole. Also, in the world of social media, a picture that is exactly lined up looks better in your feed.
I consider my first encounter with this difficulty: I turned into photographing a historic church in my native land, and the spire looked like it changed into bending in the wind. After some trial and blunders, I realized correcting perspective wasn’t rocket science– it simply required the right tools and a bit of knowledge. Now, let’s discover those tools.
Essential Tools for Perspective Correction
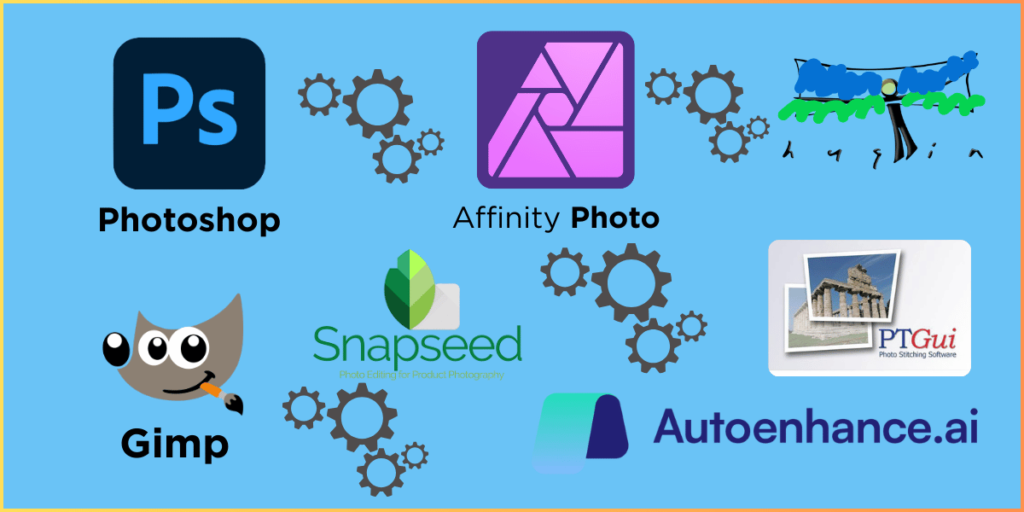
As good news, you don’t need pricey gear to correct perspective. It doesn’t matter what your income or skill level is; there is software and apps for everyone. We’ll start with the big ones and then move on to more in-depth guides.
Adobe Photoshop: The Gold Standard for Precision
If you are serious about enhancing, Adobe Photoshop is a powerhouse for perspective correction in Photoshop. It’s flexible, considering non-bad edits that hold your actual document. Whether you are handling Photoshop mindset adjustments for a single photo or batch processing, it’s miles have been given you covered. You can change pictures very precisely by aligning lines to grids to get perfect results.
Hugin is free and powerful for people who love panoramas.
Hugin is a great choice for people who like open-source software. It was originally made for stitching panoramas together, but control points make it great for perspective correction. It helps a lot when you need to line up a lot of horizontal and vertical lines to correct complex flaws. The best part? You can use it for free on Windows, Mac, and Linux.
Mobile Apps and AI-Powered Tools
Going somewhere? A photo perspective correction app can come in handy. AI is used by apps like Autoenhance.ai to automatically find and fix perspective, which makes it easy to make quick changes. Lightroom Mobile, Snapseed, and even the tools that come with iOS and Android are also very popular. You can use these to correct the perspective of pictures when you’re not at work.
For AI fans, Autoenhance.ai stands out because it can fix perspective images with very little work from the user. All they have to do is upload the picture and let the algorithms do the rest. Real estate agents trust it to clean both the inside and outside of homes in seconds.
Other Notable Mentions
GIMP is let you change things that look like they did in Photoshop.
Affinity Photo is a one-time buy that doesn’t cost much and has powerful perspective grids.
PTGui is great for landscapes that need advanced stitching and correction.
How you work will help you choose the right tool. Photoshop works well with raw files when you’re changing them. AI apps are great for making changes in groups. Let’s start using lessons.
How to Do It Step by Step: The right way to fix perspective in Photoshop
Now let’s get down to business and look at how to correct perspective in Photoshop. This is primarily based on actual-worldwide scenarios, like solving an actual property image in which partitions are leaning. I’ll walk you through it, as even though we are enhancing together.
Preparation: Setting Up Your Workspace
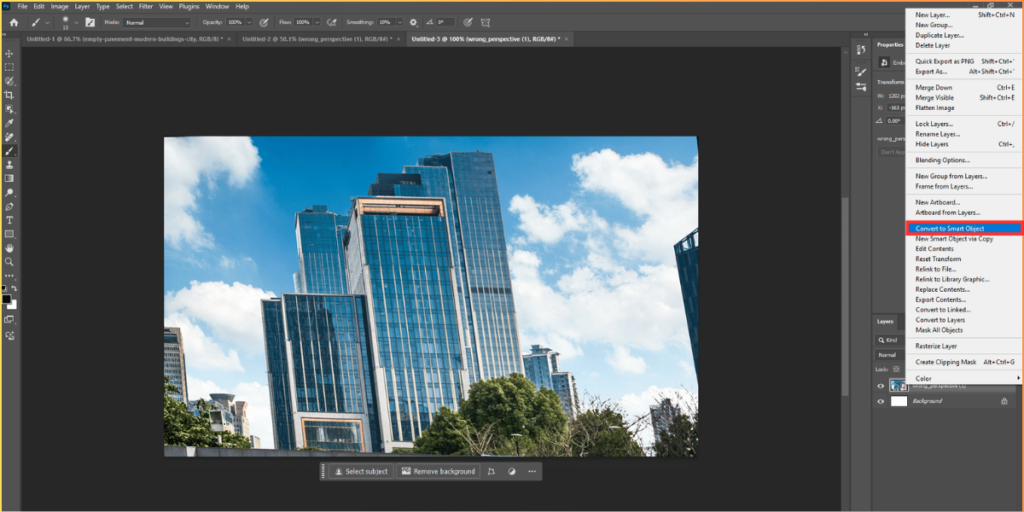
Open Your Image: Launch Photoshop and open your Image (File > Open). For excellent consequences, begin with an extensive RAW record if viable.
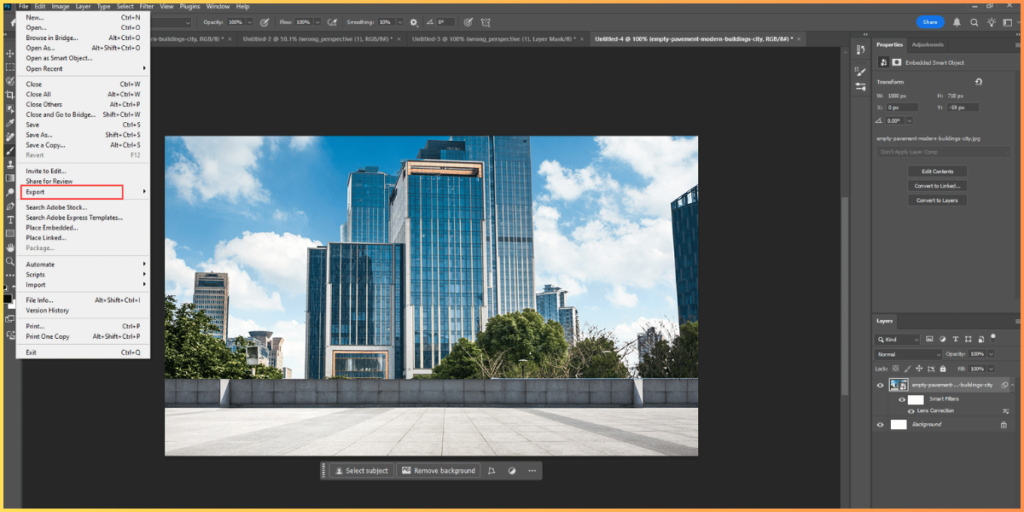
Convert to Smart Object: Right-click the layer inside the Layers panel and select “Convert to Smart Object.” This is crucial for non-horrible editing – you may tweak mindset correction in Photoshop more than one instance without quality loss.
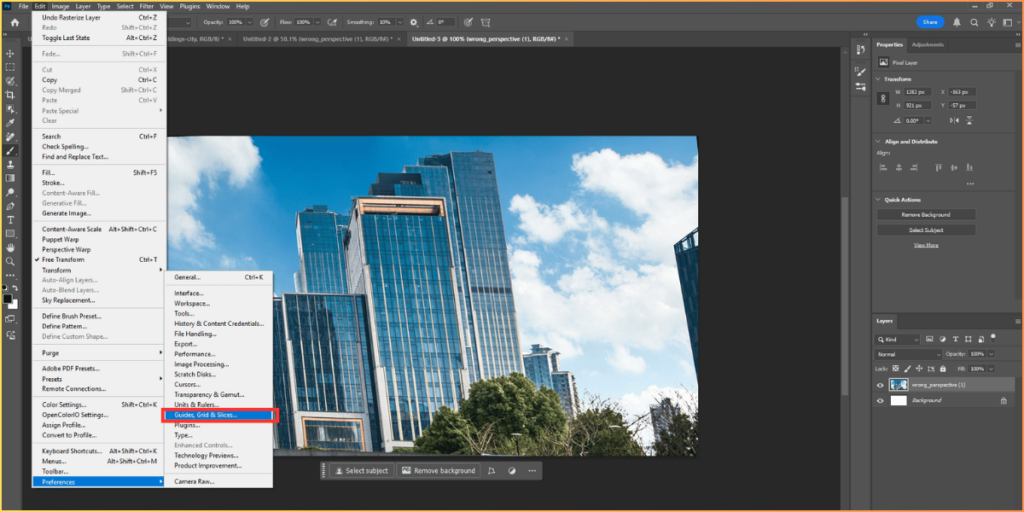
Set Up a Grid: Go to Edit > Preferences > Guides, Grid & Slices. Under Grid, set Gridline Every to five % with one subdivision. This overlay permits aligning strains visually. Toggle the Grid with Ctrl/Cmd + ‘(apostrophe).
Increase Canvas Size: Head to Image > Canvas Size and add more pixels (e.g., 1000 to width and height). This offers room to move without cropping edges earlier.
Make a grid: Click on Edit, then Preferences, then Guides, Grid, and Slices. You can set the Gridline Every to 5% with 1 section under Grid. This overlay makes lines look like they are lined up. Press Ctrl or Command +’to turn on or off the Grid.
You can make the canvas bigger by going to Image> Canvas Size and adding extra pixels, like 1000 to the width and height. This lets you move around without cutting off the ends too soon.
The Transformation Process
To use Free Transform, pick out a layer and press Ctrl or Cmd + T. There are handles around the picture.
Turn for the Basics: Right-click inside the box’s edges and select Rotate if the horizontals are off. Line up straight parts, like floors or ceilings, with the Grid.
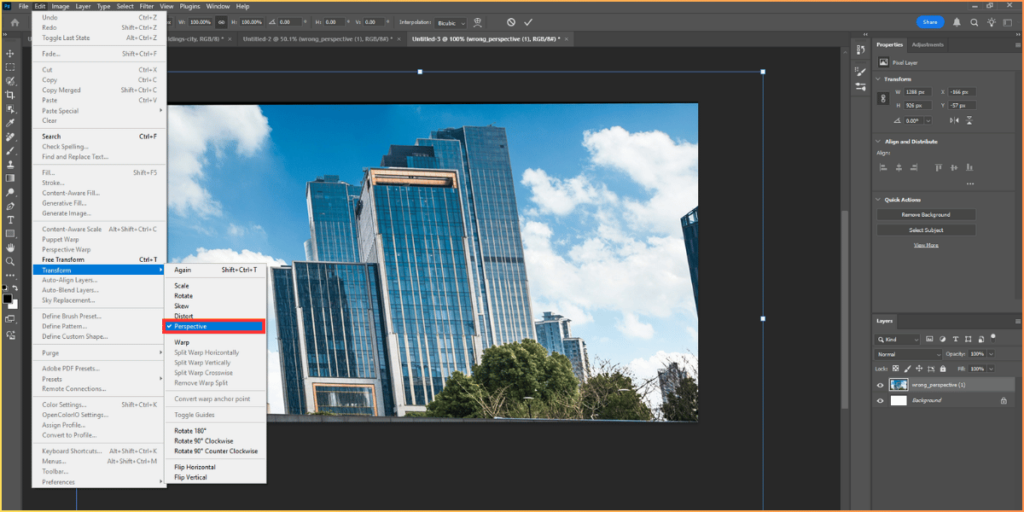
Use the Perspective Adjustment: Go to Edit > Transform > Perspective without making a choice. To make the lines straight, drag the top corners outward. See how the sides line up with the grid lines? That’s how correct perspective works in Photoshop.
Scale if You Need to: If the measurements feel off (for example, people may look shorter), go to Edit > Transform > Scale. To get back to normal heights, pull up or sideways.
For fine-tuning, use skew: Use Edit > Transform > Skew to fix angles that won’t bend. This changes places on its own.
Commit and Look Over: Press “Enter” to use. To hide the Grid, press Ctrl or Cmd +’and then zoom out. If it’s not right, press Ctrl/Cmd + T again. Smart objects let you undo this.
Tips for Advanced Photoshop
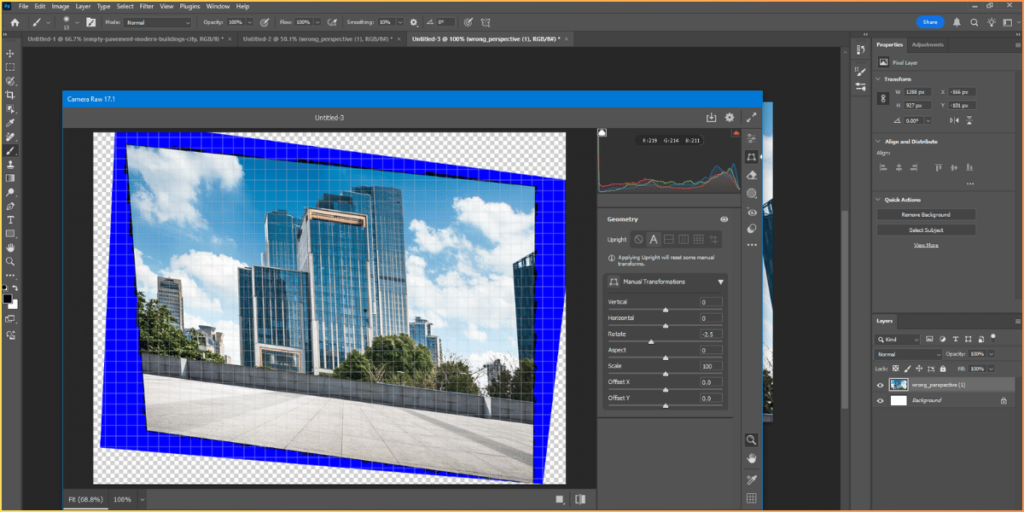
Raw camera Filters: Filter > Camera raw filter. Now set or rotate image through manual transformation option
Lens Correction Filter: Filter > Lens Correction > Auto. It handles barrel distortion along an angle.
Adaptive Wide Angle: For fisheye lenses, this tool (Filter > Adaptive Wide Angle) helps you to draw constraint strains for automatic fixes.
Content-Aware Fill: After correction, fill blank edges with Edit > Content-Aware Fill.
Pro Tip: Always correct perspective early in your workflow, and proper after RAW changes. Cropping comes final to keep away from recomposing mid-edit.
Let’s see what I mean. Imagine a picture of a brick wall with lines that aren’t straight. When you rotate and change the viewpoint, the bricks line up perfectly, which makes the subject stand out. This is something I’ve done for real estate shoots for clients, and it makes “meh” listings into must-sees.
You can get better at Photoshop perspective just by using this one trick. What if you want something free instead? Hugin comes in.
How to Correct Your Viewpoint with Hugin: A Free Alternative
Hugin may sound like a niche app, but it’s a best for fixing perspective when Photoshop seems like too much work or is too expensive. It works simply nicely with pictures that have lots of directly strains, like floor tiles or architectural features. It recalculates the photograph’s form based on manage factors to ensure it’s flawlessly aligned.
How to Begin with Hugin
Download and Install: Hugin can be downloaded and set up from its main website. It’s free and easy to use once you get the hang of it.
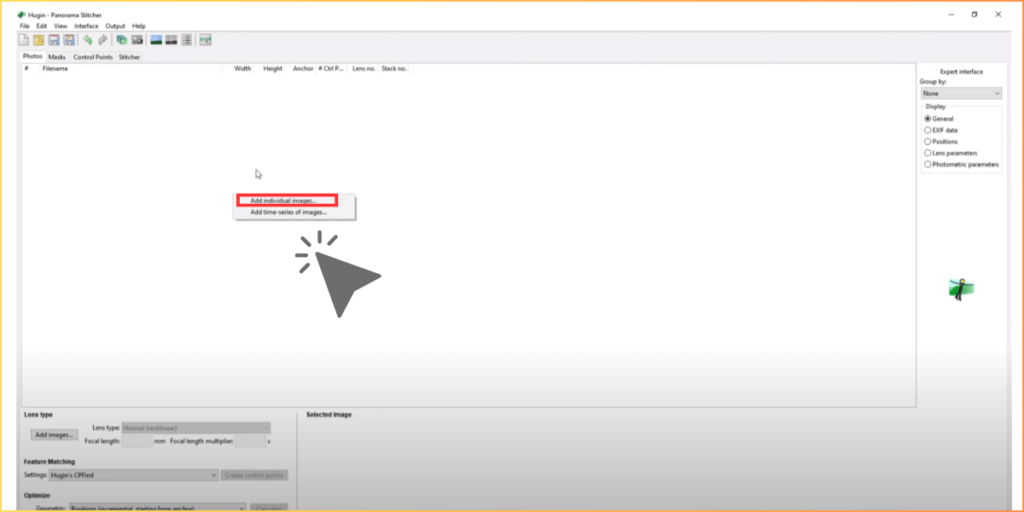
Load Your Image: Grab Hugin, select the Helper tab, and click “Load images…” Pick out a picture. If you don’t see any EXIF data, put a rough horizontal field of view (HFOV) of 50 degrees in the pop-up window.
Set Output Projection: Change the Projection setting to Rectilinear in the Stitched tab. This makes your output flat instead of round.
Putting in Control Points
Go to the Control Points Tab to look at views of your photo that are precisely the same. To make it fit, zoom in and activate “Auto fine tune” and “Auto upload.”
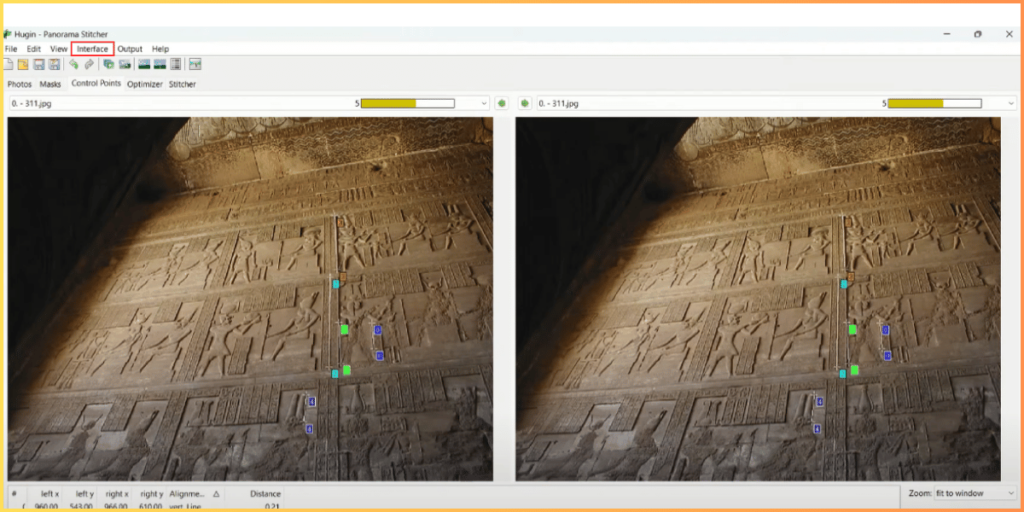
Place Vertical and Horizontal Points: To region a line, first click on one stop of a line in the left pane, then on the other cease inside the right pane. Hugin will automatically tell you if it’s horizontal or vertical; if not, you may select the mode manually.
Aim for 4 to 6 pairs of horizontal and vertical lines spread out across the picture. If you need to, zoom in to 100% and make the changes by hand.
To improve, go to the Optimizer tab. If you need to, start with “Positions (incremental, starting from anchor)” and then move on to “Positions, View, and Barrel.” Make changes and click “Optimize Now!”
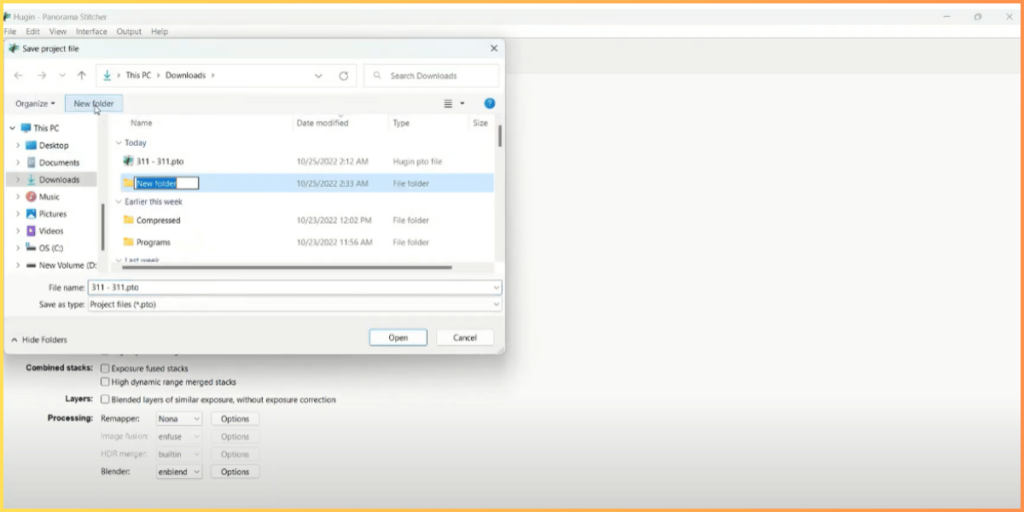
Finishing up and Exporting
For a quick look, press Ctrl or Cmd + P. Make changes if the lines aren’t straight.
Stitch and Save: Find the Field of View and the best size in Stitched again. To save, pick either PNG or TIFF, and then stitch.
Hugin really shines when it comes to fixing things like a wall painting that was shot at an angle. For one job, I used it on a picture of an old temple. The columns were perfectly straightened, showing details that the distortion had hidden.
Hugin lets advanced users calibrate lenses so that settings can be used again and again, or they can mix it with multiple images to make seam corrections. Even though it’s not as easy to use as Photoshop, the effects are just as good without the subscription fee.
Quick Fixes on the Go: Photo Perspective Correction Apps
Some people don’t have time to edit on their computers. Here’s where a photo perspective fix app comes in handy. These tools can quickly correct perspective issues with AI or simple buttons, making them great for social media or quick shares.
AI magic for easy editing with Autoenhance.ai

Autoenhance.ai stands out because it is very easy to use. You don’t need an account to upload a picture, and it will automatically fix any problems. Some features are:
- Automatic matching of the left and right sides.
- Results that look natural on both the inside and outside.
- The pros use batch processing.
When I tried it on a crooked picture of a room, the walls squared out and the room felt balanced. Real estate agents trust it because it makes listings look professional without them having to make any changes by hand.
Other Apps to Check Out
Get Snapseed for free. This Google app has a Perspective tool that lets you tilt, spin, and scale photos. Move the corners to make them line up.
Lightroom Mobile: Adobe’s app has Geometry tools that let you make guided straight-line fixes.
VSCO: Filters and subtle perspective fixes are built in.
Start with the app’s automobile mode to restoration the photo’s angle, and then fine-tune. These are extremely good for people who are simply starting due to the fact they make the method much less complex.
Problems that most people face and how to solve them
Perspective adjustment can be tricky, even if you have the best tools. How to deal with them:
- Over-Correction: Pictures can look fake if you pull too far. Always use a grid as a guide, and zoom out a lot.
- Loss of Resolution: Pixels that are stretched can make features less clear. You can work with high-resolution files and make them sharper after repair.
- Complex Scenes: For pictures of curves, like buildings with corners, use two or more tools together. For example, use Hugin for lines and Photoshop for masks.
- Lighting problems: Making changes could show that the lighting is uneven. Use editing layers to fix.
Work on different kinds of shots, like a product shot, a leaning tower, and an interior that is distorted. All of them teach something new.
The Before and After Examples in Real Life
As an example, think about the inside of a house. After: The room feels small because the walls lean in. After Photoshop fixed the perspective, the furniture is arranged better, making the room look better.
Or the front of a building in Hugin: The original has lines that come together, but the corrected form stands tall and straight.
In apps, you may quick take a photograph of a painting on the wall, and AI will fix it up now it’s prepared for Instagram.
These changes are not just quite to look at; in addition, they make the story better.
More advanced techniques: Going Further
Once you know the basics, look into:
- Multi-Image Stitching with Correction: Hugin lets you line up images and fix the perspective at the same time.
- 3D Modeling Integration: In Blender or SketchUp, you can use fixed pictures as textures.
- Lens Calibration: Tools like Lensfun give information that auto-fixes can use.
- Batch processing uses scripts in Photoshop or AI to do a lot of work at once.
For creative people, try intentionally distorting things, but know how to undo it.
How to Keep Things From Distorting in the First Place
Though changing your point of view is effective, avoiding problems is better:
- Use a stand to make sure your camera is level.
- Don’t tilt up; instead, move back and zoom in.
- To lessen the effects of wide-angle lenses, choose longer focal lengths.
- Modern cameras have levels built in that help you take straight shots.
When you add post-processing to these, you’ll get perfect results.
Putting It All Together: How to Get Perfect Perspectives
We’ve talked about a lot! You now have everything you need to correct perspective like a pro, from knowing distortion to getting hands-on help in Photoshop and Hugin and quick app fixes. Remember that practice makes perfect, so get some old pictures and try different things. It gets easier to understand as you play more.
What gives you the most trouble with perspective? Leave a note or a before-and-after picture. Have fun editing, and make sure your lines are always straight!
Read more blog
What Are Smart Objects in Photoshop? All You Need to Know
How to Increase Exposure in Photoshop: Step-by-Step Guide
8 Simple Steps to Perfect Colour Matching in Photoshop