Hey there! Anyone who’s done real estate photography knows this one big truth: lighting can make or break a listing. I’ve been snapping photos for years, from cozy little bungalows to huge estates, and I can tell you—good lighting is what turns a picture into something amazing and gets buyers excited. Whether you’re a pro, a real estate agent trying your hand at photography for the first time, or just a homeowner selling your place, picking the right lights for real estate photography is the secret to taking shots that really stand out!
2026 update: This guide has been refreshed for current reader expectations, search intent, and practical decision-making. Always confirm prices, rules, platform features, and availability before making a final choice.
In this tutorial, I am going to teach you everything I know about lighting in real estate photography. We will cover the equipment you will be using, how to get the best shot, and useful tips to make your listings get noticed in 2026’s tight market. My wish is that you will take photos that are so appealing that buyers will ask for a showing. Let’s get started!
Table of Contents
Why Lighting Matters in Real Estate Photography
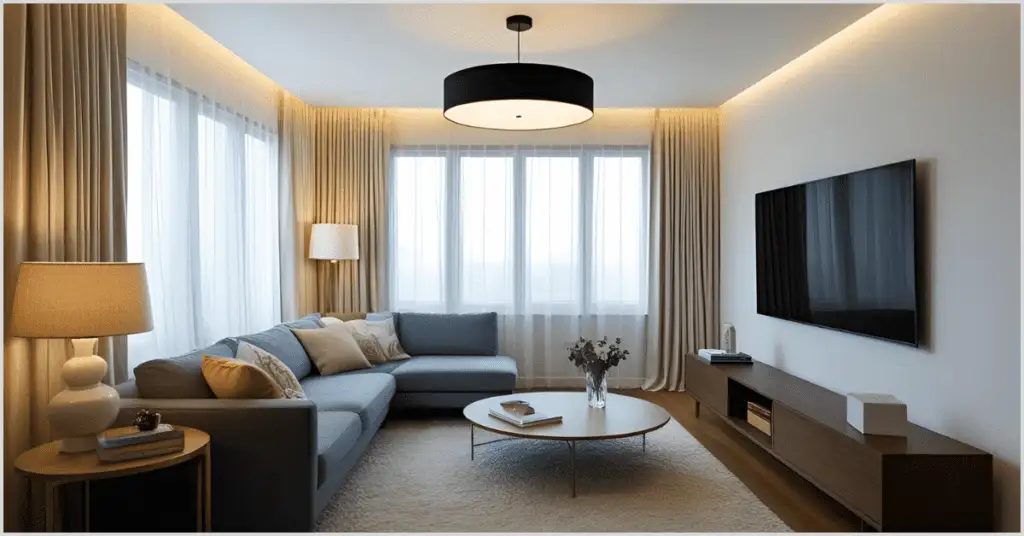
Imagine this: you enter a house with low, low-slung lights casting creepy shadows on the walls. Not exactly the ambience that yells “dream house,” is it? Now imagine the same space filled with soft, warm light spilling down on shining hardwood floors and a warm fireplace. That’s lighting magic—it sets the atmosphere, shows off a home’s personality, and makes buyers swoon before they’ve even entered the door.
That is why lighting is very important to real estate photography:
- Showcases Details: From delicate crown moulding to smooth kitchen countertops, the right lighting illuminates all the details.
- Enhances Mood: Bright, airy spaces feel welcoming, but dark spaces feel cold or cramped.
- Improves Clarity: Nobody wants fuzzy, grainy photographs. Proper lighting makes for crisp, clear images.
- Boosts Online Appeal: Listings that are better photographed receive more traffic on websites like Zillow or Redfin—fact.
In 2026, buyers demand nothing less than photoshoot-approved images. Let’s explore lighting solutions that will make it possible for you to deliver the same.
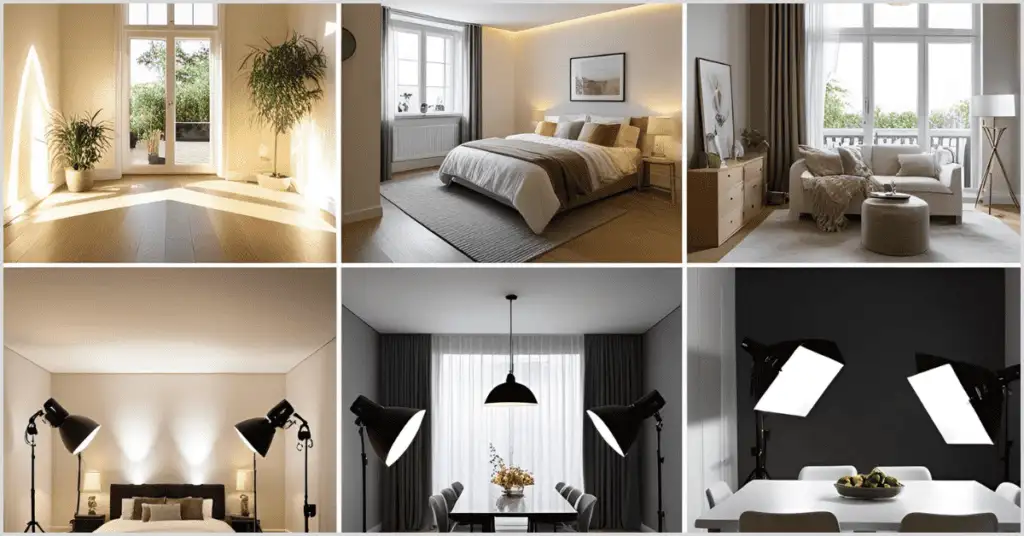
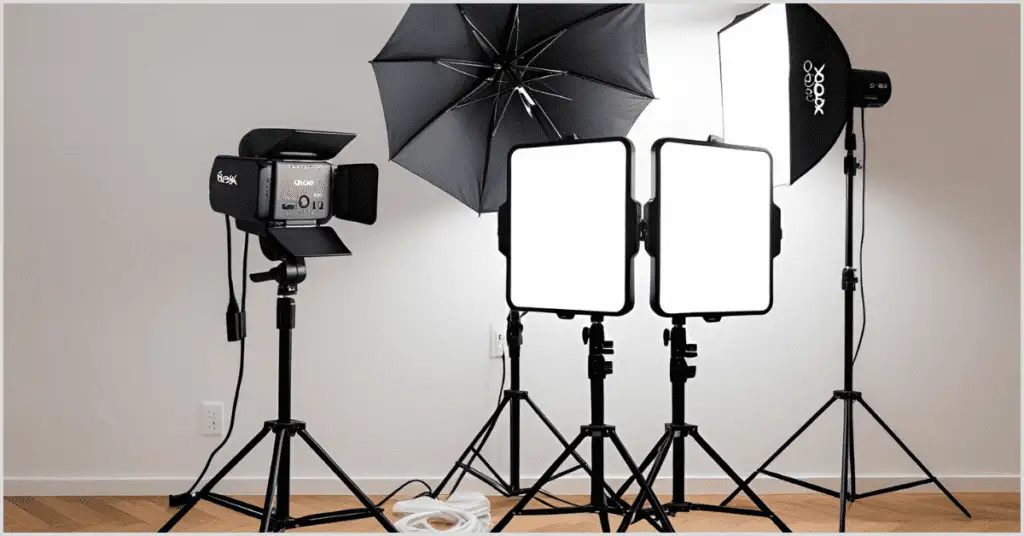
Types of Lights for Real Estate Photography
I’ve used all sorts of lights over the years, from good studio rigs to whatever available natural light I could get from a window. Each has benefits and drawbacks, and the best for the job at hand depends on the job at hand. What follows is a rundown of the most used types of light for real estate photography, including my preferences (and dislikes).
1. Natural Light:
Light pouring in through a window is lovely. It is warm and natural, and it reveals a house as buyers will actually see it. I have photographed homes without using any flash, and the effect can be incredible.
Pros:
- It’s free—who doesn’t love that?
- Gives photos an authentic, lived-in feel.
- Perfect for daytime shoots when you want that golden glow.
Cons:
- Mother Nature’s unpredictable. Clouds roll in, and your perfect light’s gone.
- A harsh midday sun can create ugly shadows or blow out highlights.
- No windows? No dice.
Tips for Using Natural Light:
- Time your shoot for a golden hour—that magical time just after sunrise or before sunset when the light is soft and warm.
- Use sheer curtains to tame harsh rays.
- Play with your camera’s settings (think low ISO and fast shutter speed) to keep things balanced.
2. Continuous LED Lights
Continuous LED lights are a staple in real estate photography due to their versatility and ease of use. These lights stay on constantly, allowing you to see the lighting effect in real-time.
Pros:
- You can tweak brightness and colour temperature on the fly (warm for cosy, cool for modern).
- They’re energy-efficient, so I’m not sweating the electric bill.
- Tons of affordable options for beginners.
Cons:
- Big rooms might need multiple units, which adds to the setup.
- Some cheaper models get hot if you leave them on too long.
- It’s not as portable as a flash.
Top Picks for 2026:
- Godox SL-60W: Solid power for the price, and it plays nice with softboxes.
- Aputure Amaran 100D: Compact but punches above its weight.
- Nanlite Forza 60: My pick for tight spaces.
3. Speedlights (On-Camera Flash)
Speed lights are those little flashes you pop onto your camera (or use off-camera with a trigger). I started with these years ago because they’re so darn portable, and I still keep one in my bag for quick jobs.
Pros:
- Small enough to toss in a backpack.
- Awesome for bouncing light off walls or ceilings to soften the glow.
- It’s way cheaper than big studio lights.
Cons:
- Not enough juice for huge spaces.
- You’ve gotta know your stuff to avoid that “deer in headlights” look.
- Batteries die fast if you’re shooting all day.
Tips for Using Speedlights:
- Bounce the flash off a white ceiling for a natural spread.
- Slap on a diffuser for extra softness.
- Use a wireless trigger to move the flash wherever I need it.
Top Picks for 2026:
- Canon Speedlite 600EX II-RT: Never lets me down.
- Nikon SB-5000: A Nikon shooter’s best friend.
- Godox V1: Budget-friendly with a cool round head for better light.
4. Studio Strobes (Monolights)
When I’m shooting a luxury listing, I bring out the heavy hitters—studio strobes. These are powerful flashes that can light up an entire mansion like it’s a movie set. They’re not cheap, but they’re worth it for high-end gigs.
Pros:
- Crazy power for massive rooms.
- Total control over every beam of light.
- Works with all sorts of modifiers like softboxes or grids.
Cons:
- Pricey. For example, “Ouch, my wallet” is pricey.
- Bulky—don’t expect to lug these around easily.
- Takes some know-how to set up right.
Top Picks for 2026:
- Profoto B10 Plus: Pricey but so easy to use.
- Godox AD400 Pro: A steal for the power.
- Elinchrom ELC 500: Built like a tank.
5. Softboxes and Umbrellas
Okay, these aren’t lights, but they’re game-changers. Soft boxes and umbrellas take your harsh light and make it buttery smooth, cutting down on shadows that scream “amateur.”
Pros:
- Turns any light into a soft, flattering glow.
- Works indoors or out.
- Comes in sizes for every space.
Cons:
- It can be a pain to set up in cramped rooms.
- Adds weight to your gear bag.
Tips for Using Modifiers:
- Softboxes are used for precise lighting in kitchens or living rooms.
- Umbrellas for fast setups in small spaces.
- Always use a sturdy stand to keep things safe.
6. Ring Lights
Ring lights aren’t my first choice for real estate, but they’ve got their moments—like when I’m shooting a tiny bathroom or a detail shot of a fancy fixture. They give off this super-even light that’s hard to beat in tight spots.
Pros:
- No shadows, period.
- Lightweight and dead simple to use.
- Doubles as a video light for virtual tours.
Cons:
- Not great for big rooms.
- It can make shiny surfaces look weird with those ring-shaped reflections.
Top Picks for 2026:
- Newer 18-Inch Ring Light: Cheap and cheerful.
- GVM 5600K Ring Light: Easy to pack for on-the-go shoots.
How to Pick the Perfect Lights for Real Estate Photography
I’ve been there—standing in the camera store, overwhelmed by choices, wondering what’s worth the cash. Here’s how I break it down:
- Budget: If you’re just starting, grab a speedlight or some LEDs. Pros might splurge on strobes.
- Property Size: Small condos? Speedlights are fine. Mansions? Strobes or big LEDs.
- Skill Level: LEDs are forgiving for newbies. Strobes need some practice.
- Portability: Shooting five houses in a day? Stick with speed lights or compact LEDs.
- Lighting Style: Want bright and airy? Lean on natural light. Going for dramatic? Strobes with modifiers.
For most gigs, I mix natural light, a couple of speed lights, and an LED panel. It’s versatile enough to handle anything from a studio apartment to a suburban sprawl.
Lighting Techniques for Real Estate Photography
Gear’s only half the story. Knowing how to use it is what makes your photos stand out. Here are my favourite techniques for lighting real estate like a pro:
1. Bounce Flash for Soft Lighting
Early on, I learned that pointing a flash straight at a room is a rookie mistake—it’s harsh and flat. Bouncing light off a ceiling or wall spreads it out, making everything look soft and natural.
- How I Do It: Aim my speedlight at a white ceiling at about a 45-degree angle. If there’s a reflector card, I use it to push more light forward.
- Perfect For: Cozy bedrooms or small living rooms.
2. Layered Lighting for Depth
One light source? Boring. I like to mix things up—sunlight through windows, a table lamp’s warm glow, maybe a softbox in the corner. It adds dimension and makes rooms feel alive.
- How I Do It: Start with whatever natural light I’ve got, then add LEDs or strobes to fill in dark spots. I’ll flip on any cool fixtures the house has for extra charm.
- Perfect For: Open kitchens or great rooms.
3. HDR Photography with Ambient Light
Sometimes, you’ve got a room with bright windows and dark corners that just won’t play nice. That’s when I lean on HDR—shooting a few exposures and blending them later to get everything looking perfect.
- How I Do It: Set up on a tripod, shoot three shots (dark, normal, bright), and merge them in Lightroom. I’ll add a soft LED if the shadows are stubborn.
- Perfect For: Rooms with big windows or weird contrast.
4. Window Pull Technique
Nothing’s worse than a photo where the window’s a blinding white square. The window pull trick fixes that, balancing the inside and outside so buyers can see the view.
- How I Do It: Stick a strobe outside to light up the yard, then match the indoor lights to the same brightness. Blend the shots in the post for a seamless look.
- Perfect For: Lakefront homes or city penthouses.
5. Light Painting for Large Spaces
This one’s a bit artsy, but it’s a lifesaver for big, dark spaces. I’ll use a long exposure and “paint” light into the scene with a handheld LED or flash.
- How I Do It: Set my camera to a 20-second exposure, then walk around waving light at furniture or corners that need a boost.
- Perfect For: Huge living rooms or creepy basements.
Must-Have Gear to Round Out Your Setup
Lights are just the start. Here’s what else I keep in my bag to make every shoot smooth:
- Tripod: Keeps my camera rock-steady for long exposures or HDR.
- Light Stands: Holds my lights or softboxes without tipping over.
- Reflectors: Bounces light into shadows without extra gear.
- Diffusers: Softens my lights for that dreamy look.
- Wireless Triggers: Let me fire off-camera flashes from anywhere.
- Gels: Tweaks my light’s colour to match the room’s vibe.
Setting Up Lights for Different Rooms
Every room’s got its personality, and lighting needs to match. Here’s how I tackle the big ones:
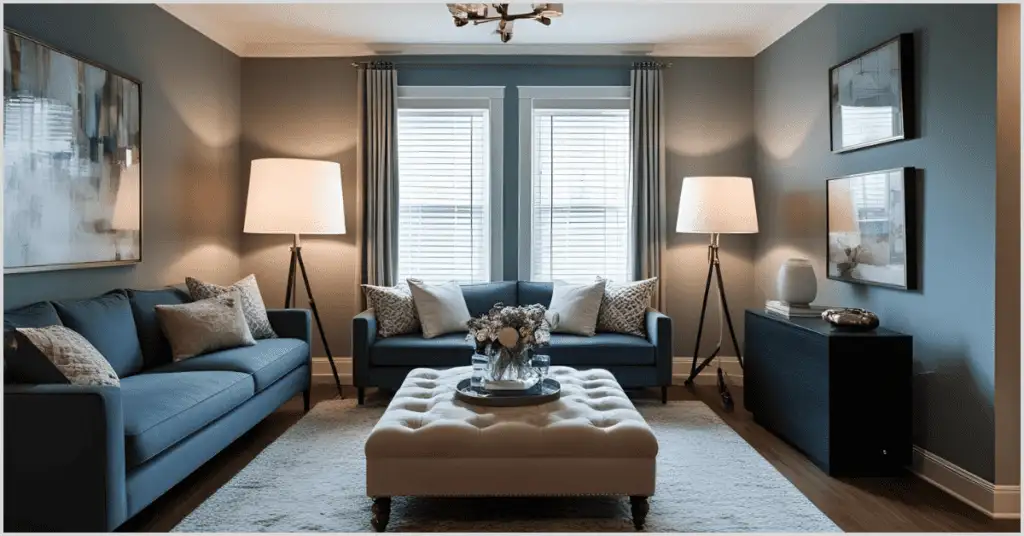
1. Living Rooms
- The Vibe I’m Going For: Warm and welcoming, like a hug.
- Setup: Natural light as the star, with a bounced speedlight to fill in. I’ll turn on any cool lamps for extra cosiness.
- Trick: Angle a softbox toward the fireplace to make it the hero.
2. Kitchens
- The Vibe I’m Going For: Clean, bright, and modern.
- Setup: Bright LEDs at 45 degrees to avoid countertop glare. Strobes for big kitchens with islands.
- Trick: Light up under cabinets to show off that fancy backsplash.
3. Bedrooms
- The Vibe I’m Going For: Restful and intimate.
- Setup: Bounced flash for soft light, maybe a warm LED to mimic sunset vibes.
- Trick: Keep bedside lamps on—they scream “home.”
4. Bathrooms
- The Vibe I’m Going For: Spa-like and squeaky clean.
- Setup: Ring light or small softbox for even coverage. No harsh shadows on the tiles.
- Trick: Add a subtle backlight to make glass showers sparkle.
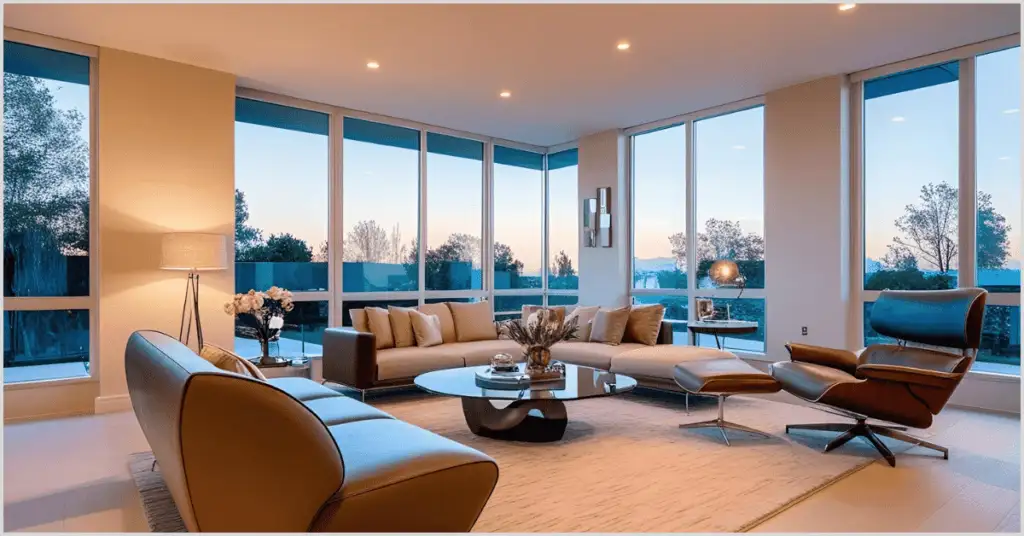
5. Exteriors
- The Vibe I’m Going For: The curb appeal that stops scrollers.
- Setup: Golden hour for natural magic, or strobes at twilight to light up the facade.
- Trick: Toss some light on landscaping to seal the deal.
Post-Processing Tips for Perfect Lighting
Even my best shots need a little love after the shoot. Here’s how I make lighting pop in editing:
- Adjust Exposure and Contrast: Brighten up dark spots and tame overblown highlights.
- Correct White Balance: No one wants a blue-tinted kitchen. I match colours to reality.
- Blend Exposures: For HDR or window pulls, I stack shots for perfection.
- Remove Glare: Windows and shiny floors get a quick cleanup.
- Enhance Details: Boost textures like wood grain, but don’t go overboard.
Lightroom and Photoshop are my go-to, but free tools like GIMP work in a pinch.
Common Lighting Mistakes to Avoid
I’ve made my share of mistakes—here’s what I’ve learned to avoid:
- Overusing Flash: Looks like a crime scene. Diffuse or bounce instead.
- Ignoring Ambient Light: Those built-in fixtures add character—use ‘em.
- Mixed Color Temperatures: Makes photos look wonky. Stick to one vibe or gel your lights.
- Underexposing Windows: Kills the view. Balance exposures or use a strobe outside.
- Skipping Post-Processing: Straight-out-of-camera shots rarely cut it. Post is your friend.
Best Practices for Real Estate Photography Lighting in 2026
Here’s the playbook I follow to keep my photos ahead of the pack:
- Scout First: Check out the house beforehand to plan your lighting game.
- Buy Smart: Good gear saves time and headaches.
- Go Manual: Dial in your camera settings for total control.
- Stay Fresh: Try new stuff like smart LEDs or AI editing tools.
- Keep It Cohesive: Use the same lighting style across all shots for a polished listing.
Top Lighting Kits for Real Estate Photography in 2026
If you’re ready to gear up, here are my favorite kits for every level:
- Starter Kit ($200–$500):
- Godox V860III Speedlight
- Neewer LED Panels (2-pack)
- Couple of light stands
- Basic umbrella
- Mid-Level Kit ($500–$1,000):
- Godox AD200 Pro Strobe
- Aputure Amaran 100D
- Two softboxes
- Wireless Trigger
- Pro Kit ($1,000–$2,000):
- Profoto B10 Plus
- Godox AD400 Pro
- Big softboxes
- Heavy-duty stands
How to Optimize Your Real Estate Photography for Online Listings
Great lighting gets you halfway—here’s how to make sure your photos kill it on listing sites:
- High-Res Rules: Shoot for 2,000–4,000 pixels wide so details stay crisp.
- Compress Smart: Shrink file sizes with Tiny PNG to load fast.
- Tag It: Add keywords like “real estate photography” and the city to file names.
- Mix It Up: Wide shots, close-ups, exteriors—give buyers the full picture.
- Go 3D: Pair photos with virtual tours for next-level engagement.
Conclusion:
If there’s one thing I’ve learned, it’s that lights for real estate photography are your secret weapon. They turn average shots into scroll-stopping images that get buyers excited. Whether you’re working with sunlight, a cheap speedlight, or a full studio setup, the right approach can make any home look like a million bucks.
In 2026, the bar’s higher than ever—buyers want visuals that feel real and inviting. So grab your lights, play with these techniques, and start creating photos that sell. Got a shoot coming up? Try one of my tips and let me know how it goes—I’d love to hear your wins.
Quick Q&A for Real Estate Lighting
- What’s the best light for real estate photography?
Depends on the gig, but I’d say a mix of natural light and speed lights for versatility. - Do I need pricey lights to get good shots?
Nope! A $100 speedlight and some know-how can work wonders. - How do I stop harsh shadows?
Bounce your flash or use a softbox—keeps things nice and soft. - Can I just use sunlight?
Totally, but artificial lights give you control when the sun’s not cooperating. - When’s the best time to shoot?
Golden hour, hands down. Early morning or late afternoon for that dreamy light.