
Want to know best camera settings for real estate photography? All there is to it is mastery of a few adjustments: sharp images, proper light, and professionalism. The correct settings can make all the difference as you display a property. Within this guide, we’ll help break down the essential settings for capturing beautiful real estate photography indoors or outdoors.
This in-depth guide will explain everything you need about camera settings, lighting, techniques, and tips for taking incredible real estate photos. We will also review the essential tools and strategies professional real estate photographers use to create captivating images that attract buyers.
Table of Contents
1. Camera Settings for Real Estate Photography
AV Mode (Aperture Priority Mode)
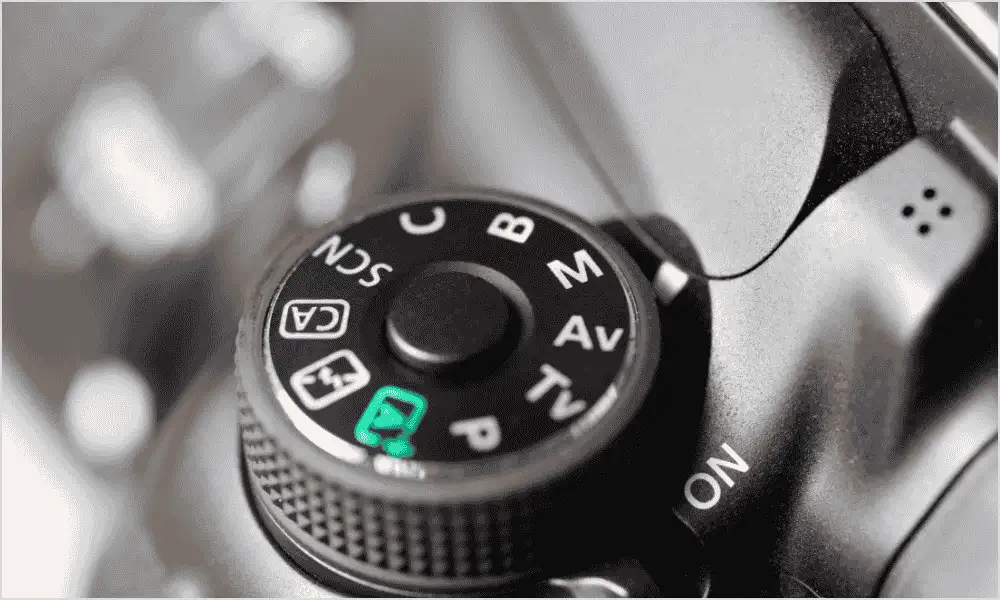
When shooting real estate photos, AV Mode- Aperture Priority is among the first settings to consider. This mode allows you to control the aperture, or the size of the lens opening, as the camera automatically adjusts the shutter speed to achieve proper exposure, which is very useful in shooting indoors where lighting can’t be consistent.
By choosing AV Mode, you ensure that the background and the foreground are in focus. It makes images sharp and detailed, essential in real estate photography.
Aperture – F8
The aperture setting will also regulate the amount of light entering the lens and influence the depth of field. For real estate photography, f/8 is often a good aperture setting. As such, at f/8, the depth of field is wide enough such that both the foreground and background are in focus. This means that rooms or wide exterior shots can be taken relatively quickly.
A wider aperture, like f/2.8, can blur too much of the image, which is unsuitable for real estate photography, as images must be very sharp. Conversely, an aperture that is too small, like f/16, reduces sharpness due to diffraction.
ISO 100
When shooting real estate, the lowest ISO setting is best, mainly at ISO 100. This allows you to produce the best quality image with little noise and high quality, with the sharpness and cleanliness of photos without that grain resulting from higher ISO values.
However, you may need to bump it a notch in low-light conditions, such as when shot indoors at night, just to get proper exposure; yet, you want to use the lowest ISO number as much as possible to prevent grainy images.
Shutter Speed – Determined by the Camera
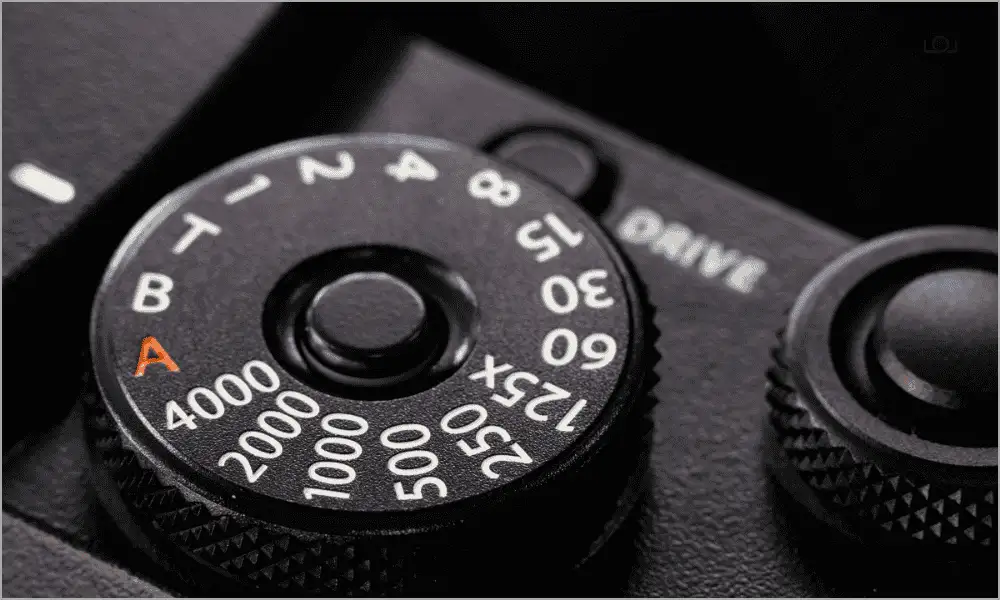
The shutter speed is when your camera’s sensor is exposed to light. In AV mode, the camera will automatically determine the best shutter speed based on your aperture setting and the lighting conditions.
For real estate photography, the shutter speed should be between 1/60th and 1/125th of a second if shooting indoors with a tripod. A faster shutter speed would cause underexposed images, while a slower shutter speed may result in motion blur, especially in handheld shots.
Remote Release / Self-Timer to Activate the Shutter
The remote shutter release or a camera’s self-timer function would be the best option to eliminate camera shake and get the sharpest image. That would help minimize any movement the shutter button brings, especially when using slower shutter speeds or shooting from a tripod.
AF-One Shot Mode
In One Shot autofocus mode, it focuses on the subject and locks that concentrate there. This is particularly useful in taking real estate photos where perfect focus is required, especially when doing room interiors or architectural details.
If autofocus is in use, focus on a point essential to the image, such as a door frame or corner of the room, to ensure the whole space is in focus.
Auto Exposure Bracketing – Set to +/- 2 Stops
Auto Exposure Bracketing (AEB) is a setting that automatically takes a series of shots at different exposure levels. If you set AEB to +/- 2 stops, you will capture a range of exposures for each shot, which you can later blend in post-processing to create an HDR image.
The mode can help expose all areas of the shot regardless of whether it is bright, like windows, or a deeper part of the room, providing a well-exposed result.
Drive Mode – Continuous Shooting
Continuous or burst shooting is a drive mode for photographing rooms. This would take a series of exposures in rapid succession if the shutter button is held down; it is excellent for grabbing multiple angles of a room or exterior in as little time as possible.
This also has the advantage of making its adjustments whenever the light changes in the frame, like during sunset or on a cloudy day. It gives you different choices to pick from later.
Image Recording – RAW
The best quality images are shot in RAW format. RAW files preserve the image data from the camera’s sensor, which gives more flexibility to edit. You’ll have more control over exposure, white balance, and colour adjustments during post-processing without losing image quality.
JPEG files, on the other hand, are compressed, meaning some of the image data is lost, which can make post-editing much more difficult.
Auto White Balance
Auto White Balance (AWB) generally does a good job adjusting the colour temperature for real estate photography. However, in certain lighting conditions (like mixed lighting from both natural light and artificial lighting), AWB can sometimes produce undesirable colour casts.
You should manually set the white balance to ensure accurate colour, especially when the lighting condition is unflattering. You may use the white or grey balance to adjust the camera’s color balance.
Metering – Evaluative
Generally, most cameras have a default setting called evaluative metering. Thus, evaluative or matrix metering is well suited to taking a real estate photograph, evaluating the scene, and using the appropriate exposure settings. A balancing factor in this exposure control is observed since most rooms include a specific part that’s light or not bright.
If you photograph a scene with tricky lighting, such as rooms with bright windows, you may need to make exposure adjustments using exposure compensation.
Camera on a Tripod
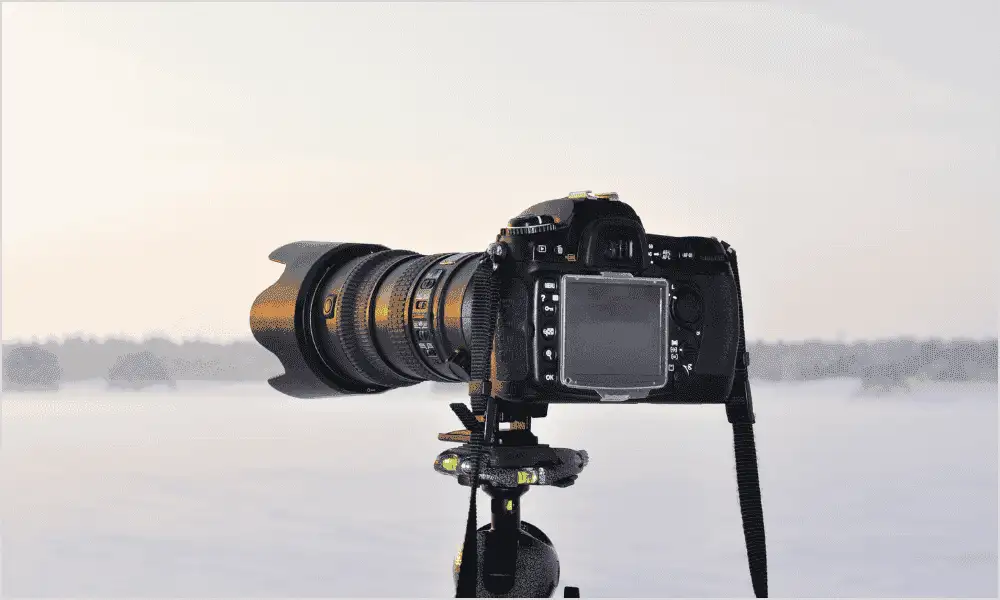
No discussion is possible around real estate photography and not having a tripod. Using a tripod prevents any blur that may appear due to camera shake as your camera becomes steady. In indoor shooting, where the requirement for higher exposure times to capture clear images is mandatory because light levels are low.
A firm tripod also increases consistency for you since you capture more shots with the same angle, resulting in more uniform images.
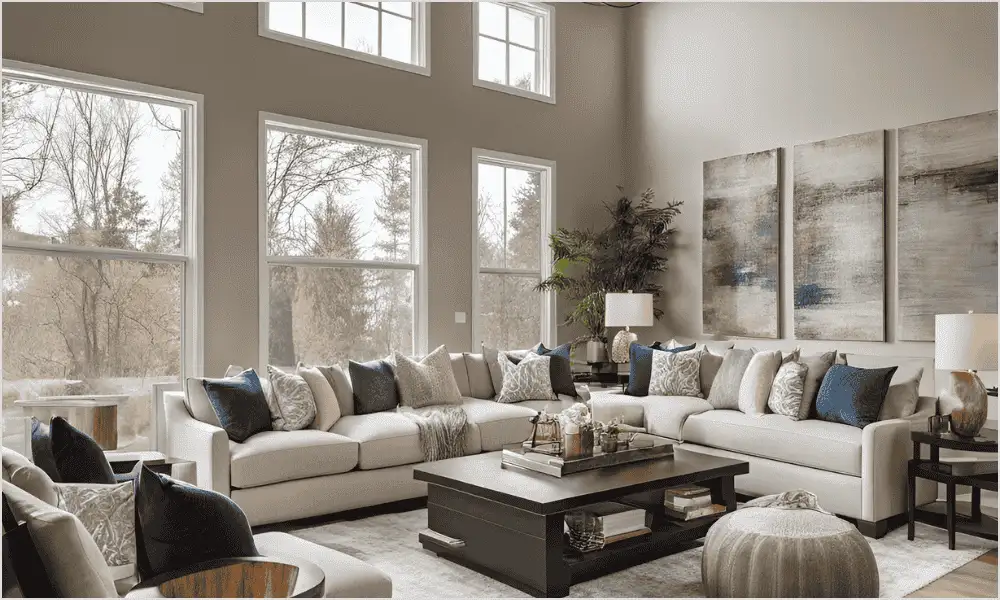
2. Characteristics that make for an excellent real estate photo
An ideal real estate photo showcases the good about a property while displaying a candid yet accurate portrayal of the residence. Such characteristics include the following.
- Sharp Focus: A well-composed real estate photo should be sharp throughout the frame without noticeable blur or distortion. Using a small aperture like f/8 and shooting at a proper exposure will help maintain sharpness across the image.
- Proper Exposure: A balanced exposure makes dark and bright areas visible. Using AEB and HDR techniques can help achieve this.
- Good Lighting: Good lighting is key to making the property feel welcoming. Natural light is fantastic, but interior lights are essential when shooting indoors.
- Wider Angles: This type of photography must also give a sense of space. Wider angle lenses, ideally between 14mm and 24mm, can allow expansive views, though again, avoid extreme wide angle use as it can cause distortions.
- Clean and Clear: The space should be free of clutter, and the images should be crisp and clear, giving the viewer a realistic sense of the property’s layout.
3. What Do You Need for Perfect Real Estate Photos?
To get perfect real estate photos, you will need the following tools and gear:
- Camera (DSLR or Mirrorless)
- Wide-Angle Lens (14mm to 24mm)
- Tripod
- External Flash or Light Source (for interior shots)
- Remote Shutter Release or Self-Timer
- RAW Image Editing Software (such as Adobe Lightroom or Photoshop)
- Professional Editing Software for HDR and Image Stacking
4. Camera Settings for Shooting Indoors
(A) Camera Settings for Rooms that Are Not Dark
If the room you are photographing is bright, then you can apply these:
- Aperture: f/8
- ISO: 100
- Shutter Speed: 1/60 to 1/125 sec
- White Balance: Auto or Custom (depending on the light)
- Metering Mode: Evaluative
(B) Camera Settings for Rooms That Are Dark
You’ll have to change the following for darker rooms:
- Aperture: f/8
- ISO: 400 to 800, depending on how much light you have
- Shutter Speed: Slow it down to around 1/30 to 1/60 sec; use a tripod
- White Balance: Auto or Custom
- Metering Mode: Evaluative, but you can add exposure compensation
5. Camera Settings for Shooting Outdoors

(A) Camera Settings for a Sunny Day
Use these settings for a bright sunny day:
- Aperture: f/8 to f/11
- ISO: 100
- Shutter Speed: 1/125 sec or faster
- White Balance: Auto
- Metering Mode: Evaluative
(B) Camera Settings at Night
For nighttime or twilight photographs:
- Aperture: f/8 to f/11
- ISO: 800 to 1600
- Shutter Speed: 10-30 sec (prolonged exposure to collect the light)
- White Balance: Custom for tungsten or warm lighting, depending on the scene’s ambient light.
- Metering Mode: Evaluative
For night photography, especially in an exterior shot at twilight or nighttime, longer shutter speed shots will be needed to capture ample lighting. A tripod becomes vital to avoid camera shakes due to longer exposures. Lastly, a remote shutter release or self-timer may be employed to reduce any slight blurring from the moment when the shutter button of your camera is pressed.
6. The Best Time to Shoot to Get Perfect Lighting in Photos
Lighting is the one thing that matters most in real estate photography, and knowing when to shoot is essential. The time of day can make a massive difference in the quality of your photos and how the property is perceived.
Golden Hour is either early morning or late afternoon
The “golden hour” is when the sun is rising or setting. This time of day offers warm, soft light that could make your photos more inviting. During this time, the sun’s angle casts flattering shadows, adding depth to the property’s features. This is the best time for exterior and interior shots if you want to capture the home’s exterior with warm, soft sunlight.
Blue Hour (After Sunset or Before Sunrise)
The “blue hour” is just before sunrise or after sunset, when the sky turns deep blue and natural lighting has a soothing effect. It is an ideal time for twilight shots or capturing properties that are well-lit in the evening. This contrast of the darkening sky and lights in the house adds drama and elegance to your real estate photos.
Midday Sun
Even though the mid-day sun can be rather harshly creating blown-out highlights and shadows at times, it might still work depending on the exterior shot needed – perhaps shooting a property with enough foliage around it or shots of a pool or substantial garden. In any event, you must shoot during that time; HDR might assist in balancing out your exposure among bright skies and dark, shadowy areas.
Overcast Days
The sky helps distribute light evenly on cloudy days, so shots will be softer with fewer prominent shadows. This is good for those who want to get bright shots without using additional lights on location. But on those foggy days, colors get a bit muted, making you need to edit into something warmer and brighter as well.
7. Why Good Real Estate Photos Are Important
Good real estate photos could attract the buyer and thus make a great first impression. Nowadays, many buyers opt to find their desired properties over the internet. Listings that have fantastic photos are quite noticeable and have a better probability of receiving more questions and visits.
Here are the importance of good real estate photography to you:
- First Impressions Matter: The first thing people looking to buy notice is pictures. A listing with professional, good images shows the property is cared for and worth their time. Features: Good photos highlight the best parts of the property, such as large rooms, nice gardens, or special building details. This helps possible buyers visualize themselves living there.
- Increased Click-Through Rate: Professional photos in listings increase the clicks of a real estate website. The more clicks, the more exposure to the home and, consequently, the higher the number of potential buyers.
- Faster Sales: Quality photos sell homes faster than poor or average photos. Research has shown that properties with great images sell 32% faster than those with poor imagery.
- Higher Price Perception: Buyers tend to perceive houses with good pictures as being more expensive or worth more money than houses in the same neighbourhood that may have the same listing price. Quality pictures reinforce value.
9. What is Exposure?
Exposure is the quantity of light that falls on the image sensor and determines whether a frame is going to be light-toned or dark-toned when shot. This depends mainly on the aperture, shutter speed and ISO of the camera.
- Overexposure occurs when too much light hits the sensor, causing the highlights to be washed out and lose detail.
- Underexposure occurs when too little light hits the sensor, causing the image to be too dark and obscuring details in the shadows.
For real estate photography, you want to balance the exposure so that even brighter areas, such as windows and less-lighted rooms, are well exposed. Use the techniques of exposure bracketing and HDR photography to capture the whole range of lighting in the scene. In this way, you may combine several exposures into a well-lit image.
10. Take advantage of Professional Real Estate Photo Editing Service
Even if you take great photos, the post-processing is where you can bring out the best in your images. Professional photo editing can make colours pop, correct exposure issues, and even remove distracting elements from the scene.
Some everyday edits in real estate photography include:
- Colour Correction: Adjusting the white balance and saturation to make the colours pop and look more natural.
- Exposure Adjustment: Fine-tuning the exposure to bring out details in shadows and highlights.
- Sky Replacement: Replacing a dull sky with a more dramatic one, especially for exterior shots.
- Window Pulls: Bringing out the details in window views by replacing blown-out windows with proper exposures.
If you need more experience in photo editing, outsource it to a professional real estate photo editing service. It can turn the raw images into ready-for-the-market photos to woo buyers.
Conclusion
Real estate photography is a subject where technical knowledge must be merged with creativity. The knowledge of getting a camera right, especially focusing on the right aperture, ISO, and shutter speed will ensure that photos taken help sell the property.
From indoor to outdoor shots, mastering settings like Auto Exposure Bracketing (AEB), using a tripod for stability, and understanding how to balance the exposure triangle will help you deliver stunning images. Additionally, professional editing services can take the photos to precise perfection.
High-quality photos invest in your success as a real estate photographer, helping clients sell properties faster and for higher prices. Keep experimenting, refining your technique, and paying attention to the details that make a difference—lighting, composition, and post-processing—and you’ll soon see the difference in your results.
Settings are only the first half of the final image
Good camera settings give the editor cleaner files to work with. Bracketed exposures, stable framing, correct white balance, and sharp source images make HDR blending and window pulls more natural.
For shoots where the lighting range is difficult, pair careful capture with a professional HDR editing workflow.