How to Take a Photo Without Shadow: Pro Lighting Secrets
The picture is ruined or enhanced by the presence of the shadow. The proper way to eliminate shadows while photographing is to become a master of the technique and get the appropriate equipment and the correct settings to be able to create a shadow-free and clean picture.
A product photographer, a portrait shooter, or someone who captures images for online content would be the most principled and deserving of being a master of their trade. Speaking for the objectives of this guide, we will discuss all the information about how to take a photo without shadow by using the mentioned lighting techniques, camera settings, and editing tips.
Table of Contents
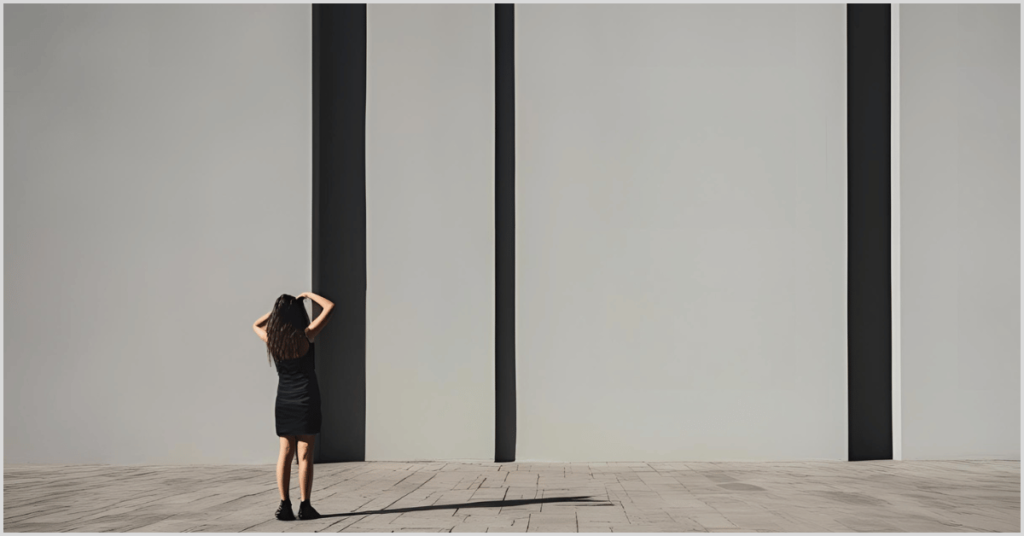
Understanding Shadows in Photography
However, fundamental truths about what they are and how they are formed are unclear. To learn to remove them, what if we reverse the approach and first find the base knowledge of a shadow, what it is, and how it is shown? A shadow is formed when a subject obstructs the light source and prevents the light from illuminating particular parts of the scene. The light is a crowning factor, and pointing to different places can change the shadows.
- The type of light source: Natural and artificial light sources produce different shadows.
- The light angle that hits the subject: A light source located from the side or enough downward cast long, and the ones whose details are fully pronounced keep track of their shadows, whereas it placed above only gives a small soft shadow.
- The distance from the light source to the subject: Light sources close to the subject are more efficient in creating the effect of sharp and clear shadows, while those distant from it diffuse the shadows.
- The reflective surfaces found in the environment: Light can be lost or increased by the reflective surfaces that bounce light in the scene.
By controlling these elements, you are likely to prevent the appearance of shadows in your pictures. Getting into the differentiating configurations to arch over the concept will be interesting.
How to Take a Photo Without Shadow: The Best Techniques
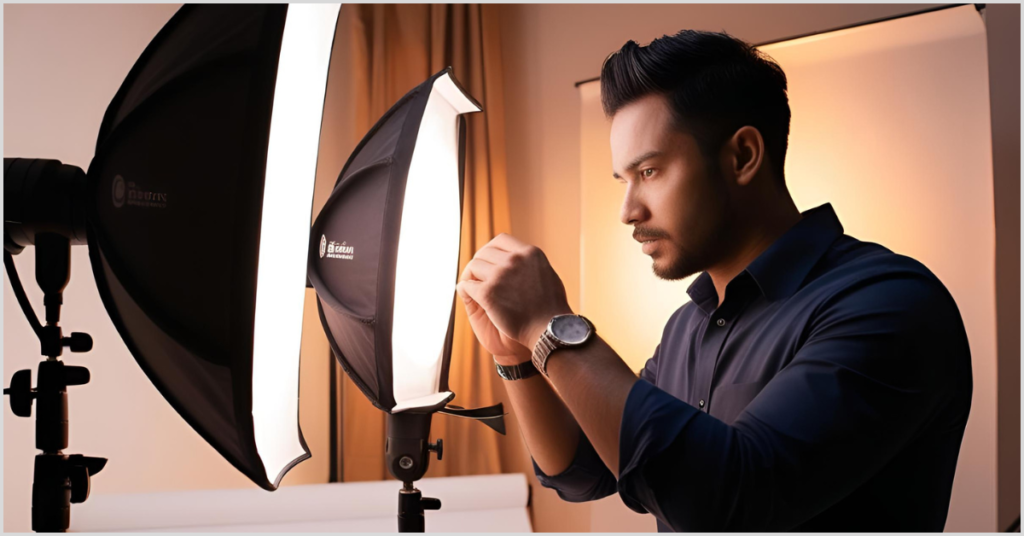
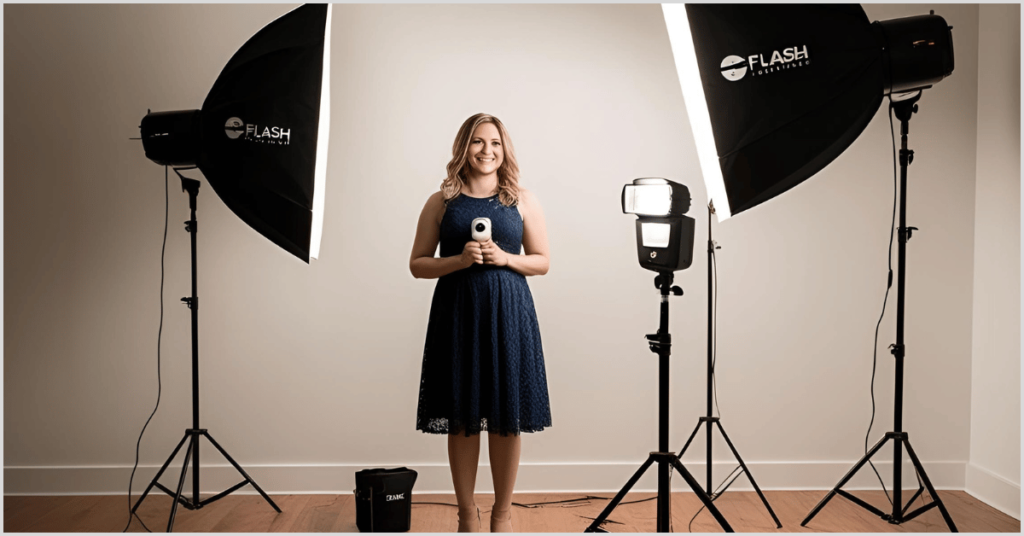
1. Use Soft and Diffused Lighting
The fairest way of doing away with shadows is through the softening and scattering of the light rays. Only by this did the model get a shadow that blends with the surrounding light, making it challenging to roll out that it has one.
How to Achieve Soft Lighting:
- Place the soft box where it will emit the light: The soft box connects with the source of the light so that it will not go in one direction.
- Use curtains to soften the effect of the direct sunlight: Although blocking the light through a curtain will soften its impact, window light will still be there.
- Get an umbrella diffuser: It lets light in and doesn’t shade the image or make it too dark.
- Deflect it “on” walls, “on” sheets, or something similar: This will obtain a more uniform and softer light, which will not harm the shadows and remove them quickly.
Apart from the supplied pattern, soft lighting can make a lot of difference, especially in the creative print sector.
2. Position Your Lights Strategically
One of the benefits of light sources is that they can control the amount of shadow produced. For instance, to avoid shadows:
- Employ two or more light sources: Less shadow play is produced with one light source than with two. The more the lights are, the more evenly the light will be spread.
- Avoid placing a light source at an angle with the subject: The light should be coming from the front, not the side, to avoid shadows.
- Say no to overhead lighting: Lighting above can produce peculiar shadows under the chin or direct items to the ceiling.
In the case of a portrait, a key light can be the primary light source that provides the subject’s head, aligning it with the model’s head to avoid the appearance of a shadow.
3. Use Reflectors to Fill Shadows
A reflector is a source of light that evenly spreads the light around the facets.
How to Use Reflectors:
- Stand a white reflector between the light source and the camera: This will make the light beam reflect onto the object.
- To get a more substantial reflection, use a silver reflector, or for a warm tone, use a gold reflector.
- For product photography, a DIY white foam board is okay.
Reflectors are valuable accessories that can be applied as one of the solutions to hide the issues with light play that bothers photo shoots a lot.
4. Use a Ring Light for Even Illumination
The circular-shaped ring light that surrounds the camera lens is the one that operates as a uniform light source. This LED light lights up the subject, wherever it is. When one stops the very weak, soft, or fading light, the person will be more sensitive to blinking and developing shadows.
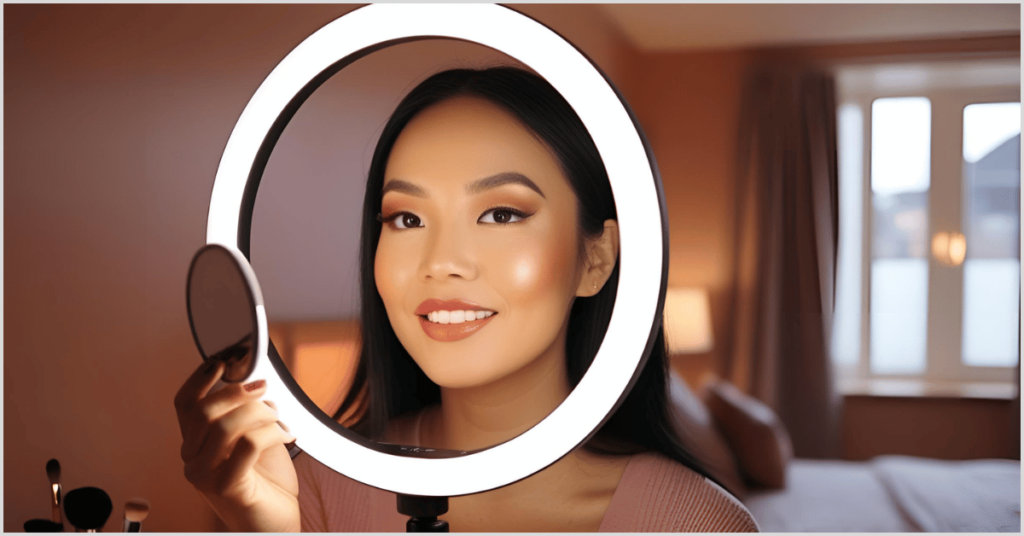
Best Practices for Using a Ring Light:
- Make sure the ring light is installed just in front of the subject.
- Turn the light input down so it will not be too bright.
- Use a diffuser if necessary to soften the light further.
Ring lights are increasingly familiar to the fashion and beauty industry since they can offer adequate, close-to-natural lighting free of shadiness.
5. Adjust Camera Settings for Optimal Exposure
While the camera still works as the control, the lighting remains the key to photography. Both perfect flash setup and camera settings heavily determine the quality of photography.
- Increase ISO (but not too much): Although a digital camera can make an object brighter through more ISOs, the grain also increases. Use a relatively low- or medium-ISO number, such as 200 or 400, to give less grain.
- Set a wide lens opening (the lower the F-number, the better). By doing so, more light enters the lens, making it easier to see even details that are cast upon the shadow.
- Slow down the shutter speed: Longer shutters allow more light to enter the camera, increasing exposure.
If the weather changes, photographers have to change too, so they must be dynamic players and take advantage of the less frequent conditions.
6. Choose the Right Background
Carefully chosen background flawlessly supports light quality. Try this instead:
- Use a white or light-colored background: The visibility of the shadow becomes almost nothing if the background is white.
- Pick a white seamless paper backdrop: You can now make a white backdrop with the help of a background light source for DIY purposes.
- Use a lightbox: Lightboxes build equal light and shadow environments across all four sides, preventing unwanted shadows.
7. Use Flash Effectively
There is a better alternative for the shininess of a reflection without using a flash, yes, but because of it, the flash should be used informatively.
Tips for Using Flash Without Shadows:
- Unplug the built-in flash and connect an external one instead.
- Mount the flash on the ceiling or wall and have it dot the place from there. This will make the area dimmer.
- Use a flash diffuser: This will mellow the strength of lights and thus remove moving shadows around the target.
- Set angles on no less than two flash units and place them strategically around the subject. This will burn the shadows off.
Flash means a practice that makes perfect and a deep understanding of the mysteries of light and its creation.
8. Shoot in a Well-Lit Environment
Pictures are more likely to produce fewer shadows if taken with more light.
Best Practices:
- Shoot during the golden hour (early morning or late afternoon) provides soft, diffused light.
- Use multiple artificial light sources indoors: This ensures even illumination.
- Avoid strong directional sunlight: This can create harsh shadows.
A well-lit environment simplifies the process of capturing shadow-free photos.
9. Post-Processing to Remove Shadows
Post-processing is a great way to improve the quality of your shot without adding any electronics.
Best Tools for Shadow Removal:

- Adobe Photoshop: Brighten the shady sections using the Dodge Tool or by moving the Shadow Adjustment Slider.
- Lightroom: Decrease the Shadows slider in the Tone panel to open up the shadow areas.
- Snapseed (mobile app): Use the Selective tool to edit only the shadowed portions of the photo.
Post-processing is a way of making photos look high-level in all aspects.
10. Experiment with Angles
Another fashion-related photo can be created through a comparatively adjusted shot angle, thus getting rid of either or all shadows. For example, when you shoot from above, the shadow appears under the chin or nose, and you need to photograph children from their elbow-central sight level to place the shadows without inhibiting the symmetry.
Advanced Techniques for Shadow-Free Photography
1. Use a Light Tent for Product Photography
The light tent doesn’t have to be a big, permanent, solid, and air-flowing tent; it can be an easy-to-carry thing set up in a car’s trunk.
How to Use a Light Tent:
- Brighten the tent from the inside: This ensures an even light process.
- Arrange the lights from the outside: This ensures even distribution of light.
- Adjust the camera settings: Ensure they align with the room’s brightness.
Photographers use light tents because uniform illumination helps achieve a professional look in images free of shadows.
2. Combine Natural and Artificial Light
Mixing the lights is what makes us insulate the light play.
How to Combine Light Sources:
- Using natural light as the primary source provides a soft, diffused effect.
- Add artificial lights to fill shadowed areas: Adjust their intensity to match the natural light.
This technique is beneficial for indoor photography.
3. Use a Scrim for Outdoor Photography
A scrim serves as a sunblock.
How to Use a Scrim:
- Place it between the subject and the sun: This diffuses harsh sunlight.
- Adjust the angle of the scrim: This controls the amount of light.
- Use reflectors to focus the light on a model: The light is distributed evenly, so all the parts are illuminated.
Scrims are the most efficient option in outdoor portrait photography because they diminish the light and remove the shadows that tend to disturb the atmosphere.
Common Mistakes to Avoid
- Using Only One Light Source: Getting into many dark places is natural. Instead, use multiple lights or reflectors.
- Ignoring the Background: A poorly chosen background can also introduce the presence of unwanted shadows.
- Overexposing the Image: Although adding brightness can reduce shadows, the washed-out nature will cause you to lose vital details.
- Relying Solely on Post-Processing: Getting the lighting right during the shoot is perhaps the most optimal way to fix any editing shortfall.
Conclusion
Taking a shadow-free photo is complicated due to the correct lighting, choice of camera settings, and strategic placement. One can obtain raw, shadow-free pictures by using soft and diffused light, employing reflectors, adjusting camera settings, and using post-processing tools.
Whether you are dealing with product photography, portraits, or aerial photography, here are some practices that will help you get to a stellar level of quality. Implementing these into the task will add a higher level of visual attractiveness to your photos and make them more suitable for commercial purposes, e.g., online sales, social media, and business portfolios. It is time to start working on these methods and seeing the fantastic outcome today!