Learn how to get Perfect lighting for indoor photos with helpful tips on natural light, artificial lights, reflectors, and how to set up rooms. Photography relies much on Lighting, especially when shooting indoors where natural light may be limited. Perfect indoor Lighting can make a dull image a masterpiece. It is, therefore very, essential to understand how to use and manipulate light. Whether it is a natural or artificial light source or even a combination of them, the proper lighting environment setting is also important to achieve the best indoor pictures.
We’ll go through some of the best techniques and tips to achieve fantastic indoor Lighting, meaning your images will look professional and bright.
Table of Contents
1. Utilize natural light.
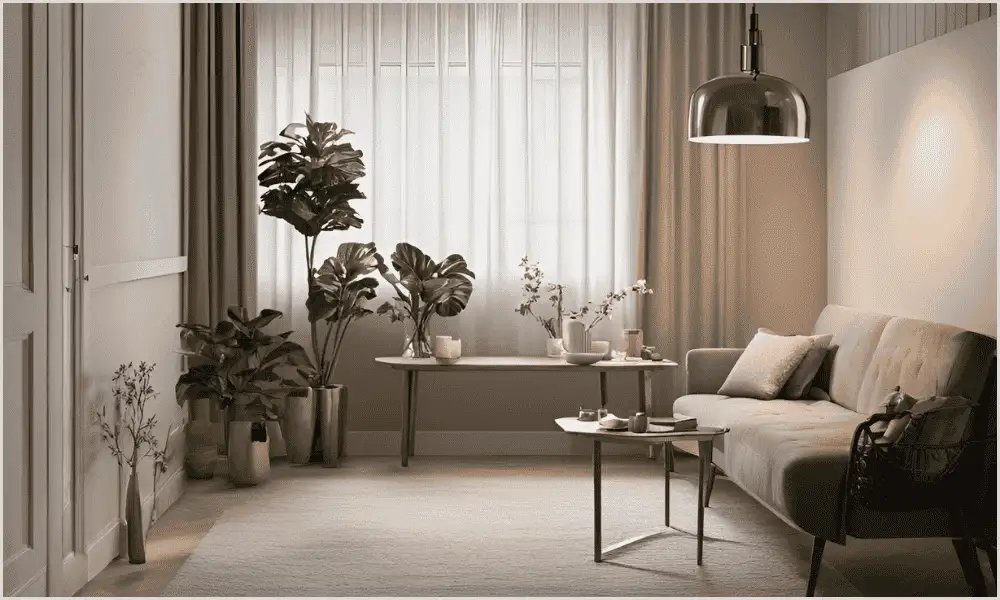
Natural daylight is among the least expensive yet most flattering indoor lighting sources. Its use most effectively usually entails tactical placement and timing.
Maximizing Window Light
- Provide your subject with a big window to take soft, diffused Lighting.
- Take pictures during golden hours. These are early morning and late afternoon when the light is warm and gentle.
- Simply use sheer curtains or blinds to control the strong sunlight coming from the window. These will soften the light and bring down shadows.
Adjust for Directional Light
- Experiment with the width of the light angle in shots. Often, side lighting can create depth and texture, while front Lighting can provide a well-illuminated image.
- If it is too bright, use a thin fabric to diffuse the light.
Improve with Reflectors
- Excellent for bouncing back natural light onto your subject, reflectors come in two forms: professional and simple-as-things-like a white poster board or aluminium foil.
- Set the reflector facing the light source to avoid shadows and spread the Lighting evenly.
2. Artificial Lighting for Indoor Photos
Artificial light can be a superb alternative when the amount of natural light is inadequate. What follows are some helpful tips for taking indoor photos with artificial light:
Types of Artificial Light
- LED Lights: They are highly versatile, energy-efficient, and available in all directions for colour temperatures.
- Softboxes and umbrellas are great for making soft, even light and look like natural light.
- Ring lights: Super for close-up shots, portraits or product images because they eliminate unflattering shadows.
- Studio strobes and speed lights are essential for any professional setup because they give very bright, adjustable light.
Four Tips for Artificial Lighting
- Diffusion is essential: Use softboxes, diffusers, or clear umbrellas to soften harsh light and prevent unflattering shadows.
- Positioning Is Crucial: Try a few different angles and see what produces the desired result. For portraits, shooting from above at about a 45-degree angle often yields nice natural highlights and shadows.
- Colour Temperature Adjustment: Ensure that artificial Lighting of a similar colour temperature to the surrounding Lighting is used to prevent weird effects around colour. Adjust the white balance settings.
- Layer Your Lighting: Use key, fill, and background lights together to make your photos look more profound and more enjoyable.
3. Mastering Light Positioning
Position your light source to heavily influence the mood and depth quality of your indoor photos. Click here for how.
Main Glare
- Place the primary source of light to emphasize the best aspects of your subject. Consider changing the angle to avoid creating strong shadows or too much light.
Fill Light
- A secondary light positioned opposite the leading light can minimize shadows and balance the illumination. Reflectors may also be used as fill lights when there are not many lights.
Backlighting
- Backlighting makes a halo around your subject or helps it stand out from the background, giving a dramatic look. Use it carefully to prevent too much light or dark shadows.
Overhead Lights
- Overhead Lighting should bring sunlight-like illumination, but it can be harsh under the eyes or nose, so use diffusers or reflect off the ceiling to soften the effect.
4. Diffusion for Softer Light
The dispersing of light loses the strong shadows that are present and makes the light become dispersed. This technique is beneficial for both natural and artificial light.
How to Spread More Light Inside
- Install sheer curtains on windows to soften strong sunshine.
- Diffusers can be placed on artificial lights like LEDs or strobes.
- Make your diffusers using parchment paper, frosted acrylic sheets, or even white umbrellas.
5. Light arrangement for the room

Indoor photography always requires an essential consideration for the environment. An arrangement of your room may assist in better Lighting and a proper place to take photographs.
Bright Wall
- Light-coloured or white walls reflect light, making a room brighter and reducing sharp shadows.
Declutter for Clarity
- Reduce distractions within your sight so the Lighting and subject can be more noticeable.
Mirrors and reflective surfaces
- Light bounces around the room through the mirrors or shiny material in cool lighting effects.
Curtain Options
- Sheer curtains allow light to come in nicely, while blackout curtains give complete control over the light.
6. Camera settings and techniques
Proper camera settings can make a real difference to your indoor photography, mainly when shot in harsh light.
ISO Changes
- In areas with low light, let the ISO increase somewhat, but not as noisy.
Aperture Settings
- Use a large opening-it lets in much more light, and any suitable range of background will be slightly blurred for portraits or close-up pictures.
Shutter Speed
- The use of a slower shutter speed captures more light, but to avoid motion blur, the camera should be kept relatively steady using a tripod.
White Balance
- White balance to match the light and keep colours accurate. New cameras will have indoor lighting settings, such as “Tungsten” or “Fluorescent”.
7. Post-Processing for Perfect Lighting
Usually, Lightroom or Photoshop will significantly aid in editing your images. Here are some essential post-processing tips:
- Brightness and Contrast: Increased details by adjusting the settings to enhance brightness and contrast.
- Colour temperature for White balance gets rid of those nasty colours.
- Highlight and Shadow Recovery: Tools to recover details within over-exposed highlights or under-exposed shadows.
- Add subtle vignettes: let the edges of your picture be darker, making your subject stand out.
- Noise Reduction: Removes graininess that may appear due to increased ISO settings.
8. Creative Use of Reflectors
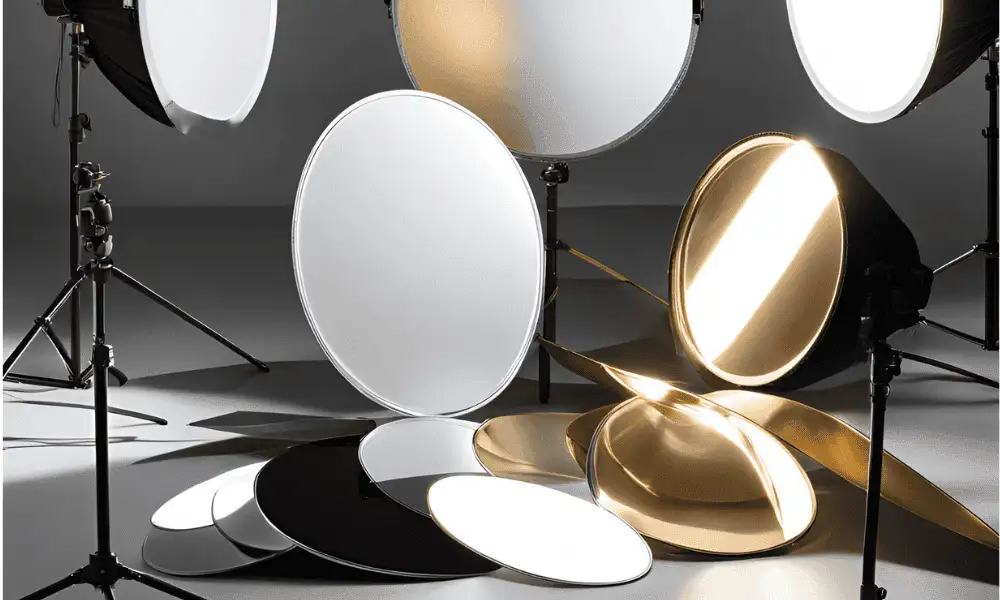
Reflected Lighting is vital in indoor photography. It is an inexpensive technique for controlling light.
Types of Reflectors
- White reflectors provide soft, natural light and little colour change.
- Silver reflectors give a more remarkable appearance and a brighter shining effect.
- Gold Reflectors: Add warmth, which is excellent for portraits.
- Black reflectors absorb light, making shadows and filling the design with life.
How to Use Reflectors
- You place a reflector in front of your light source to reflect light onto your subject.
- For more prominent subjects or more uniform illumination, use multiple reflectors.
9. Experimenting with Light and Shadows
To create unique lighting effects, creative Lighting can really make indoor photography special.
Silhouette Photography
- Bright light behind your subject and placed between the light and the camera to create deep silhouettes.
Shadow Play
- Try partial Lighting for dramatic shadows and patterns. Interests can be made up with blinds, lace, or even plants.
Dull Lighting
- You will use fewer light sources for the same reason so your subject stands out against a dark background.
10. Some Basic Tools in Indoor Lighting
Good tools for buying will significantly help your photography indoors.
- Tripod: A must-have for stability, especially in low-light situations requiring slower shutter speeds.
- Light Meter: Measure light intensity accurately to ensure proper exposure.
- Lighting Kits: A combination of softboxes, ring lights, and reflectors for various purposes.
- Remote Shutter Release: Prevent camera shake when shooting at slower shutter speeds.
11. Common Problems of Indoor Lighting
- Uneven Lighting: Use fill lights or reflectors to balance the Lighting on your subject.
- Harsh Shadows: Dimmed or repositioned light sources tend to minimize evil shadows.
- Low Lighting: Make the ISO higher, and use bigger openings or even more artificial light.
- Blend Lighting: Use one type of light or gels to match the colour of the lights.
In Conclusion
Indoor Lighting requires a combination of technical knowledge, creativity, and experimentation. By using natural light, optimizing artificial sources, mastering positioning, and perfecting your camera settings, you can take your indoor photography to professional levels. In remembrance, it’s all about how bright or pale the Lighting should be for its surroundings or setting and presentation. How to control it in light from the inside is all important, no matter if the photograph depicts people, merchandise, or artwork. Get out your gear, have fun trying these methods, and be creative!