
Best HDR Real Estate Photography Settings
When it comes to real estate photography, it’s essential to capture the property’s beauty and character accurately. High dynamic range (HDR) photography is an effective technique that helps you achieve stunning images that showcase the property’s features. HDR photography helps you capture a wide range of tones and colors, making your photos appear more vibrant and natural. In this article, we’ll discuss the essential HDR real estate photography settings you need to know to capture stunning real estate photos.
Table of Contents
HDR Real Estate Photography
HDR photography combines multiple images with different exposure settings to produce a final image with a high dynamic range of tones and colors. It’s an effective way to capture the full range of tones and colors in a scene, especially when the lighting conditions are challenging. HDR photography is popular in real estate photography because it helps to produce high-quality images that showcase the property’s beauty and character.
Why HDR Photography is Important in Real Estate
Real estate photography is all about showcasing the property’s features and highlighting its unique selling points. HDR photography helps you capture the property’s interior and exterior accurately, showcasing its beauty and character. It’s an effective way to create a visually appealing listing that grabs the attention of potential buyers. HDR photography also helps to create a more natural-looking image that accurately represents the property, which is crucial in today’s competitive real estate market.
Understanding the Dynamic Range of Your Camera
The dynamic range of a camera refers to the range of tones and colors that it can capture. The greater the camera’s dynamic range, the better it can capture a wide range of tones and colors. When it comes to real estate photography, it’s essential to choose a camera with a high dynamic range. This will help you capture the property’s full range of tones and colors accurately.
Choosing the Right Camera for HDR Photography
When choosing a camera for HDR photography, you need to consider its dynamic range, image quality, and other features such as bracketing and exposure compensation. Full-frame DSLRs are an excellent choice for HDR photography because they offer a high dynamic range and excellent image quality. Mirrorless cameras are also a good choice for HDR photography because they offer features like in-body image stabilization, which helps to stabilize your shots.
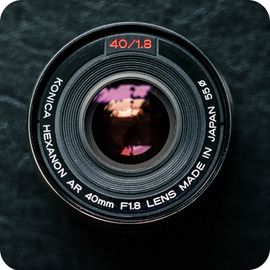
Selecting the Right Lens for HDR Real Estate Photography
When it comes to real estate photography, the lens you choose is just as important as the camera. A wide-angle lens is an excellent choice for real estate photography because it allows you to capture the full view of a room or a space. It also helps to make small rooms appear more spacious, which is essential in real estate photography. A good wide-angle lens for real estate photography should have a focal length of 16-35mm and a fast aperture of f/2.8 or lower.
Using a Tripod for Stability
Stability is crucial in real estate photography because it helps to avoid blurry images. A tripod is an essential tool in real estate photography because it helps to stabilize your camera and prevents camera shaking. It also allows you to take multiple shots at different exposure settings, which is essential in HDR photography. When choosing a tripod, look for one sturdy, lightweight, and easy to set up.
Setting the Correct Exposure for HDR Photography
When shooting in HDR mode, it’s essential to set the correct exposure settings for each shot. You can either shoot in manual mode or use the auto-bracketing mode, which automatically adjusts the exposure settings for each shot. When shooting in manual mode, you need to adjust the aperture, shutter speed, and ISO settings to capture the full range of tones and colors accurately. When using the auto-bracketing mode, the camera takes multiple shots at different exposure settings, which you can later merge into a single HDR image.
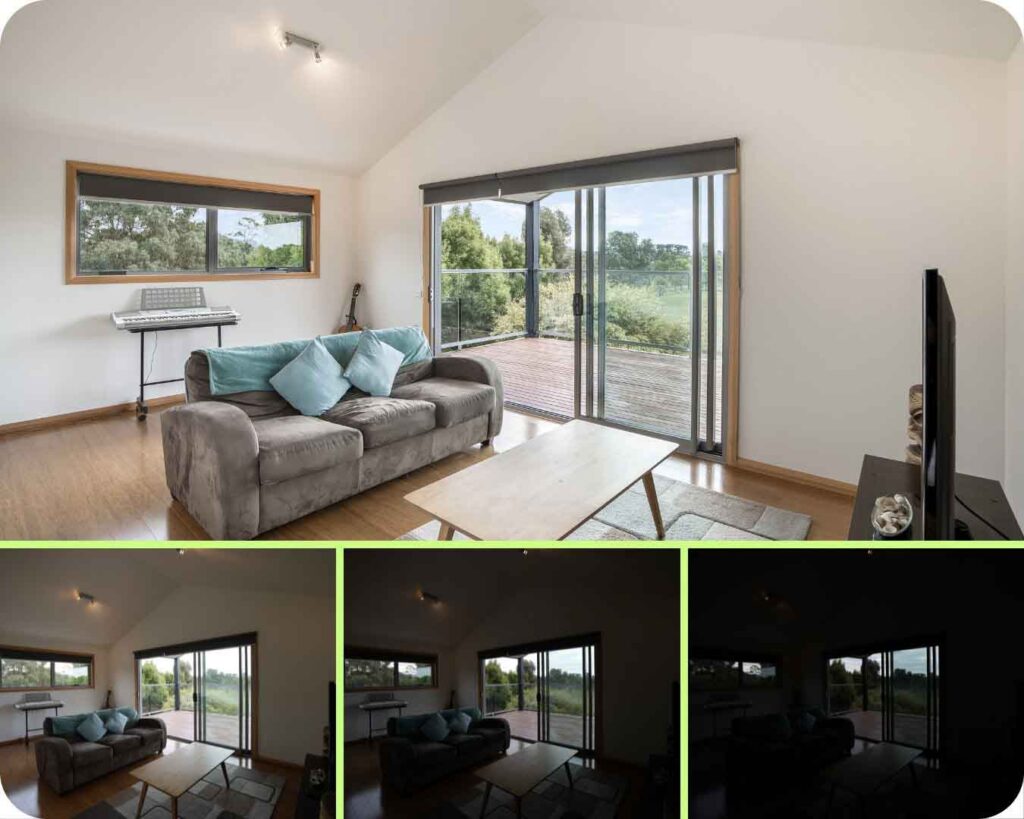
Understanding Bracketing and How to Use it for HDR Photography
Bracketing is a technique used in HDR photography to capture multiple shots of a scene at different exposure settings. Bracketing involves taking several shots at different exposure values, such as underexposed, correctly exposed, and overexposed. The different shots are then merged into a single HDR image using HDR software. Bracketing is essential in HDR photography because it helps to capture the full range of tones and colors accurately.
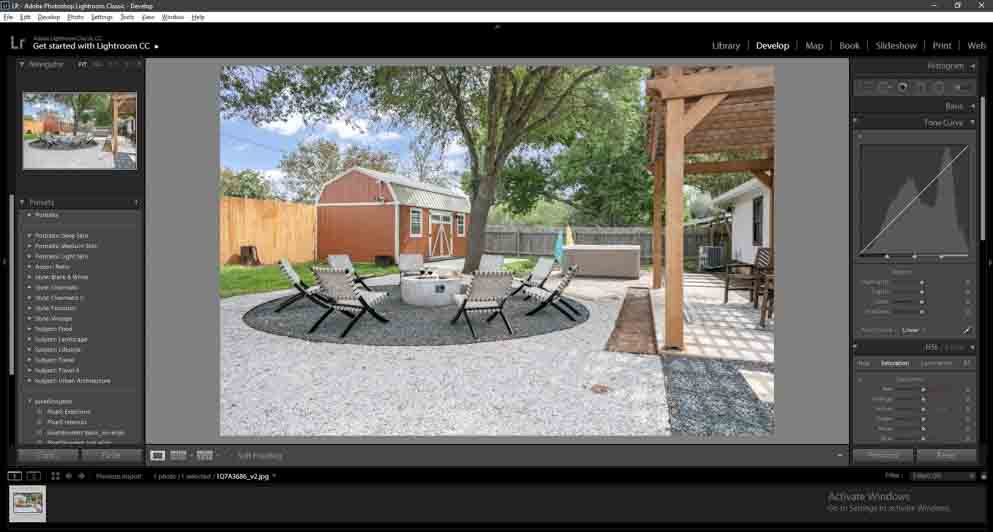
Using HDR Software to Merge and Tone-Map Images
After capturing the bracketed shots, you need to merge them into a single HDR image using HDR software. HDR software helps to combine the different shots, align them, and remove any ghosting or artifacts. The software also allows you to tone-map the image, which adjusts the contrast, brightness, and saturation levels. Popular HDR software includes Adobe Lightroom, Aurora HDR, and Photomatix.
Tips for Shooting Interiors with HDR Photography
Shooting interiors with HDR photography can be challenging because of the various light sources, such as natural light, artificial light, and shadows. Here are some tips for shooting interiors with HDR photography:
- Use a tripod to stabilize your shots and avoid camera shake
- Shoot in RAW format for maximum flexibility during post-processing
- Use a wide-angle lens to capture the full view of the room
- Use bracketing to capture multiple shots at different exposure settings
- Avoid shooting directly into the light source
- Use HDR software to merge and tone-map the images
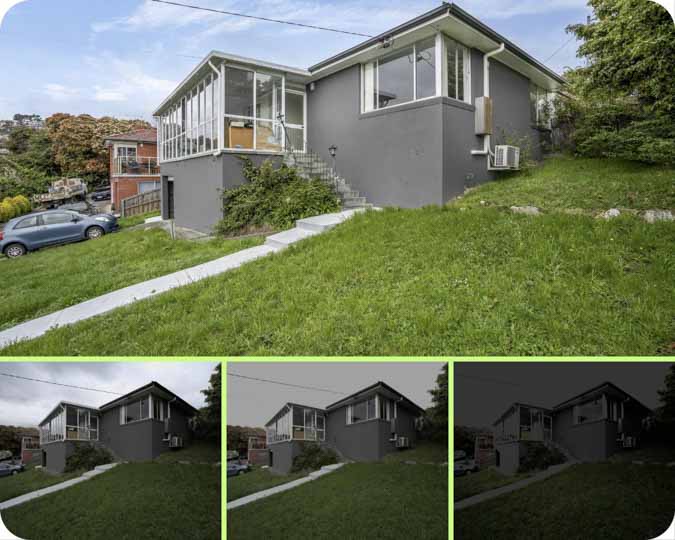
Tips for Shooting Exteriors with HDR Photography
Shooting exteriors with HDR photography requires a different set of skills and techniques compared to shooting interiors. Here are some tips for shooting exteriors with HDR photography:
- Shoot during the golden hour or blue hour for optimal lighting conditions
- Use a tripod to stabilize your shots and avoid camera shake
- Use a polarizing filter to reduce glare and enhance colors
- Use bracketing to capture multiple shots at different exposure settings
- Avoid shooting directly into the sun
- Use HDR software to merge and tone-map the images
Avoiding Common Mistakes in HDR Real Estate Photography
Here are some common mistakes to avoid in HDR real estate photography:
- Over processing the images, results in an unnatural look
- Poorly aligned shots, resulting in ghosting or artifacts
- Using too much or too little bracketing
- Not using a tripod, results in blurry images
- Not using the correct lens, results in distorted or unnatural perspectives
Post-Processing Techniques for HDR Real Estate Photography
After capturing and merging the bracketed shots, you need to post-process the images to achieve the desired look. Post-processing involves adjusting the contrast, brightness, saturation, and other settings to create a natural-looking image. Here are some post-processing techniques for HDR real estate photography:
- Adjust the white balance to correct any color casts
- Adjust the exposure and contrast to achieve the desired look
- Adjust the saturation to enhance the colors
- Sharpen the image to enhance the details
- Remove any dust spots or blemishes
- Crop the image to remove any distractions or unwanted elements
Best Practices for Delivering HDR Real Estate Photographs to Clients
Delivering high-quality HDR real estate photographs to clients is essential in today’s competitive real estate market. Here are some best practices for delivering HDR real estate photographs to clients:
- Provide the images in multiple resolutions and sizes for different uses
- Deliver the images in a timely manner
- Provide a secure and easy-to-use platform for downloading the images
- Provide a detailed invoice and payment options
Conclusion
HDR photography has become an essential tool for real estate photographers looking to capture and showcase a property’s best features. The technique allows for a greater range of tones and colors, resulting in stunning and realistic images. By using bracketing, HDR software, and post-processing techniques, photographers can achieve high-quality images that appeal to clients and help them sell properties faster.
When shooting real estate with HDR photography, it’s important to understand the different techniques and best practices to achieve the best results. Whether you’re shooting interiors or exteriors, using a tripod, bracketing, and using the right lens and filter can make a significant difference in the final image quality.
By following the tips and techniques outlined in this article, you’ll be well on your way to mastering HDR real estate photography and delivering stunning images to your clients. Remember to avoid common mistakes and always strive to provide the highest quality images possible.
In conclusion, HDR real estate photography is an essential tool for real estate photographers looking to capture and showcase properties’ best features. With the right techniques and tools, photographers can produce stunning images that help sell properties faster and appeal to clients.