Real Estate HDR Photography EP.08: A Beginner’s Guide to Using a Tripod for Photography
Welcome to the eight episodes of Real Estate HDR Photography. In this episode, we will be discussing how to use a tripod and how Using a tripod can also help you compose your shots more effectively. Providing a stable base, allows you to take more time to carefully frame your shot and make adjustments as needed. This can be especially useful when shooting interiors, where you may need to make subtle adjustments to the camera’s position in order to capture the full scope of the space.
Another benefit of using a tripod is that it can help reduce the number of images you need to take for Real estate HDR photography. When shooting handheld, it can be difficult to keep the camera in exactly the same position for each shot, which can lead to alignment issues when blending the images together. By using a tripod, you can minimize these alignment issues and potentially reduce the number of shots you need to take to achieve the desired HDR effect.
Finally, using a tripod can help you work more efficiently. Providing a stable base, it can allow you to take your time and focus on capturing the best possible shots, rather than rushing to get everything done quickly. This can help you produce better images in less time, which can be especially important if you’re shooting multiple properties in a single day.
Overall, using a tripod is an essential tool for real estate HDR photography. It provides stability, consistency, and precision, all of which are essential for creating high-quality images that showcase the property in the best possible light.
Table of Contents
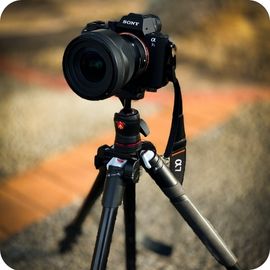
Choosing the Right Tripod
The first step in using a tripod for HDR photography is choosing the right tripod for your needs. There are many different types of tripods available, each with its own strengths and weaknesses. The main factors to consider when choosing a tripod are height, weight, stability, and cost.
Height: The height of the tripod should be comfortable using a Tripod. A tripod that is too short can be uncomfortable to use, while a tripod that is too tall can be difficult to transport.
Weight: The weight of the tripod is also important. A heavier tripod will generally be more stable, but it can be difficult to transport. A lighter tripod will be easier to transport, but it may not be as stable.
Stability: The stability of the tripod is essential for Real estate HDR photography. A tripod with a low center of gravity and sturdy legs will provide the best stability.
Cost: The cost of the tripod will depend on your budget. There are many different tripods available at various price points, so it is important to find one that meets your needs without breaking the bank.
Setting Up the using a tripod
Once you have chosen the right using tripod, it is time to set it up for HDR photography. The first step is to find a level surface on to place the tripod. A level surface is essential for ensuring that the tripod is stable and that each shot is taken from the same position.
Next, adjust the tripod legs to the desired height. The legs should be spread out enough to provide stability, but not so far apart that they get in the way. Once the legs are at the desired height, lock them in place using the tripod locks.
Attaching the Camera
After setting up the tripod, it is time to attach the camera. To attach the camera, locate the tripod mount on the bottom of the camera. This amount is usually located on the bottom of the camera body or on the bottom of the camera lens.
Once you have located the tripod mount, attach the camera to the tripod by screwing it onto the tripod mount. Make sure that the camera is securely attached to the tripod to prevent it from falling or moving during the photo shoot.
Adjusting and Settings
Before taking any photos, it is important to adjust the camera settings. The settings will depend on the lighting conditions and the desired outcome. Generally, for HDR photography, it is recommended to shoot in Aperture Priority mode, which allows you to set the aperture and let the camera adjust the shutter speed.
Use a Tripod to Stabilize Your Camera
The aperture should be set to a small aperture, such as f/8 or f/11, to ensure that the entire scene is in focus. The ISO should be set to the lowest possible value to reduce noise. The shutter speed should be set to the appropriate value for the lighting conditions.
Using a tripod to stabilize your camera is one of the main benefits of using this tool. When you take photos or videos, even small movements of the camera can result in blurry or distorted images. A tripod helps to eliminate this problem by providing a stable platform for your camera.
Here are some tips for using your tripod to stabilize your camera:
- Use a sturdy tripod: A tripod that is lightweight or flimsy will not provide adequate stability for your camera. Choose a tripod that is sturdy and has a weight capacity that is suitable for your camera.
- Extend the legs fully: To provide maximum stability, extend the legs of the tripod fully. This will ensure that the tripod is firmly planted on the ground.
- Keep the center column down: If your tripod has a center column, keep it down as much as possible. The higher the center column, the less stable the tripod will be.
- Use a remote shutter release: To minimize camera shake, use a remote shutter release or the timer on your camera. This will allow you to take the photo without physically touching the camera.
- Use the tripod head to adjust the angle: If you need to adjust the angle of the camera, use the tripod head to do so. This will allow you to make small adjustments without moving the tripod.
- Use the spirit level: Many tripods have a built-in spirit level that will help you ensure that the camera is level. Use this feature to avoid taking crooked photos.
By following these tips, you can use your tripod to stabilize your camera and create sharp, clear images and videos. Whether you’re shooting landscapes, portraits, or videos, a tripod is an essential tool that will help you take your photography to the next level.
Pack Up Your Tripod
Once you’re done using your tripod, it’s important to pack it up properly to protect it and ensure that it’s ready for your next use. Here are some tips for packing up your tripod:
- Remove your camera: Start by removing your camera from the tripod. Make sure you turn off your camera and securely pack it away in your camera bag.
- Loosen the tripod head: Loosen the tripod head and make sure it’s not too tight. This will make it easier to adjust the tripod for your next use.
- Fold the legs: Fold the legs of the tripod inwards, starting with the top section and working your way down. Make sure you don’t force the legs or apply too much pressure.
- Secure the legs: Once the legs are folded, secure them in place with any latches or clips that your tripod may have.
- Store the tripod: If your tripod came with a carrying case, store it in the case. This will help protect your tripod from any damage during transport.
- Clean the tripod: If your tripod is dirty or has any debris on it, wipe it down with a clean cloth or use a soft brush to remove any dirt or dust.
- Store the tripod in a dry place: It’s important to store your tripod in a dry place to prevent any moisture from damaging it.
By following these tips, you can pack up your tripod quickly and easily, and ensure that it’s ready for your next use. Remember to take care of your tripod and keep it in good condition, and it will last you for years to come.
Conclusion,
Using a Tripod is essential for HDR photography. It ensures that each shot is taken from the same position, which is necessary for creating an HDR image. When choosing a tripod, consider factors such as height, weight, stability, and cost. Once you have chosen the right tripod, set it up on a level surface and attach your camera. Adjust the camera settings and take multiple photos at different exposures. Finally, use software to combine the photos into an HDR image. With practice and experimentation, you can create stunning HDR images that capture the full range of brightness levels in a scene.
[…] HDR bracketing requires taking multiple photos at different exposures, which can be challenging if you’re hand-holding your camera. To ensure your images are sharp and aligned, it’s essential to use a tripod. […]
[…] a tripod: To ensure that your photos are aligned and there is no movement between shots, use a tripod to keep your camera […]
[…] a tripod: To capture the best possible image, you’ll need to use a tripod. This will help you keep the camera steady and avoid blurry images. It will also allow you to use a […]
[…] a tripod: It is advisable to use a tripod to stabilize your camera and prevent camera shake. A tripod also allows you to make precise […]
[…] a Tripod: Using a tripod is essential for HDR photography as it helps to keep the camera steady and avoid camera shake, […]
[…] to take multiple shots at different exposure settings, which is essential in HDR photography. When choosing a tripod, look for one sturdy, lightweight, and easy to set […]
[…] you use a tripod, you can be sure that the camera stays in the same position throughout the entire sequence of […]
[…] a Tripod: A tripod is essential for keeping your camera steady during a long exposure. Your photos will be sharp and […]
[…] are immediately. Crooked lines can make a property appearance unprofessional and unappealing. Use a tripod and a spirit degree to maintain your digital camera degree and make certain that your photos are […]
[…] sturdy tripod is crucial for HDR photography to maintain stability during longer exposure times. Using a tripod ensures that the frames are perfectly aligned during the bracketing process, avoiding any […]
[…] sturdy tripod is an essential accent for attaining sharp and properly-composed real estate photographs. It allows […]