Want to really capture some great interior photographs that pop? Explore the 8 expert tips about improving your interior photoshoot by mastering lighting and composition with the right tools and proper styling techniques. This comprehensive guide will help you enhance your skills and create professional-quality images that showcase any space to its best. Whether you are seasoned or a beginner, you will find actionable tips to elevate your photography game.
Table of Contents
What is an interior design photoshoot?
That kind of photography, which captures aesthetic value, usage, and sense in that interior, is what an interior design photoshoot is. These photographs are utilized in property marketing by designers, architects, estate agents, or owners for the purpose of projecting the same space in the best way possible to tell a visual story that is sure to attract its targeted audience.
Tools Needed for an Interior Photoshoot
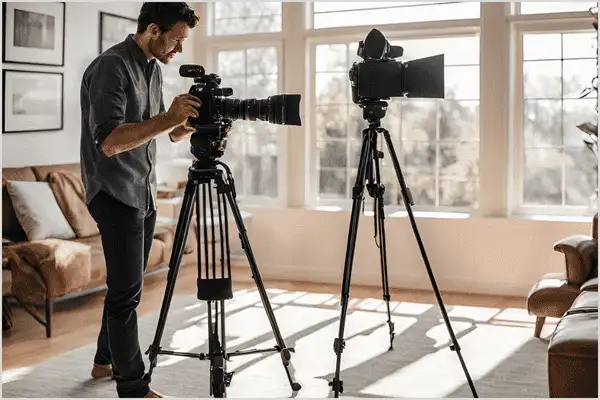
The best photos for interior design shoots would be produced after the acquisition of the right tools. These include:
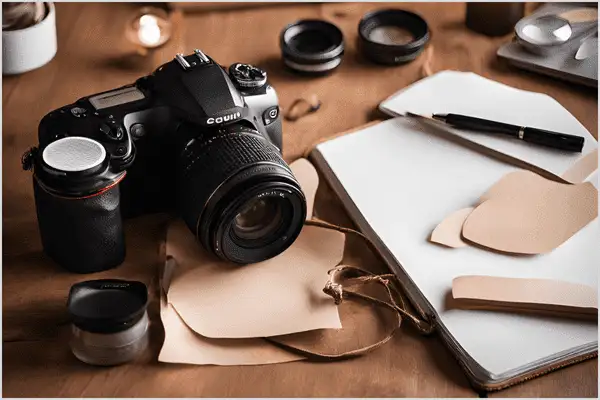
- A DSLR or mirrorless camera. This would allow complete control over all settings.
- Lenses: Wide-angle lenses for capturing wide images and prime lenses for wide-angle close-up shots.
- Tripod: Keeps things steady and helps create accurate pictures.
- Lighting Tools: Reflectors, Diffusers, and External Flashes control the light.
- Post-processing Software: Adobe Lightroom and Photoshop are two examples of software used.
- Styling Props: Cushions, vases, and plants to make the place look better.
- Color Checker: Assists in correcting color in various lighting conditions.
8 Tips for a Outstanding Interior Photoshoot
Taking great interior photos demands a little creativity, technical skill, and care when it comes to planning. Be it a professional photographer or a homeowner displaying an abode, these tips will definitely aid you in taking beautiful pictures that let you display the real feel of the interior. Along the way, we also cover some common concerns relating to styling and budgeting an interior photoshoot.
1. Plan the Shoot Around Natural Light
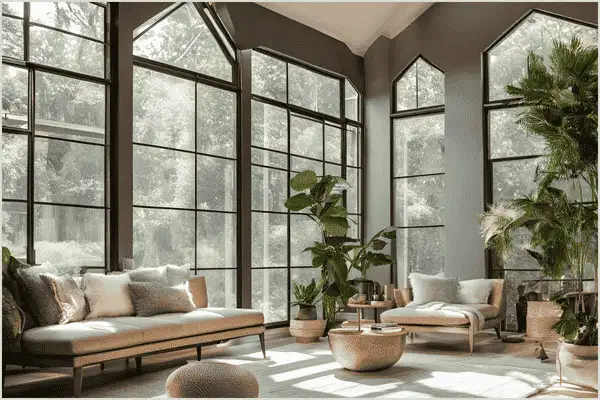
This means that in an indoor location, the part of photography that is so very significant is lighting. The natural light brings the actual color of a room to life – literally as warm and inviting. Then, of course, capture those “golden hours”, generally early morning hours and late afternoon hours when light is soft and spread.
Pro Tip: Turn off artificial lights to avoid competing color temperatures unless strategically blending light sources. Use reflectors or white surfaces to bounce light into shadowy areas.
2. Clear up and tidy the space.
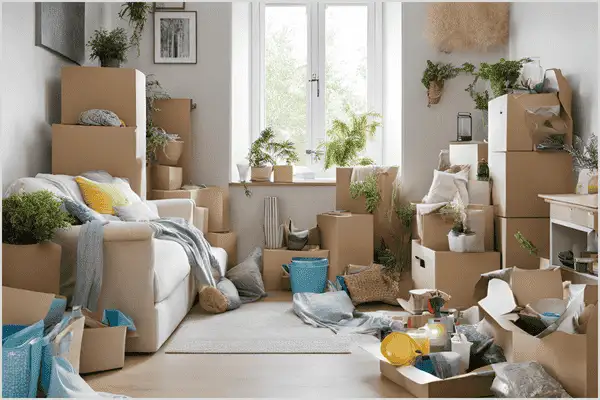
A clean space works to highlight building and design features. There should be a removal of too much stuff, such as personal items, loose wiring, and too many decorations that bring down the overall presentation.
Pro Tip: Use some unique items such as books, flowers, or candles to make your space feel comfy but still neat.
3. Use a Tripod for Sharp, Consistent Shots
A tripod stabilizes your camera, ensuring sharp images even in low light.
It also allows for precise composition and consistency across multiple shots.
Pro Tip: Using a remote trigger or the timer on a tripod helps to minimize camera shake.
4. Experiment with Composition Techniques
Composition is able to lead the eye and tell a story. Utilize the rule of thirds, leading lines, and symmetry, among others, to make an interesting image.
Pro Tip: Photograph views from different angles, including eye level, low shots, and above, to feature exceptional inside views.
5. Include depth and layers

Adding different things, such as furniture and decorations, in the indoor photoshoot helps improve the shots. It makes the image interesting and gives it a three-dimensional look.
Pro Tip: Use what is in front of the object- a partly open door, perhaps or a piece of furniture- to frame a bit.
6. Mind the White Balance Settings
Interiors have many light types, which may change the appearance of the color. Change the white balance settings of your camera so that the colors will be realistic.
Pro Tip: Take photos in RAW format to have more control over color changes later.
7. Optimize the Space With Styling
Styling is to present an interior in the best possible version, with an emphasis on furniture and decor arrangement that significantly enhances the features of that room in pursuit of matching the deemed mood.
Pro Tip: Fresh flowers and fruit bowls or neat folding to give the space a sense of welcome.
8. Invest Time in Post-Processing
That is where magic happens: editing. Exposure, contrast, and sharpness are the tools in which your pictures will take on that professional look. Adobe Lightroom or Photoshop can help with the job.
Pro tip: over-edit. Look for a way to reach organic composition images of this space.
Why Hire a Professional Stylist for Your Photoshoot?
It is also possible to increase the quality of your interior photoshoot with a stylist. Here is why hiring one may become worthwhile:
- Experts in styling know how to make a space look better by highlighting its best features and downplaying its flaws.
- They do save time since they know which props and setups are best for different themes.
- Versatility: Stylists bring fresh ideas and can adapt the look to match current trends or your vision.
What If You Can’t Afford a Stylist?
A professional stylist can be helpful, but there are cheaper options:
- DIY Decorating: Take ideas from websites like Pinterest or Instagram to plan your designs.
- Talking to Friends or Family: Someone else’s perspective can also offer invaluable advice to your system.
- Rent Props: Instead of buying a new prop, try to rent some fantastic wall decorations for the shoot.
How Much Does a Photo Stylist Cost?
The cost of hiring a photo stylist varies depending on their experience, location, and the scope of your shoot.
Here’s what to expect:
- Hourly Rates: Stylists usually charge around 50–$150 per hour.
- Package Deals: Many professionals have half-day or full-day packages that cost between $300 and $1,500.
- Extra Costs: Plan in case one needs to rent props or travel expenses are added.
Knowing all of these parts will help you make a wise decision that matches your budget and goals.
Conclusion
Taking interior photoshoot is an excellent method to prove the beauty of the place. These suggestions, in case you will style and plan costs, would make outstanding images unique to you. Whether you’re an experienced photographer or a newbie, you’re going to know these techniques, and your work will be better and stronger.