
Table of Contents
1. Introduction
Have you ever scrolled past an image and stopped because you can’t tell if it’s a photo or CGI? That second of confusion is the whole goal of photorealistic 3d rendering.
A decade ago, if you wanted to do this as an architect (or designer), it meant having a server room in addition to spending 7-14 days (or longer) developing your “look”. Today, your clients can have their wants met faster than ever before–a freelancer working on a laptop can create a kitchen render that will allow a potential buyer to see the design before even completing the home! An architect/client can provide virtual walkthroughs of an existing building that hasn’t been built yet. A product manufacturer can create a chair in 20 different colors without producing one!
The advances in computer speed are complemented by increasingly effective software that emulates the behavior of light. There are also new materials that reveal small imperfections like scratches or dust. Finally, AI can help remove unwanted material, so you won’t have to spend hours waiting.
Regular renders show shapes; photorealistic renders show feelings – the warmth of sunlight on wood floors, the way smudges appear on fridge doors, and the softness of shadows under couches. Therefore, brands and designers will spend money on that reason. People purchase plans, not just the product itself, based on an idea of what it could be.
This resource will be beneficial whether you’re just starting as a 3D Designer or if you have been working with 3D Rendering for many years. You will find step-by-step instructions that will help you become an expert in 3D Rendering by 2026.
2. What Is Photorealistic 3D Rendering?
Photorealistic 3D Rendering means creating an image of a three-dimensional object and rendering it so it appears as if it were a photograph taken in real life. This is achieved through the computer’s ability to replicate how light travels as well as changes when reflected off objects.
Three factors that contribute to rendering success:
- Realistic light reflections (light reflects off surfaces and picks up color). High-quality renderers replicate this effect.
- Realistic material properties (there are no perfect materials – high-quality materials have imperfections such as uneven surfaces/pebbly surfaces/blemishes from handling). The term for this is “PBR” or physically based rendering).
- Flaws common in real cameras: Real cameras sometimes have unexpected issues such as blurring, distortion, and overexposing images. Use those imperfections to make your computer animated features look more realistic.
Animation vs. Rendering: Animation is the process of creating an animated or animated-like object. Rendering is the process of photographing an object in such a way that it appears perfectly lit.
Rendering vs Photo Editing: Photo editing changes a real photo. Rendering builds the light from scratch.
What has taken place leading up to now: In 2010, we faked ambient occlusion and light effects with hacks; by 2018, we had developed realtime ray tracing; and by 2026, Nvidia’s CEO said we would have moved to a neural-rendering method of determining how light behaves, where AI estimates how light acts instead of calculating the movement of each ray!
Examples with which you are familiar:
- Architecture: The sunlight coming through the window creates a striped pattern on the living room floor.
- Product: The phone renders where you can see the metal edging reflecting the space in which they are used.
- Games: Games allow for the natural bouncing of lights as you walk through and around the environment.
3. How Photorealistic Rendering Works
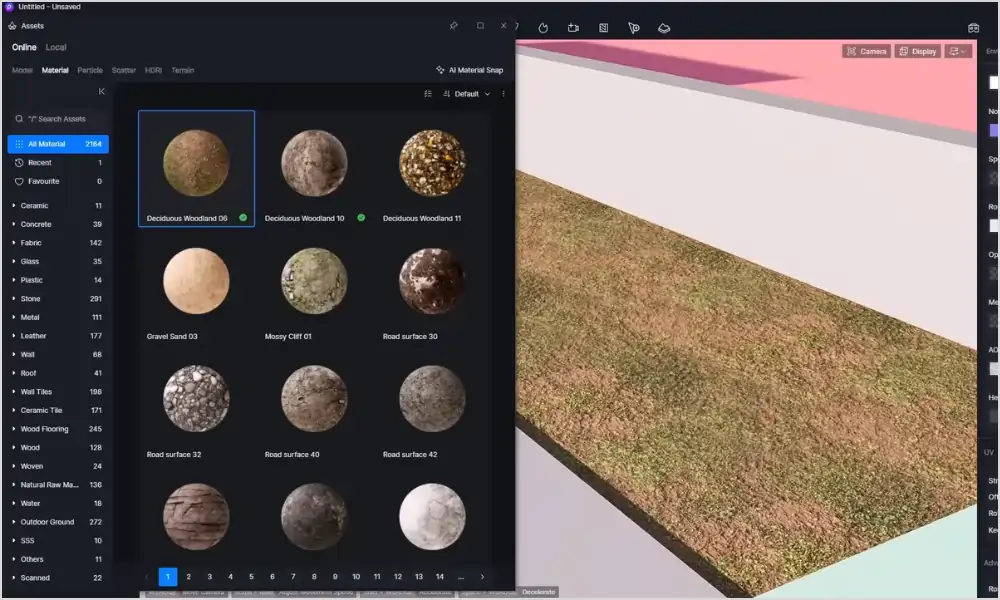
Photorealistic Rendering is like doing a photoshoot of your model on your computer.
1) Modeling
Clean shapes are a must. The secret is to add a slight radius to every edge, giving it a rounded look. For example, actual objects such as tables or phones have rounded edges, while their models do not. A radius of approximately 1mm will add realism through the way the light hits the round edge.
2) Texturing
Adding texture to your model is often a tough job for beginners. Don’t use a plain color when texturing! If possible, grab scans of wood, concrete, and fabric from actual sources with at least 4K or 8K resolution; Ensure that you add dirt in your corners and scratches on your metal, as well as adding water spots on glass. When doing close-ups, ensure that you are using displacement maps to create realistic geometry based on your model’s bump mapping.
3) Lighting
Light makes up 80% of the work.
HDRI – A high dynamic range image (360° captured image) that not only can light a scene but can also reflect in windows. For outside shots, use a bright sky, whereas for product shots, use a studio HDRI.
Global Illumination – The light has been reflected off the floor and bounces to light the ceiling. The more the light bounces off the surfaces, the more realistic it becomes.
Raytracing involves shooting millions of rays of light with the render engine. This means in 2026 it will be possible to render images in real time (live) using free tools such as D5.
4) Camera Settings
Camera settings should emulate those of a real camera:
- Depth of field; f/2.8 blurs out backgrounds (for products); f/8 keeps images in focus beyond everything (for rooms).
- Shooting Exposure: Don’t make your windows look completely blown out white – retain some detail.
- Motion Blur: Adding a small amount during animation will help it look like real film.
- Lens Distortion: This is realistic optical distortion; use a small amount (around 1%) to mimic the look of an actual lens.
5) Rendering Engines
CPU Rendering: Rendering on your CPU is much slower than using a GPU, but it can render massive scene files. CPU rendering is done by render engines such as Corona & Arnold.
GPU rendering uses a graphics processing unit to provide faster speeds than traditional CPU rendering. Octane and Redshift are examples of GPU rendering software.
Realtime means that when you make a change in the software, you see it right away. Some examples of realtime rendering software include Unreal Engine, Lumion, and D5.
6) Post-Production
Always do some post-production on your work, even if it’s to add a soft glow to your windows that are being lit brightly. By manipulating color similar to that done using a photo filter, you can further enhance your photography by adjusting only slightly to create sharper imagery with more depth through haze effects added to the image.
4. Why Photorealistic 3D Rendering Matters
Photorealistic 3D rendering is used at least partly because it generates revenue (money).
Clients viewing realistic images of a property (vs. blueprints) approve faster (40%) than they would if they were only shown blueprints. For example, developing contractors have sold entire developments based primarily on the 3D-rendered visualizations of the finished condominium buildings without “bricks and mortar” ever being erected.
Interior Design: Try out 10 sofas within an hour rather than ordering samples first.
Product Marketing: When using an image of a product, the rendering can be created for approximately $500, whereas a photoshoot could run up to $10,000, and will allow you to see the item in every color instantaneously.
Automobiles: You can build your car online, and the configuration will provide you with a realistic picture of the paint finish and how it sparkles in the sunlight.
Video Games: Unreal Engine is used to create backgrounds for film and television using LED walls instead of traditional chroma key green screens.
eCommerce: Large furniture retail chains are rendering 75% of their product catalog without the need to maintain an inventory. Customers can return items less frequently because they know what they have purchased through the picture quality. When your mind interprets a well-rendered image as a memory, it is not perceived as an advertisement; it is considered to be real.
11 Best Photorealistic Rendering Software 2026 – Comparison Table
| Software | Best For | Price | Speed (4K) | Download |
|---|---|---|---|---|
| Blender with Cycles X | Freelancers, Learning | Free | ~18 min | Learn More |
| V-Ray 7 | Large Studios, Archviz | $470/yr | ~9 min | Learn More |
| Corona Renderer 12 | Architects, Interiors | $350/yr | ~22 min | Learn More |
| Unreal Engine 5.5 | VR, Interactive, Games | Free | 2-5 min | Learn More |
| Lumion Pro 2026 | Architects (Speed) | $1,575/yr | 30-60 sec | Learn More |
| D5 Render 2.8 | Freelancers, Real Estate | Free/$360 | ~45 sec | Learn More |
| Octane Render 2026.3 | Motion Graphics | $240/yr | 6-8 min | Learn More |
| Redshift 2026 | Animation, VFX | $264/yr | Fastest | Learn More |
| Arnold 7.3 | Film, High-end | $435/yr | ~35 min | Learn More |
| KeyShot 2026 | Product Design | $1,188/yr | ~5 min | Learn More |
| Twinmotion 2025.2 | Architects, Students | Free/$445 | ~1 min | Learn More |
Choosing the wrong photorealistic rendering software can take away up to 6 months of investing in developing your business. That’s why we’ve created an honest breakdown of the best photorealistic rendering software for 2026.
1. Blender with Cycles X
What does it mean: Free, Open Source, and now a professional-level product. Blender will be providing professional rendering services at no charge. With Cycles X, rendering is 30% to 50% faster than prior versions of Cycles with improved light handling.
Who Can Use This: Freelancers and Small Shops – Anyone Who’s just Getting Started – V-Ray For Blender Will Now Run On MAC OS (You Can Add Professional Quality While Using An Existing V-Ray For Blender Subscription).
Pros: Free for all time; Range of free materials online; Works on most computers; Tutorials are everywhere within the community.
Cons: Slower than paid GPU rendering programs for larger animations. If your scene is too heavy for your video card, it may crash.
Speed: Medium/Slightly longer; it takes approximately 18 minutes for a 4K room on a mid-range card.
How realistic does it look: As real as a $500 package with the equivalent of good experience.
Learning curve: Medium, should take approximately 3 months.
Recommended for: Building designs, product presentations, and 3D learning.
Cost: Free to start; V-Ray costs $470 annually.
Best choice: free and robust 3d model rendering software to finish.
2. V-Ray 7
Architectural industry standard software. V-Ray excels in architectural photorealism. Version 7 is a big update.
Chaos AI Enhancer is a new product for 2026. It can enhance the appearance of people and trees without having to add plugins to your project. V-Ray 7 will add caustics to GPU-based rendering, reduce the amount of memory used by out-of-core textures, and run 3 times faster than previous versions of V-Ray on new Apple silicon chips.
In addition, the software includes an AI-based Material Generator, Night Sky tools, and the ability to stream 3D files to clients via the cloud. V-Ray 7 also introduces a new feature called Gaussian Splat, which creates a surface representation of the object being rendered, as well as allowing for realtime viewing during rendering.
Ideal for: Large companies that require a consistent appearance with each use.
Pros: Provides consistent results. Identical to how it performs in SketchUp, Rhino, 3ds Max, Maya, and Blender. Supplied with over 3,100 true scanned materials. New AI upscale allows small renders to be converted to 4K.
Cons: Too many buttons, very hard to learn. Expensive. Sounds come out of the GPU when the glass has been rendered.
Speed: Very Fast – can create a 4K room in approximately 9 minutes on a top-notch card.
Realness: The industry leader. Has won many awards each year.
Difficulty Level: Difficult. Expect to spend at least 6 months to really learn how to use it.
Best Use: High-end residential projects and commercial spaces. Best suited for high-end product showrooms.
Cost: $470 per year or $800- both options include access to the “Live” rendering feature.
Takeaway: When clients are willing to pay above the norm for something, you will have a good return on your investment.
3. Corona Rendering 12
What does it offer: A simplified and more forgiving version of V-Ray with a lot of features included, such as AI tools, realtime previews, and ready-to-use models (over 15,000).
Who it’s aimed at: Perfect for architects wanting quick and stunning results.
Pros: Easiest rendering software to learn; hit render, and the output will look great. No fireflies/strange dots in image. Lighting works perfectly for interiors!
Cons: Currently, Corona is a CPU-only renderer, which makes it slower than GPU-based renderers. It is available as a plugin for both 3ds Max & Cinema 4D.
Speed: Average – approximately 22 minutes to create a 4K render on a powerful CPU.
How realistic: Photographs with a softer appearance than V-ray, which works great for clients.
Difficulty level: Simple – you could achieve good quality Renderings within two weeks.
Best Applications: Residential, Multi-Family, and Interior Designer projects.
Annual fee per user: $350.00 USD.
Overall: You get more than your money’s worth with ArchViz.
4. Unreal Engine 5.5
A gaming engine that produces Movies. Unreal is the leader in realtime visualisation, with numerous features for creating realistic lighting using their new position tracing feature in version 5.5.
Ideal uses: Charting, VR, anything interactive.
Pros: Allow for instantaneous changes. Change the location of the sun and see an immediate update of the shadows cast. Allows clients to walk through it while they are in VR mode. Includes free Megascan library, which contains over 10,000 real-life objects.
Cons: Much more complex than traditional rendering. More complicated materials. Still a bit behind V-Ray (5%) in delivering perfect still images.
Speed: Realtime (30-120 fps) final image rendered (final-path-traced) in 2-5 minutes.
How true: Very, and increasing each month.
How difficult: Very. You should plan on paying for 4-6 months before you see any success.
Best Applications: Real estate tours; virtual studio setup to create movies; car configurators.
Cost: Free until $1M revenue, then 5% of revenue.
In short, if you want to traverse within an area, use Unreal.
5. Lumion Pro 2026
Provides fast rendered images for architects! With realtime rendering support, Lumion Pro 2026 has been established as one of the industry’s fastest rendering programmes.
It features advanced AI upscaling technologies and over 10,000 different 3D models to use, including planar 3D objects created with any of Revit, SketchUp, AutoCAD, and many other types of 3D applications. Lumion Pro 2025 introduced the ability to use AI upscaling and created higher-quality trees.
Ideal Client: Architects who require quick video production.
Pons: Quick turnaround times: can produce video within 2 hours of beginning the project. One-click access to weather conditions and seasonal changes. Outstanding quality trees and plants for rendering. New AI technology increases the quality of low-resolution renders to 4K.
Cons: The annual fee of $1,575 is expensive. Provides you with the same style of finish as Lumion; however, it gives far less control than would be the case if you used Unreal for rendering. Not well-suited for detailed rendering of small product components.
Speed: Immediate. Final 4K image ready within 30-60 seconds.
How Real? Very realistic and aesthetically pleasing, good for selling but not designed for detailed construction documents.
How Hard? Very simple; you can learn how to use it in approximately 3 days.
Best For: Architectural designers & landscape architects.
Cost: $1,575 annually for the Pro version.
Bottom Line: If time equals money, Lumion will save you several days of work.
6. D5 Render 2.8
What it is: The most popular way to create fast, beautiful renders today. D5 Render has a distinct advantage over Lumion for creating realtime ray-traced images with accurate lighting and has an easy-to-use interface for syncing data from both Revit and SketchUp. D5 Render is also excellent for client walk-throughs.
Ideal Audience: Freelancers demanded high-quality Lumion materials at a low cost.
7. Octane Render 2026.3
What is it: The fastest rendering option available using GPU technology. Otoy has released OctaneRender 2026; this is another great release, as they added meshlet streaming, which allows you to render huge scenes with improved memory efficiency. Some benefits are the addition of support for MaterialX and the addition of 3D Gaussian Splats.
They added a Neural Radiance Cache to reduce the noise created when using these methods. The result is that you can create motion graphics, and they can develop the look of these graphics using this program.
Pros: Lightning fast. Instant response to changes in lighting. Ultra-high speed GPU rendering with OctaneRender technology allows for virtually immediate response. This is perfect for testing things out.
Cons: VRAM requirement is significant and often causes crashes, the version for Cinema 4D has numerous bugs, and it uses Nvidia graphics cards primarily.
Speed: Extremely quick, rendering 4K resolution in about 6-8 minutes
Realism: Excellent but still slightly more “CG” than Vray out of the box
Difficulty: Medium, 2 months
Ideal for: Product animations, motion graphics, and concept artwork
Ongoing Costs = $240 per year
If you enjoy making changes to your work and seeing those changes immediately, then you will appreciate how well Octane performs.
8. Redshift 2026
The studio’s go-to renderer when making animated content. Redshift performs exceptionally well with bias rendering and is capable of producing very high-quality renderings quickly. It has a reputation for being very stable and scalable, even when rendering very complicated scenes.
Best Suited For: Large animated projects.
Pros: Supports rendering of complex, very large scenes that would cause other GPU rendering engines to crash. Extremely high levels of stability have been used to create the animated effects for numerous Marvel films. Supports the ability to scale with multiple GPUs. Has the best tools available for compositing.
Cons: Cheating; Speed will not be 100% correct.
Speed: Fastest; about 25% faster (animation).
How realistic: Very real; proven by motion picture production.
Difficulty: Medium; Hard.
Best Use: VFX studios, animators, and Arch Viz films.
Cost: $264.00 per year.
Bottom Line: Render animations instead of images? Choose Redshift.
9. Arnold 7.3
Best at: Motion picture and very high-end production.
Strengths: Most accurate physically. Best for skin, hair, and difficult-to-render materials. If Arnold says it is correct, then he is correct.
Weaknesses: Slowest of any package here. Cannot meet tight project deadlines without having a rendering farm. Very expensive.
Speed: Very slow. It takes about 35 minutes to render a 4K frame.
Realism: Reference quality. This is the bar set for all other rendering engines.
Difficulty: Very difficult.
Best suited to: Motion picture, automobile commercials, and hero product shots.
Price: $435.00 annually.
In summary: Overkill for 99 percent of rendering, but a requirement for any motion picture.
10. KeyShot 2026
Product Rendering Made Simple. KeyShot is a 3D visualization tool trusted by over 30,000 teams and 52 of the 100 top companies. Increased Speed: KeyShot Studio 2025.1 delivers up to 20% greater lighting performance and up to 60% faster export times.
Good for: Product designers and engineers.
Strength: Drag-and-drop; you can easily import a model from SolidWorks, choose a material, and render it without needing to adjust the UV mapping, light setup, etc. Your customers can also visit your website to view this in real time.
Weakness: Not an alternative for architectural design; weak for larger scenes; very high price point; basic animation tools.
Speed: Fast: product renders in 4K format within 5 minutes.
How real: Good for studio-type product photos; bad for outside product photo shoots.
How hard: Very easy to use – about one day to learn.
Best Users: Product designers, engineers, and marketing departments.
Price: $1,188/yr.
In brief: If you’re a product maker, here’s how to quickly generate excellent visuals.
11. Twinmotion 2025.2
What does it do? Makes an architect’s life easier using the Unreal Engine. Twinmotion is ideal for fast rendering and free pricing for small companies during realtime design review.
Pros: Quick presentations to clients
Cons: Free up to a $1m earning threshold; Live-sync with Revit and Archicad; New path tracer; Best VR; excellent demo capabilities
Weaknesses: Limited model/clothing selections compared to competition; Larger cities can cause lag issues
Speed: Realtime (approximately 4k in one minute)
Accuracy: Very good and quickly improving
Difficulty Level: Very easy to create
Best Uses: Architects, urban planners, students/college
Cost: Free or $445/year
Bottom Line: The best way to start using realtime for free
Best Choices: For The Best Quality For Images—V-Ray 7,
For Ease To Use — Corona, For Realtime Rendering
D5 Render, For Product Rendering — KeyShot, For Free Rendering—Blender,
And Finally For The Fastest Animation Renderings – Redshift.
Free Realtime Renderers
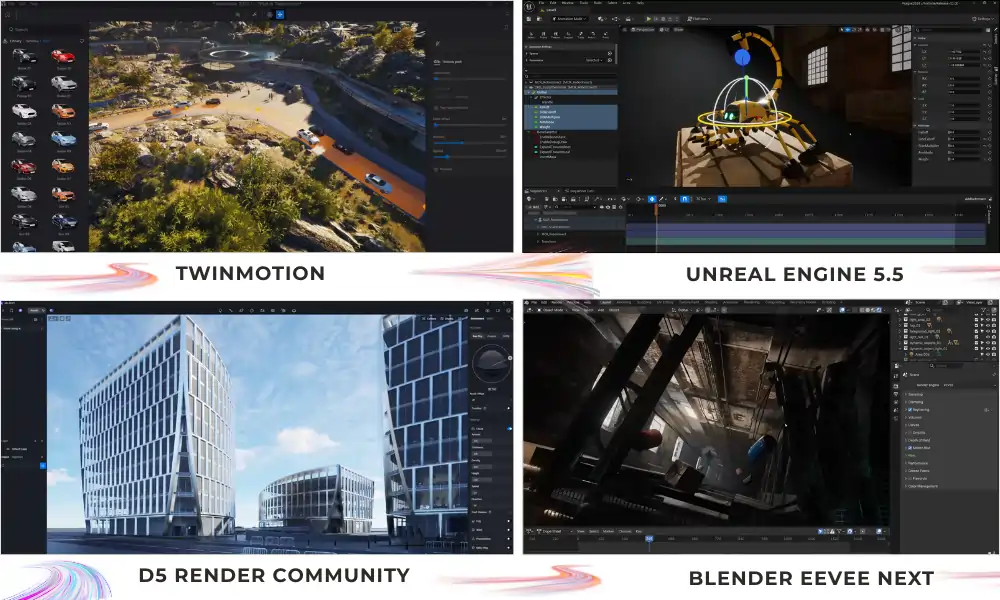
You Can Start Creating Without Spending Any Money, Since There Are Many Excellent free real time rendering software Available As Of 2026.
Blender Eevee Next: Free; Initially No Ray Tracing; Excellent For Quick Preview, But Not Quite Good Enough To Use For Final Image Production. But it is fast.
Unreal Engine 5.5 Free to start with no restrictions: Create functional game designs and run through them. It will run on the very minimum if you have a good graphics card.
Twinmotion is free for Small Business owners: Works together with Revit software. Excellent for Client meetings.
D5 Render Community is free to use: 2000 Models available. Realtime Path tracing, very realistic rendering.
Unity HDRP is free and used to make interactive applications. You know applications; you know some programming.
Pros: Instant results, quick turnaround time.
Cons: Must have a good graphics card with at least 8 GB of RAM.
Photorealistic Production Techniques
Pros utilize:
- Ray Tracing: the primary tool for replicating light beams.
- Path-tracing: A version of ray tracing that simulates bounces of light to generate soft shadows.
- Caustics: Light patterns refracted through glass (think of sunlight shining through rippling water).
- Subsurface scattering: Light that penetrates materials such as skin, wax, and marble, causing candles to appear to glow.
- Ambient occlusion: Dark spots appearing in shadows created by two or more surfaces meeting; used only very lightly.
- Volumetric lighting: Light shining through dust particles or fog.
- Displacement: Realistic displacement due to the surface structure of an object vs. a fake use of displacement for small parts at a very close range.
- Photogrammetry: Taking 200 or more photographs to create an accurate digital 3D model.
- AI Denoiser: Allows rendering with fewer samples, helping you save hours on your final output.
Common Mistakes That Make Renders Look Fake
- Too Perfect: Scuffs, scratches, and dirt are part of the real world, so make sure you include them.
- Too Many Lights: Use only a sun and sky light when lighting your scene; nothing else.
- Wrong Shadows: A sharp shadow should be cast by the sun at noon; a soft shadow by the sunset.
- Wrong Scale: Your furniture should be measured. Large items will ruin your scene.
- Sharp Edges: All edges should be slightly rounded.
- No Flaws: Adding fingerprints to a piece of glass or wrinkles to a piece of linen means you’ll have realistic elements in your final render.
- Increase the roughness of your material for a more plastic appearance; it can’t be 0% rough!
- The height of your camera needs to be at eye level (about 5’3″), not looking down from 7′.
- Photographs in the real world tend to be more muted; reduce your saturation by 10%.
To correct these mistakes, professionals will have a real photograph beside their render so they can compare the two.
AI’s Impact on Realistic Image Creation
In 2026, AI has become commonplace.
Tools: Architects have used Veras to create photorealistic renders while retaining the BIM data from their building models. On the other hand, Midjourney can create visually appealing images, but they may not be faithful to the original design.
Clean-Up: NVIDIA DLSS 4 can take a fast, blurry render and convert it to 4K resolution, producing a sharp, clear result.
Text to 3D: enter “modern chair” to receive a 60-second download. 3D AI Studio is the fastest, Rodin AI is the most realistic, and Tripo AI is the lowest-priced ($12/month).
AI Materials: Take one picture with your phone to generate an entire material!
Auto Lighting: D5 will determine what good lighting is for you.
Big question in the future: if your clients ask, “Is this AI?” you should be honest, particularly with physical product images.
GPU vs CPU Rendering
| What | GPU | CPU |
|---|---|---|
| Speed | 5-10x faster | Longer but consistent speed |
| Memory | Limited to card (12-32GB) | Utilizes all RAM (128GB+) |
| Usage for | Fast work, video rendering | Large scenes |
| Price | High upfront cost for card | Low initial cost for software |
| Software Options | Octane/Redshift/V-Ray GPU | CORONA/ARNOLD |
Recommendation: Start with GPU. A $500 card will perform most tasks. An expensive RTX5090 with 32GB of memory will only be necessary if you work on 8K every day.
Great Hardware for Photorealistic Rendering
Budget ($1,500): Ryzen 7, RTX 4070 12GB / 32G RAM / 1TB SSD. Capable of working with Blender and D5.
Intermediate ($3k): Ryzen 7 9800X3D and RTX 4080 Super 16GB with 64GB RAM – Excellent overall performer in combination with the top CPU for an RTX 5090.
Professional ($6k plus): Ryzen 9 9950X3D and RTX 5090 32GB with 128GB RAM – Best suited for intensive workloads plus a monitor capable of good colour reproduction.
How Long Does It Take to Render Photorealistically?
- Realtime Instant 30-60 FPS
- One 4K picture: 10 minutes to 2 hours
- 10-second video: 4 to 40 hours
Speed it up: Use AI denoise, render smaller, then upscale, use cloud render farms.
Future of Photorealistic 3D Rendering
Nvidia has stated that the RTX 5090 will probably be the last “traditional” graphics card, as they will move to neural rendering (AI-based rendering of light). Before long, you’ll be able to achieve path-traced quality on web-based applications. You will be able to have live VR meetings while moving your furniture. The distinction between photographs and rendered images will become less clear.
Industry Integration Note
Creative studio and commercial image enhancement businesses will often implement photorealistic rendering into their workflow, specifically in terms of visually enhancing real estate and architectural marketing. For instance, companies such as PixelShouters use sophisticated editing and visualization processes to enhance how properties appear in online listings.
FAQs
What does photorealistic rendering mean?
Creating a computer graphic image (CGI) that appears similar to a physical photo by applying how light reacts in a real-world environment.
What software is used for photorealistic rendering?
Architects mainly use V-Ray for projects; Corona is used for its ease of setup and rendering, and Blender is free (though slightly less used by high-end architectural professionals).
Is Blender an okay platform for rendering photorealistic images?
Currently, Blender is free for professional rendering.
What is the best GPU for rendering?
The best GPU for rendering is the RTX 5090 w/ 32GB (the fastest), while the best value would be the RTX 4080.
How long does rendering take?
Rendering can take anywhere from 5 minutes to 2 hours, depending on the image.
Can realtime rendering appear realistic?
Aye, D5 & Unreal now render almost fully replicating photographs.
Are ray tracing and Path tracing identical?
Ray tracing utilizes direct lighting. Path tracing adds reflected light.
Which rendering programs are superior for creating high-quality renders quickly?
When rendering short-motion clips, utilize Redshift; when creating images, utilize D5.
Will a render farm of some type be necessary for my project?
Only when creating a significant number of large animated videos, which may now be rendered on cloud networks, can this be afforded.
Will Artificial Intelligence supersede the role of a 3D artist?
Not at all! While AI will assist the artist in completing tedious tasks, the artist will remain responsible for providing the artistic vision.
Conclusion
Photorealistic 3d rendering is now a basic skill, not magic. In 2026, you can start free with Blender, go pro with V-Ray or Corona, or go realtime with D5 and Unreal.
Winning isn’t about having a lot of expensive software; it’s about learning how to capture and study real light, the small, fine details such as dust or scratches, and putting those skills into practice. Study one application thoroughly. Use AI to help clean up final images. Create images that don’t just look sharp; they feel organic (real).
Pick a scene today. Light it like a photo. Render it. Then do it again, but better. That’s how you master photo rendering.
Realism is the standard for property visuals
Photorealistic rendering and real estate editing share the same buyer-facing goal: the image should feel believable. Lighting, scale, texture, perspective, and color all affect trust.
When the goal is to market a real listing, realistic virtual staging and careful photo editing are usually more practical than overly stylized visuals.