
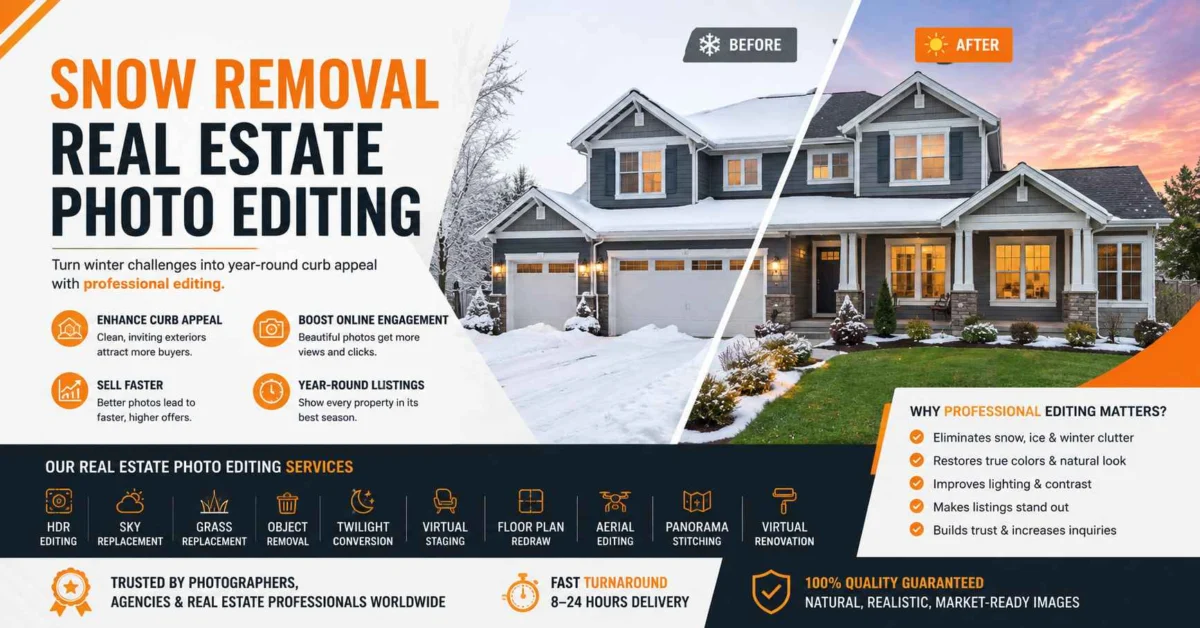
Key takeaways: This complete guide to snow removal real estate photo editing shows you how to turn snow-covered, low-CTR winter listings into bright, sellable exteriors. You’ll learn the exact pro workflow, tools, common mistakes that make edits look fake, and how to rebuild lawn, driveway and sky so buyers see the property, not the season.
Last January a client sent me a front exterior. Brick colonial, black shutters, beautiful porch. Price $639k. The entire front was under 9 inches of fresh snow. No driveway lines. No walkway. Shrubs looked like white pillows.
He wrote, “We can’t wait until April.”
That is winter real estate. The house is ready. The season is not. Buyers scroll fast. They see a white blob where the yard should be and they move on. It feels like maintenance, cold, and extra work.
This is why snow removal real estate photo editing became a standard service. Not a trick. A way to show what is already there, under the snow.
What is Snow Removal Real Estate Photo Editing?
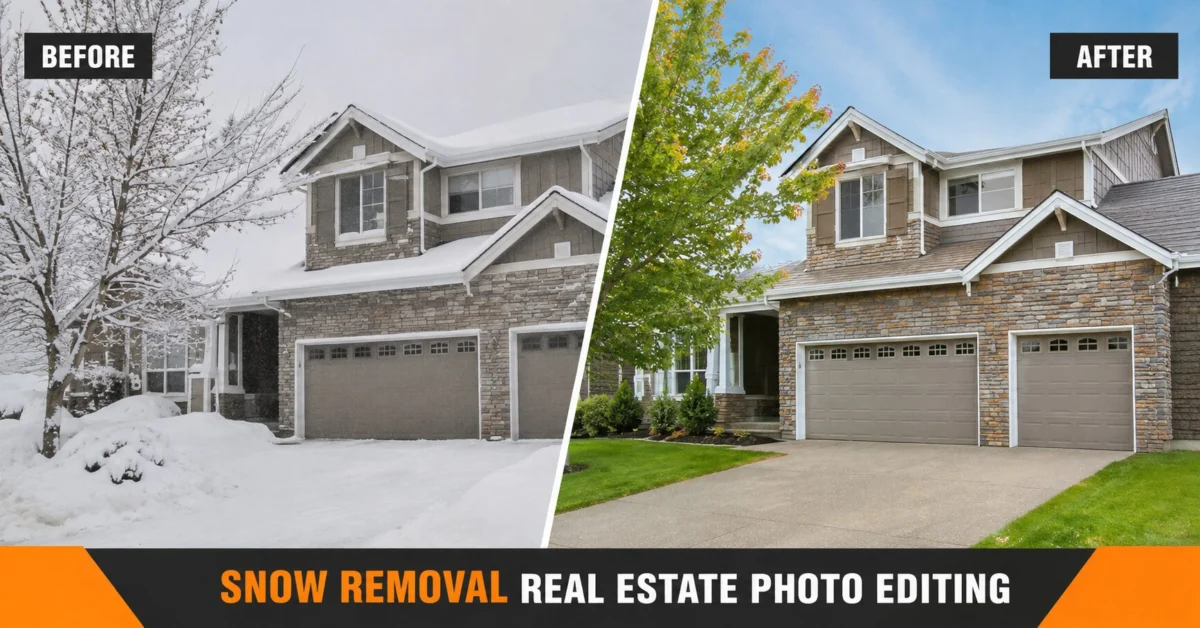
Snow removal real estate photo editing is the process of digitally removing snow from exterior property photos and reconstructing the hidden areas so the image looks like it was shot in late spring.
It’s not just making white areas green.
Purpose is simple: restore clean property appearance and winter curb appeal so buyers can see yard size, parking, and entry.
Think of it in three layers:
1. Mask: Isolate every snow area separately. Lawn, driveway, walkway, roof, shrubs.
2. Rebuild: Replace snow-covered lawn with real grass texture, clean the snow-covered driveway back to concrete, fix fences and mailboxes.
3. Blend: Match light, shadows, and color so the new grass and sky sit in the same scene.
Difference from physical shoveling? Shoveling leaves ice, salt stains, footprints, tire marks, and dead yellow grass. You still need object removal. Digital snow removal builds a usable exterior from scratch. That’s why it falls under virtual landscaping and seasonal real estate editing, not basic retouching.
Expert Advice: Don’t think “remove snow”. Think “reveal the property”. That mindset changes how you edit edges and shadows.
Why Snow Hurts Property Listings
Snow hides money.
Buyers pay for yard, driveway, patio, and curb appeal. Snow covers all of it.
Real estate photographer workflow in winter is tough because winter light is soft, cool, and low contrast. House looks darker. Windows reflect white. The whole image feels flat. Real estate image enhancement has to fight that.
Buyer psychology matters here. People don’t buy a structure. They buy a mental movie of kids on the lawn, BBQ on the patio, two cars in the driveway. Snow breaks that movie.
Quick Summary:
- Snow removes information. When information is gone, confidence is gone.
When Snow Should NOT Be Removed
Sometimes snow is the selling point. Removing it would be a mistake.
Keep the snow when:
Luxury ski homes: The buyer wants to see snow-covered driveway leading to a ski-in cabin. Removing it removes the lifestyle.
Mountain cabins and lodges: Snow proves location. A log cabin with green grass in January looks wrong.
Vacation rentals for winter tourism: If you rent December to March, show December to March. Guests book for snow.
Seasonal lifestyle marketing: If your copy says “snowshoe from your back door”, the photo must match.
Example: I edited a cabin in Park City. Agent wanted grass replacement. I told him no. We instead enhanced the snow, did a twilight conversion, added warm interior glow. That listing booked 11 nights in the first week. Green grass would have killed the story.
Quick Summary:
- Ask: Are we selling the house or selling the season? If season, keep snow.
Common Editing Challenges
This is where one-click tools fall apart.
Uneven snow: Part melted, part deep. You need 3-4 different masks, not one.
Roof snow: You can’t just color the roof brown. You have to respect shingles, gutters, and keep some snow if pitch is steep.
Driveways and walkways: Concrete has texture, expansion lines, and subtle stains. Cloning grass over it looks instantly fake.
Tree branches: Bare branches hold snow clumps. Each clump needs healing. Leave too much and it looks winter. Remove too much and tree looks bald.
Shadows and lighting mismatch: Winter light is cool at 5500-6000K and comes from low angle. If you drop in warm summer grass lit from overhead, it floats.
Ice, reflections, footprints: Windows reflect snow. Footprints and vehicle marks create gray patterns. All need property photo editing cleanup.
Shrubs and landscaping: Boxwoods buried under snow lose shape. You have to rebuild shape with virtual landscaping, not just grass.
Fence and mailbox: Half-buried. Edge needs to be razor clean or buyer sees halo.
Quick Summary:
- 90% of realism is in 10% of pixels – the edges.
Professional Snow Removal Workflow
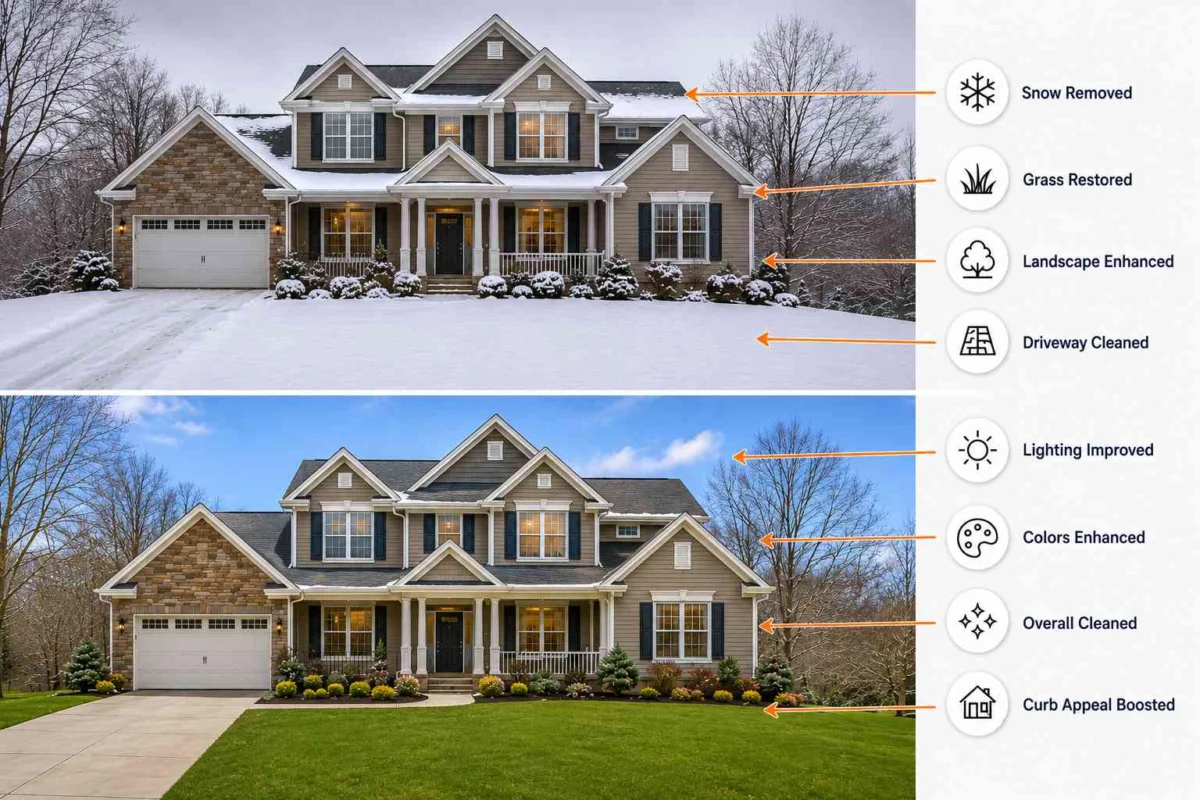
This is how high-volume studios do snow removal from real estate photos so it passes MLS and buyer zoom.
Step 1: Receive RAW and review
Open RAW files. Check bracketing. If snow is clipped to pure white with no detail, ask for another exposure. You need edge data.
Step 2: Exposure correction and HDR blending
Do real estate HDR editing first. Blend brackets to recover house detail and sky. Fix exposure before you touch snow.
Step 3: Perspective correction
Straighten verticals. Snow makes lean more obvious because you have strong white-to-house contrast.
Step 4: Snow masking
Start with AI selection for rough lawn, then switch to manual. Pen tool for driveway and walkway. Lasso for lawn. Keep separate masks: lawn, driveway, roof, shrubs. This is the most important step for remove snow from property photos.
Step 5: Lawn restoration and grass replacement
Replace snow-covered lawn with real grass. Not one texture. Use two – sun grass and shade grass. Scale grass to match lens. For northern US, use fescue mix, slightly dormant. For southern, use bermuda. Never use neon green.
Step 6: Landscape cleanup
Rebuild shrub shapes. Clean flower beds. Fix curb edge where grass meets concrete. This is where property image retouching skill shows.
Step 7: Driveway and walkway rebuild
Use Content Aware Fill + Clone Stamp to bring back concrete. Keep expansion joints. Add very subtle dirt for realism.
Step 8: Shadow correction
Recreate shadows for trees, fence, mailbox. Use soft brush, 15-25% opacity, and match sun angle from house shadows. Fake shadows that go opposite direction kill credibility.
Step 9: Sky replacement and color correction
Replace flat winter sky with soft blue sky with light clouds. Then color correct everything to same temperature. Clean window reflections that still show white snow.
Step 10: Final QA
Zoom to 100%, then 200% on edges. Look for repeated grass patterns, halos, color spill, over-sharpening. Export for MLS, portal, and social crops.
Quick Summary:
- Masking and grass matching is 70% of time. Shadows and color make it invisible.
Tools Professionals Use
- Photoshop: Core for snow masking, manual masking, Clone Stamp, Healing Brush, Frequency Separation.
- Lightroom / Camera Raw: For HDR, exposure, white balance before editing.
- AI selection tools: Select Subject, Select Sky for first pass. Never for final edge.
- Object Removal tools: Content Aware Fill for footprints, ice chunks, salt.
- Healing Brush: For tree branches and small snow clumps.
- Frequency Separation: Keeps grass texture while fixing color patches.
Pro Tip: Manual editing still matters because AI doesn’t know what a snow-covered shrub is. It will turn your boxwood into lawn. A human rebuilds the shrub so yard looks usable.
For Instagram story, AI is fine. For home listing photos that buyers zoom on desktop, manual is still standard.
Common Mistakes in snow removal real estate photo editing
Over-green lawns: Looks like AstroTurf. Real lawns in early spring are muted green with brown.
Fake shadows: Shadow from tree going left while house shadow goes right.
Wrong season mix: Lush green lawn + bare winter trees + winter light.
Lighting mismatch: Warm grass on cool house.
Poor masking: White fringe around fence, mailbox, branches.
Repeated textures: Same grass patch cloned 5 times. Eye spots repetition in under a second.
Over-sharpening: Grass becomes crunchy.
Unrealistic driveway: Pure white concrete after snow. Real concrete is light gray with subtle stains.
Common Mistake: Editors leave a hard white line where lawn meets driveway. Real lawns have a slight dirt gap and shadow. Add a 2-3 pixel soft shadow.
Real Estate Photographer Tips for Winter
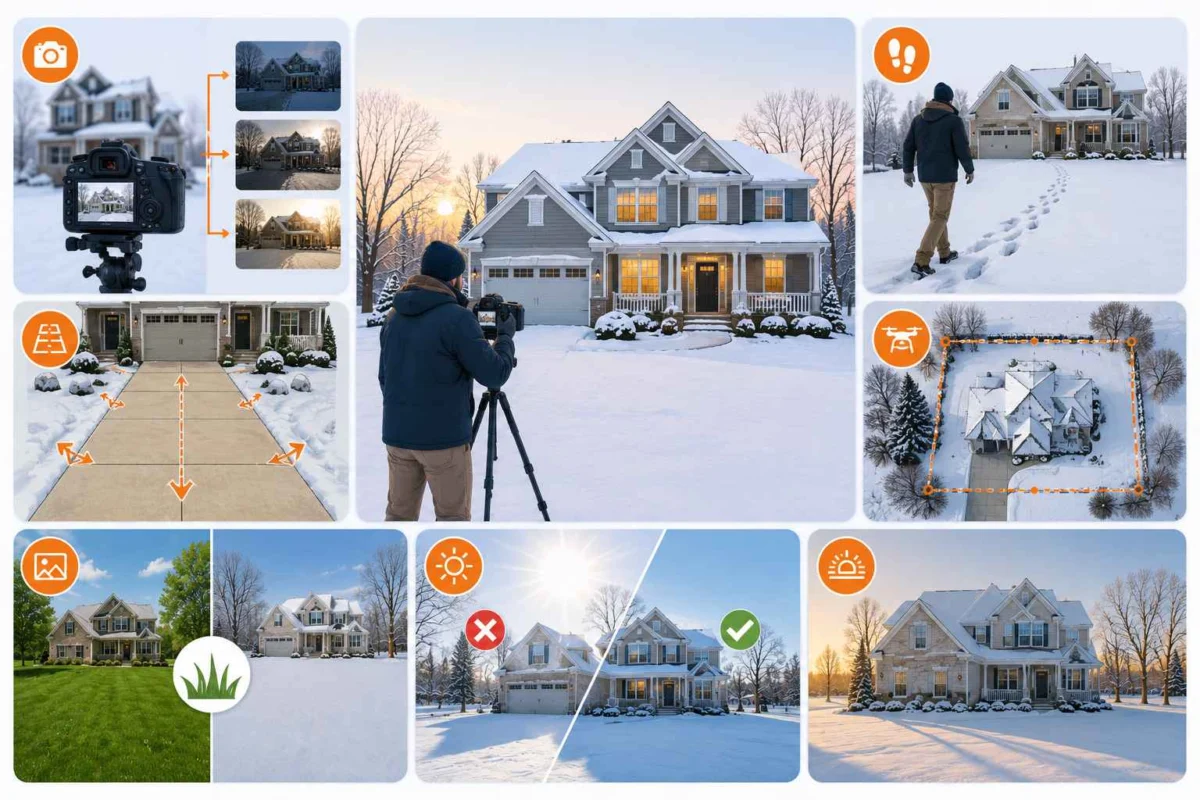
Shoot to make editing easy.
- Shoot RAW and bracket 3-5 exposures. You need data for both snow and house.
- Walk the perimeter before shooting. Your footprints will become editing work.
- Shoot multiple angles of driveway. Editor needs to see concrete lines to rebuild.
- Keep drone photos. Aerial editing shows property lines even when yard is white.
- If you shoot same builder often, ask for summer reference photos of lawn. Helps with accurate grass replacement.
- Avoid shooting at noon snow glare. Shoot early morning for softer shadows.
How Snow Removal Improves Marketing
This is not just beautification. It is marketing psychology.
- Higher CTR: Bright exterior with grass replacement and sky replacement stops scroll.
- Better MLS presentation: Consistent seasonal exterior editing makes agency brand look pro.
- Improved social media: Real estate marketing photos with green yard get more saves.
- Better first impression: Buyer sees usable yard, not shoveling job.
- Longer engagement: People stay longer on gallery, click to interior.
- Faster inquiries: When exterior looks move-in ready, buyers act.
A clean property appearance signals low maintenance. Snow signals high maintenance. Same house, different signal.
Cost Factors
- Property size: Bigger lot = more masking time.
- Landscape complexity: Simple lawn vs garden with fence, shrubs, walkway.
- Snow depth: Dusting vs 12-inch burial.
- Photo count: 1-5 vs 30-50 for agency batch.
- Turnaround: Same-day rush costs more than 24h.
- Add-ons: If you add twilight conversion, virtual staging, object removal in same order.
Typical market range is $5 to $25 per image for this specific task. Complex estate with intricate landscaping is top of range.
Should You Edit Yourself or Outsource?
If you shoot 2-3 houses a week, DIY can work. If you shoot 10-15 in January, editing will eat your shooting days.
When Outsourcing Makes Sense
Outsourcing makes sense in busy season, high volume, luxury listings where fake grass will cost you the client, or when you need fast turnaround for agency workflow.
This is usually when photographers start working with dedicated real estate editing teams. For example, I know studios like PixelShouters handle this daily, not just snow removal but the whole stack – Real Estate Photo Enhancement, HDR Editing, Sky Replacement and Grass Replacement, Day to Dusk Conversion, Object Removal, Virtual Staging, Virtual Renovation, Floor Plan Redraw, Panorama Stitching, Aerial Editing, Color Correction, Perspective Correction, Image Retouching.
You send RAW, you get back MLS-ready. That consistency is what keeps agent clients.
Snow Removal Editing Checklist
- RAW checked, HDR balanced
- Perspective straight, verticals fixed
- Separate masks for lawn, driveway, walkway, roof
- Grass replacement with correct scale and region
- Shrubs rebuilt, not grassed over
- Driveway concrete texture preserved
- Tree branches cleaned
- Footprints, tire marks, salt removed
- Shadows recreated matching sun angle
- Sky replaced naturally
- Window reflections cleaned
- Color temperature unified
- No repeated grass patterns
- Final QA at 100% and 200%
Future Trends
AI will get better at smart masking for seasonal real estate editing. Hybrid editing is already standard – AI for rough selection, human for final 20%. Future tools will auto-detect snow-covered driveway vs snow-covered lawn vs roof.
But fully automatic, MLS-ready quality? Not yet. Buyers are good at spotting fake. They may not know why, but they feel something is off. That feeling costs clicks.
Real future is automation of boring parts – masking, initial grass placement – while human does light, shadow, and QA. Also more demand for seasonal exterior editing bundles where snow removal, sky, and landscape cleanup happen in one pass.
Conclusion
Snow removal real estate photo editing is not about fooling anyone. It is about removing a temporary condition that hides real value.
A snow-covered exterior tells a story of work, cold, and hidden size. A clean edit with realistic grass, clean driveway, and soft sky tells a story of usable space and easy living. Same house. Different story.
Build a consistent workflow, avoid neon grass and fake shadows, and know when to keep snow for story. And when winter volume hits, partnering with a specialized team like PixelShouters can keep your delivery fast and your edits invisible, which is exactly how it should be.
The best edits don’t look edited. They look like the photo you wish you could have taken in May.
FAQ
1. What is snow removal real estate photo editing?
Digital removal of snow from exterior photos plus rebuilding lawn, driveway, and landscape to create a bright, season-neutral listing photo.
2. Is it allowed on MLS?
Most MLS allow it if you don’t change permanent structures. Don’t change roof shape, add features, or remove permanent objects. Check local rules and disclose if required.
3. How long does it take?
15-40 min per image manually. Bulk orders usually 12-24h turnaround.
4. Can AI do snow removal real estate photo editing alone?
Rough cut yes, final quality no. AI creates repeated grass and deletes small objects. Manual QA is still needed for listing-ready results.
5. What’s grass replacement?
Replacing dead or snow-covered lawn with realistic grass texture matched to perspective, scale, and local type.
6. Should I do sky replacement too?
Almost always. Winter sky is flat and gray. Soft blue sky makes grass believable and improves curb appeal.
7. How much does winter real estate photo editing cost?
$5-$25 per image depending on snow depth, complexity, and turnaround.
8. Can you keep snow on roof?
Yes, many editors keep light roof snow for authenticity, especially in mountain markets.
9. What photos need it most?
Front exterior, backyard, driveway, side yard – any outdoor property editing where snow hides usable space.
10. What’s the biggest giveaway of bad editing?
Neon green lawn, missing shadows, white halo around fence and trees, and same grass pattern repeated.
11. Does it help sell faster?
It improves CTR, saves, and showing requests. Better first impression means faster inquiries, which correlates with faster sales.
12. What should I shoot in winter for easier editing?
RAW, bracketed, multiple driveway angles, and avoid walking through your shot.
13. What tools are used?
Photoshop for masking and object removal, Lightroom for HDR and color, plus manual clone and healing.
14. Can it be combined with other edits?
Yes. Usually combined with HDR editing, perspective correction, object removal, and day to dusk conversion.
15. How do I make edits look real?
Use muted grass, two tones for sun/shade, recreate shadows, match noise, and never clone same patch twice.