
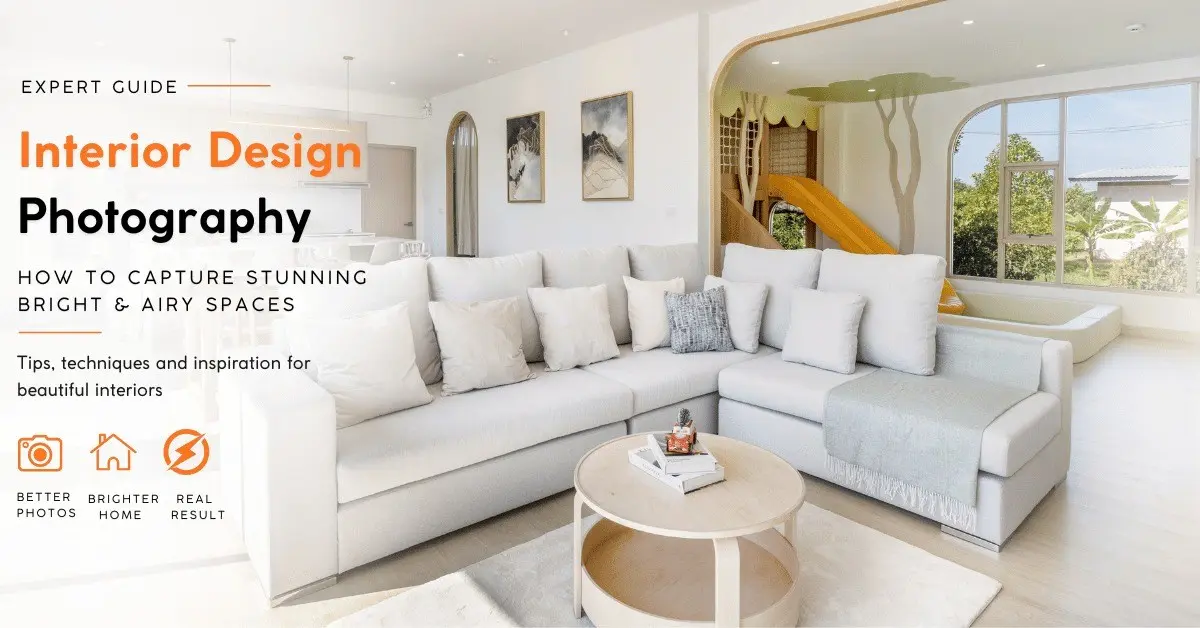
Key Takeaways: Mastering interior design photography is about shooting wide from the corner at chest height with straight verticals. For bright, pro interior design photography, keep white balance neutral, declutter 50% and style with the triangle rule + one touch of life. Use a tripod at f/8, 16-35mm or tilt-shift lens and bounce a Godox strobe to make spaces airy, true-to-color and ready to sell.
Let’s be honest, you’ve seen it happen. A designer spends months perfecting a kitchen with custom cabinets and hand-picked stone, only for the photos to make it look small, dark and yellow. That’s because great interior design photography isn’t about having a beautiful room — it’s about translating how a room feels into a photo that makes someone stop and say, I want to live here.
Whether you search for it as interior decor photography, interiors photography, or photography interior design, the skill is the same. This guide will walk you through the entire process, from prepping a room to delivering final files on a real interior design photoshoot.
Table of Contents
What Is Interior Design Photography Really?
Most people lump three different jobs together. Understanding the difference will instantly make you better.
Interior design photography is about design. You are hired to show off the choices – the texture of the boucle chair, the grain of the walnut, the way the morning light hits the plaster. You shoot details, vignettes, and mood. You are telling the story of the designer’s work.
Real estate photography is about information. The goal is to make a house look big, bright, and empty enough that a buyer can imagine their own stuff in it. That’s why those photos are super wide, super bright, and have zero styling.
Architectural photography is about structure. It’s focused on lines, scale, geometry, and how the building relates to its environment.
When you are doing an interior designer photoshoot, you are not trying to show everything. You are trying to show the right things. That’s a completely different mindset.
Why This One Skill Changes Everything for Designers and Photographers
Think about how clients find you now. It’s Instagram, Pinterest, your website. No one is walking into your studio to flip through a printed book first.
Your photos are your first impression, your portfolio, and your pitch deck all at once.
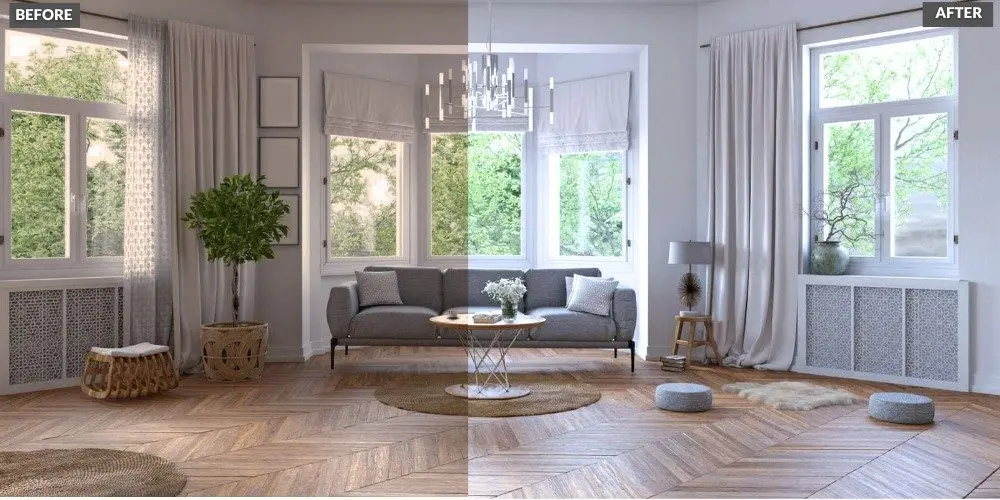
Bad photography inside kills good design. It makes colors look wrong, spaces feel cramped, and expensive materials look cheap. Great interior photography does the opposite. It builds instant trust, it makes people feel something, and it gets you published. Editors at major magazines will not even consider a project if the verticals are crooked or the white balance is off.
If you are a photographer, learning photography interior design is one of the most profitable niches you can get into. If you are a designer, learning how to direct an interior design photoshoot is the best marketing investment you will ever make.
The Part Everyone Skips: Pre-Shoot Planning
If your photos aren’t working, it’s probably not your camera. It’s your planning.
Pros spend 80% of their time planning and 20% shooting.
Build a real shot list
Don’t just walk in and start shooting. Before you touch the camera, write it down. For each room, list: How many wide hero shots do you need? How many medium vignettes? How many tight detail shots? For a typical living room, I plan for 1-2 wides, 2-3 mediums like sofa plus coffee table, and 3-5 details like the fabric, the art, the lamp base. This keeps you focused and stops you from overshooting the same angle.
Scout the light
Light is everything in interiors photography, here is how to get perfect lighting for indoor photos. If you can, visit the space the day before or ask the client to send you a quick video at 10am, 1pm, and 4pm.
Where does the sun come in? Are there trees blocking windows? For most homes, the sweet spot is between 10am and 2pm when you get bright, soft ambient light without harsh sunbeams cutting across the floor. Direct sun is a nightmare to edit.
Prep your client like a pro
This is what separates beginners from pros. Send a simple prep email 48 hours before. Tell them to remove 50% of what’s on surfaces. Yes, 50%. No fridge magnets, no trash cans, no tangled cords behind the sofa, no personal photos. Beds should be freshly made with tight hospital corners. And here is the big one most blogs miss: tell them to clean the adjacent rooms too. Your camera will see down the hallway and into the next bedroom. A messy background will ruin a perfect foreground.
Styling for the Camera, Not for Real Life
What looks good in real life looks cluttered in photos. The camera flattens everything, so you have to style with more intention.
Start empty, then add back
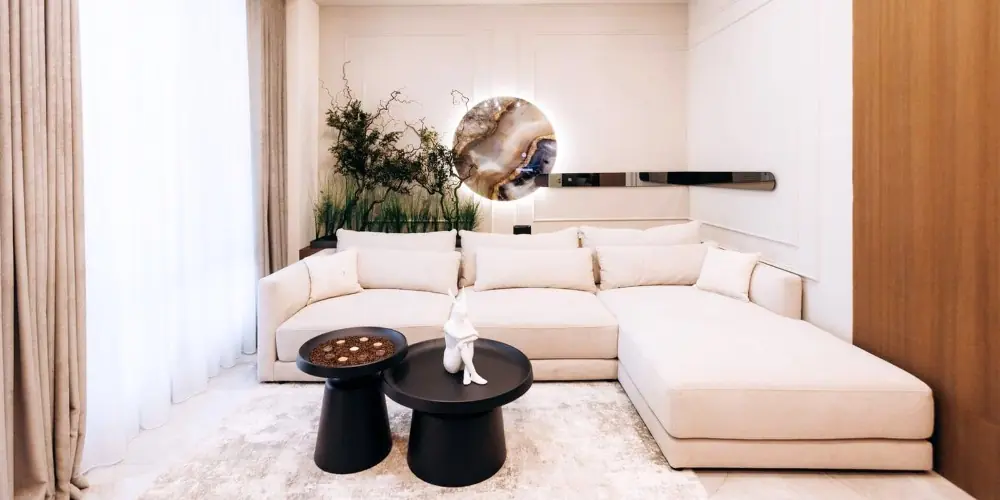
Pull everything off. Then add back in odd numbers and varying heights. For a kitchen island, don’t keep the toaster, fruit bowl, cookbook, and soap dispenser. Keep just three things: a tall wooden cutting board leaning against the wall, a low ceramic bowl, and a small plant. That triangle of heights creates movement.
Add one touch of life
The secret to interior decor photography that feels warm is not adding more decor. It’s adding a hint of life. A throw blanket that looks casually tossed, not perfectly folded. A coffee table book opened halfway. A single stem of eucalyptus in a vase. One or two touches per room is enough. If you add too many, it looks staged.
Fix what the camera exaggerates
Pillows deflate on camera, so give them a karate chop in the middle. Rugs bunch up, so tape them down with double-sided tape. Art that looks straight to your eye will look crooked on camera, so bring a small level. These tiny fixes save you an hour in Photoshop later.
Gear That Actually Matters for Interior Design Photography
You don’t need the newest $4000 camera. You need the right lens and you absolutely need a tripod.
The Camera:
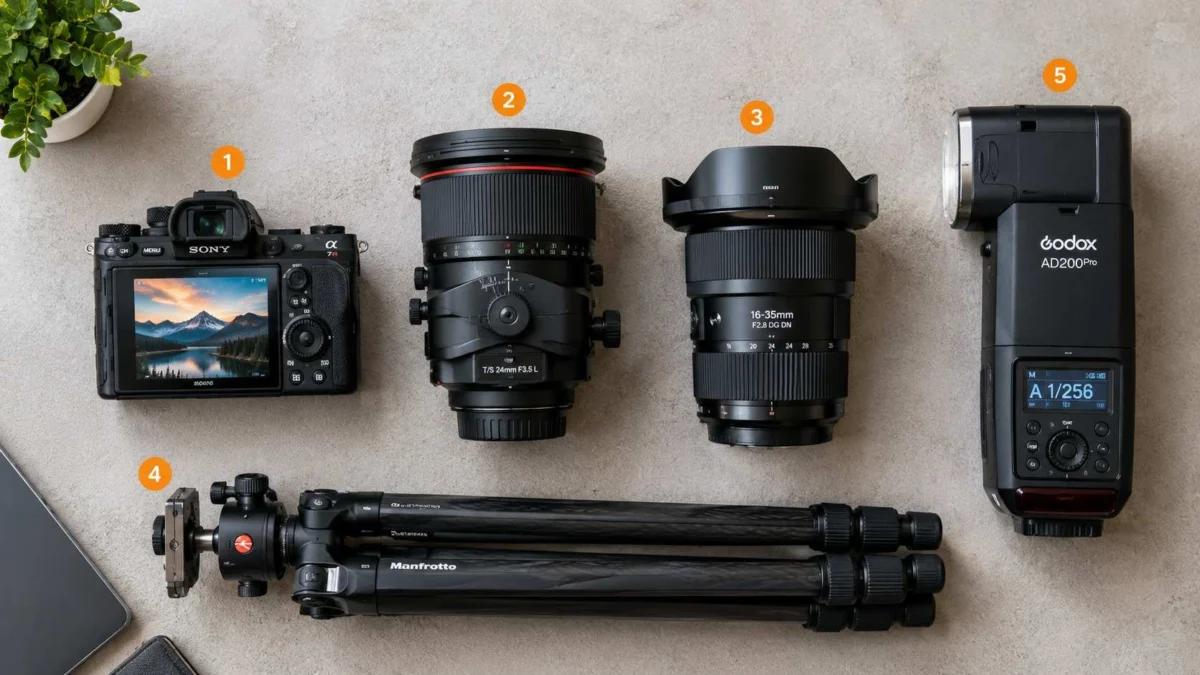
Any modern full-frame camera that shoots RAW will work. Sony A7 IV, Canon R6 Mark II, Nikon Zf or Z6 III are all fantastic because they have excellent dynamic range. Dynamic range is what lets you keep detail outside the window and inside the dark closet at the same time. That’s critical for photography interior work.
The Lenses – This is Where You Should Spend Your Money:
1. The Tilt-Shift – The Industry Standard. A 24mm tilt-shift like the Canon TS-E 24mm or Nikon PC 19mm is what every high-end interiors photographer uses – see how a tilt-shift lens works. Why? Because it lets you keep your camera level and shift the lens up to see more of the room.
That means your vertical walls stay perfectly straight. No leaning walls. No weird distortion. If you want to charge premium rates for interior design photography, this lens pays for itself.
2. The Workhorse Wide Zoom. A 16-35mm f/2.8 or 15-30mm f/2.8 – check the 12 best lenses for real estate photography list, same lenses work for interior design photography.
Here’s the trick though: don’t shoot at 16mm. Shoot at 20mm to 24mm. At 16mm, furniture at the edges stretches and looks fake. At 22mm, rooms still feel spacious but look honest. Honesty sells design.
3. The Detail Lens. A 50mm f/1.8 or even a 90mm macro. This is for those close-ups that make your portfolio feel luxurious – the stitching on a chair, the veining in marble, the texture of linen curtains. These shots are what separate interior design and photography portfolios from real estate listings.
The Tripod – Non-Negotiable.
If you shoot handheld, you will never get sharp images – you need one of the 10 best tripods for real estate photography. You need a solid tripod with a geared head.
A geared head like the Manfrotto 405 lets you make tiny micro-adjustments to get your lines perfect. You’ll be shooting at f/8 to f/11 and ISO 100, which means slow shutter speeds. A tripod is the only way.
Lighting
Two small portable strobes like Godox AD200 or AD300, plus one large white reflector and one black V-flat. You don’t need a truck full of lights.
Camera Settings for Interior Photography
Forget what your camera’s auto mode thinks. Use this as your starting point for every interior photography shot.
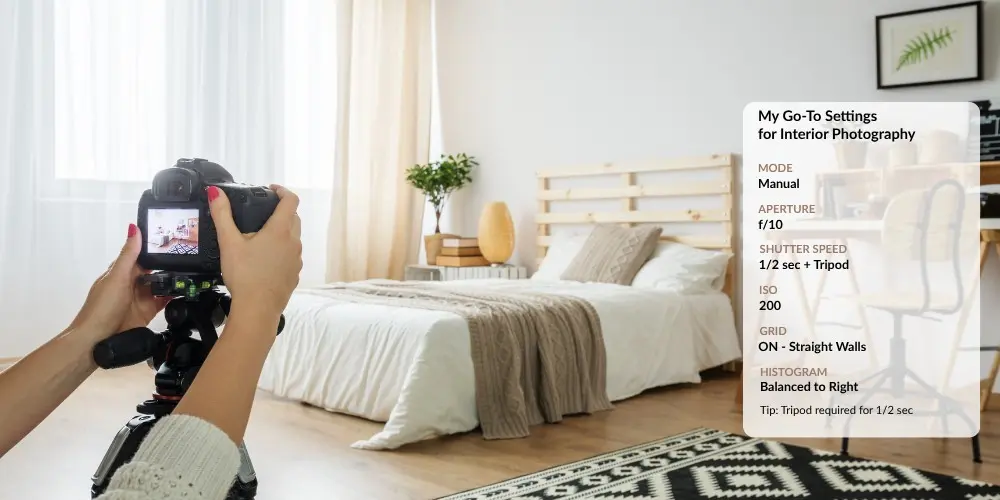
Always shoot RAW in Manual
RAW gives you so much more room to fix white balance and exposure later. JPEG throws away data you will desperately need.
Aperture: f/8 to f/11 for wides, f/4 to f/5.6 for details
For your wide hero shots, you want everything sharp from the chair in front of you to the art on the far wall. f/8 to f/11 gives you that deep depth of field. If you go to f/16 or f/22, your image actually gets softer due to diffraction. For detail shots, open up to f/4 to get that soft, blurry background that makes the texture pop.
ISO: 100 to 400, never higher if you can help it
Low ISO means clean, noise-free files. Because you are on a tripod, you don’t need high ISO. Let your shutter stay open longer instead.
Shutter Speed
Whatever the light meter says, usually 1/15th to 2 seconds.
This is why you need a tripod. Use a 2-second self-timer or a remote shutter so your hand doesn’t shake the camera. If windows are blowing out white, you need to bracket – take one photo exposed for the room, and one darker photo exposed for the view outside the window. You’ll blend them later.
White Balance: Daylight or 5500K, or Auto if shooting RAW
The key is consistency. Don’t jump between settings. If you shoot RAW, you can fix white balance perfectly in post, but try to keep it consistent on set.
Focus: Manual focus with Live View zoomed in.
Autofocus often grabs the wrong thing in a busy room. Switch to manual, turn on live view, zoom to 100% on a point about one third into the room, and focus there. That gives you maximum sharpness front to back.
Lighting: How to Get That Bright, Airy, Yet Natural Look
This is where most beginner tutorials get it wrong. They say “turn off all the lights and use only natural light.” If you do only that, your images will look flat and have dark corners.
Pros use a technique called ambient plus strobe blending
First, turn off every light in the house
Take a base photo with only natural window light. This is your clean, color-accurate foundation. It will probably have dark shadows and bright white windows, but the color will be perfect.
Second, add one bounced flash
Take one strobe, point it at the white ceiling or the white wall behind you, not at the room. Turn its power down so it’s about one or two stops darker than your ambient exposure. It just gently lifts the shadows. It should not look like flash at all. It should just look like a brighter natural room.
Third, add warmth back with practicals
Now turn on one or two lamps with warm bulbs. Put them on a dimmer if you can. You want a soft, warm glow, not an orange explosion. Take another exposure with just those lamps on.
Later in Photoshop, you blend the clean daylight shot with the warm lamp glow. This is how you get that luxury magazine look where the room feels bright and airy but also warm and inviting, and you can still see the trees outside the window.
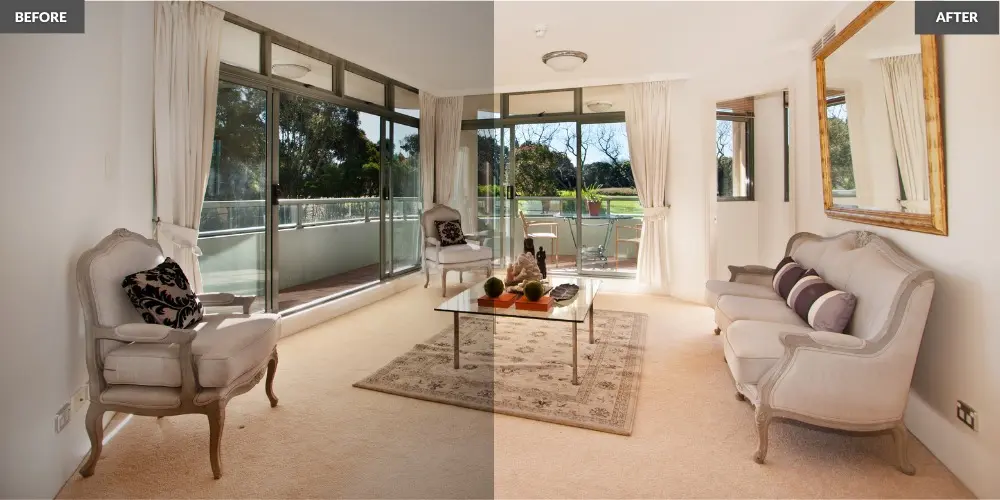
For spaces with huge windows, always bracket – see this bracketing photography guide. Take three shots: one for shadows, one for mid-tones, one for highlights. Don’t use cheap automatic HDR. Blend them manually with luminosity masks. It takes five minutes more and looks ten times more natural.
Composition: How to Make a Room Feel Like You Are Standing In It
Shoot at chest height, around 40 to 48 inches
This is the fastest way to improve your work. When you shoot at standing eye level, around 60 inches, you are looking down at furniture and rooms look like they are falling away. Chest height is how we actually experience a room when we are sitting or walking. For kitchens, go a bit lower to show off the countertop. For bathrooms, go even lower.
Keep verticals straight. Always
If your walls are leaning in, you look like an amateur – learn perspective correction to keep verticals straight. Use your tilt-shift or fix it in Lightroom Transform with lens corrections in Lightroom, but try to get it right in camera first. Heavy correction crops your image and loses quality.
Use both one-point and two-point perspective
For a calm, editorial hero shot, stand square to one wall and shoot straight on. All lines lead to one point in the center. It’s powerful and clean. For a more dynamic shot that shows depth, shoot from a corner at a 45-degree angle so you see two walls. Mix both in every room.
Layer your shot
Don’t shoot a flat, empty room. Shoot through something. Let the edge of a dining chair be slightly out of focus in the extreme foreground, with the rest of the room sharp behind it. Put a plant leaf in the corner of the frame. Layering foreground, midground, and background creates depth and makes the viewer feel like they could walk into the photo.
Give it space to breathe
Don’t cram everything into the center. Use the rule of thirds. Let your beautiful fireplace sit on the left third of the frame, with negative space on the right. It feels intentional and designed, not like a snapshot.
The Real Workflow of an Interior Design Photoshoot
Here is exactly how a full day runs:
You arrive 30 minutes before you plan to shoot. You open every blind, turn off all ceiling fans, fluff every pillow, and do one final declutter.
You start with the most important room when the light is best. You put your tripod in the farthest corner at chest height. You level it. You compose your widest hero shot.
You take your ambient exposure, then your darker window exposure, then your bounced flash fill. You check the back of the camera at 100% zoom. Is there a cord? An outlet? A wrinkle? Fix it now.
Then you move your tripod just two feet to the left or right and get a medium vignette. Maybe the reading nook. Maybe the fireplace with two chairs.
Then you switch lenses to your 50mm and hunt for details. The hardware on the cabinets. The texture of the throw. The art on the shelf.
You repeat this for every room. You never rush. A true interiors photography shoot takes 45 to 60 minutes per room. If someone tells you they can shoot a whole house in an hour, they are doing real estate photos, not interior design photography.
Shooting Small Spaces, Kitchens, and Bathrooms
Kitchens are hard because they are full of reflective surfaces – use this staging a kitchen for a photoshoot checklist. Turn off under-cabinet LEDs if they are creating green color casts. Put a black V-flat just out of frame to create a clean reflection in the fridge.
Bathrooms are even harder. You will see yourself in the mirror. The trick is to shoot from just outside the doorway and use your tilt-shift to see in, or shoot at a slight angle and clone yourself out later. Always shoot bathrooms a little lower than other rooms, it makes them feel larger and shows more countertop. And hide the shampoo bottles. One nice soap dispenser is enough.
For small spaces like entryways, don’t try to get the whole room in one shot. Shoot a vignette. A console table with art above it tells the story better than a distorted ultra-wide shot that makes the space look like a bowling alley.
Editing: Where Good Photos Become Great
Never deliver straight out of camera images. Editing is half the job.
In Lightroom
Start with lens corrections to remove distortion. Set white balance using the eyedropper on something that should be truly white. Use Transform to make verticals straight. Bring shadows up about +25 to +40 and highlights down -30 to -50 to recover window detail. Be careful with saturation. A good trick is to go to HSL and pull yellow saturation down -10 to -15. That removes the ugly yellow cast from any bulbs you left on without making the whole image gray.
In Photoshop
This is for cleanup. Remove light switches, air vents, alarm sensors, cords, and your own reflection in the TV. Straighten lines perfectly. Blend your window exposure with your interior exposure using layer masks. The goal is natural. If it looks like HDR with halos around everything, you’ve gone too far.
Export two versions: a full-resolution TIFF for print at 300 DPI, and a web JPEG at around 3000 pixels on the long edge, sRGB, quality 80. Name your files properly for SEO like
organic-modern-bedroom-interior-photography.jpgnotDSC_1234.jpg.
Mistakes That Instantly Make You Look Like a Beginner
- Shooting at 16mm and making furniture stretch at the edges.
- Leaving overhead recessed lights on mixed with daylight. You get orange pools and blue windows in the same photo.
- Crooked verticals. It’s the number one giveaway.
- Overdoing HDR until it looks crunchy.
- Too much stuff on surfaces. If you wouldn’t see it in a showroom, take it away.
- No focal point. Every photo needs a hero. What is the eye supposed to look at first?
- Cutting off the bottom of chairs or the top of art. Leave breathing room.
Turning Your Shots Into a Portfolio That Gets You Hired
Don’t show 30 photos of one project. Show 8 perfect ones. Curate like a magazine editor. Start with the wide establishing shot, then a medium lifestyle shot, then a few details, then close with a unique angle or twilight shot.
If you are a designer, tag your photographer and give them credit. If you are a photographer, tag the designer, the builder, the stylist. Collaboration is how you get referrals in the world of interior photography.
And always write good alt text for your website using your keywords naturally: “bright Scandinavian kitchen interior decor photography with oak cabinets” helps you rank for interior decor photography, photography interior design, and interior design photoshoot all at once.
Quick Checklist for Your Next Shoot
- Shot list and inspiration images saved to phone
- Client prep guide sent
- Fresh greenery ordered
- Batteries charged, cards formatted
- Tripod, tilt-shift, 16-35mm, 50mm, strobes, reflector packed
- Lens cloth, level, gaffer tape, extra bulbs
- RAW, f/8-f/11, ISO 100-400, chest height, verticals straight
Great interior photography is not about having the most expensive camera. It’s about patience, styling, understanding light, and respecting lines. It’s the perfect marriage of interior design and photography.
Master that, and your photos will stop being just pictures of rooms. They will start selling the feeling of being in them.